Windows 10 Map Network Drive
You can map a network drive on Windows 10 with the Map Network Drive utility in File Explorer. Suppose you constantly use a specific virtual folder over a shared network. In that case, it’s only logical to create a shortcut so that you can easily access it when you open the file manager.
This is where the network drive mapping comes into play, and it’s surprisingly easy to do If you follow the proper steps. Read on below to find out how to go about it.
How to Map Network Drive on Windows 10
If you already have a series of drives attached to a network hub, the following steps will guide you:
Launch File Explorer
You can open it with the keyboard shortcut, Windows key + E, or by simply clicking on the folder icon in the taskbar
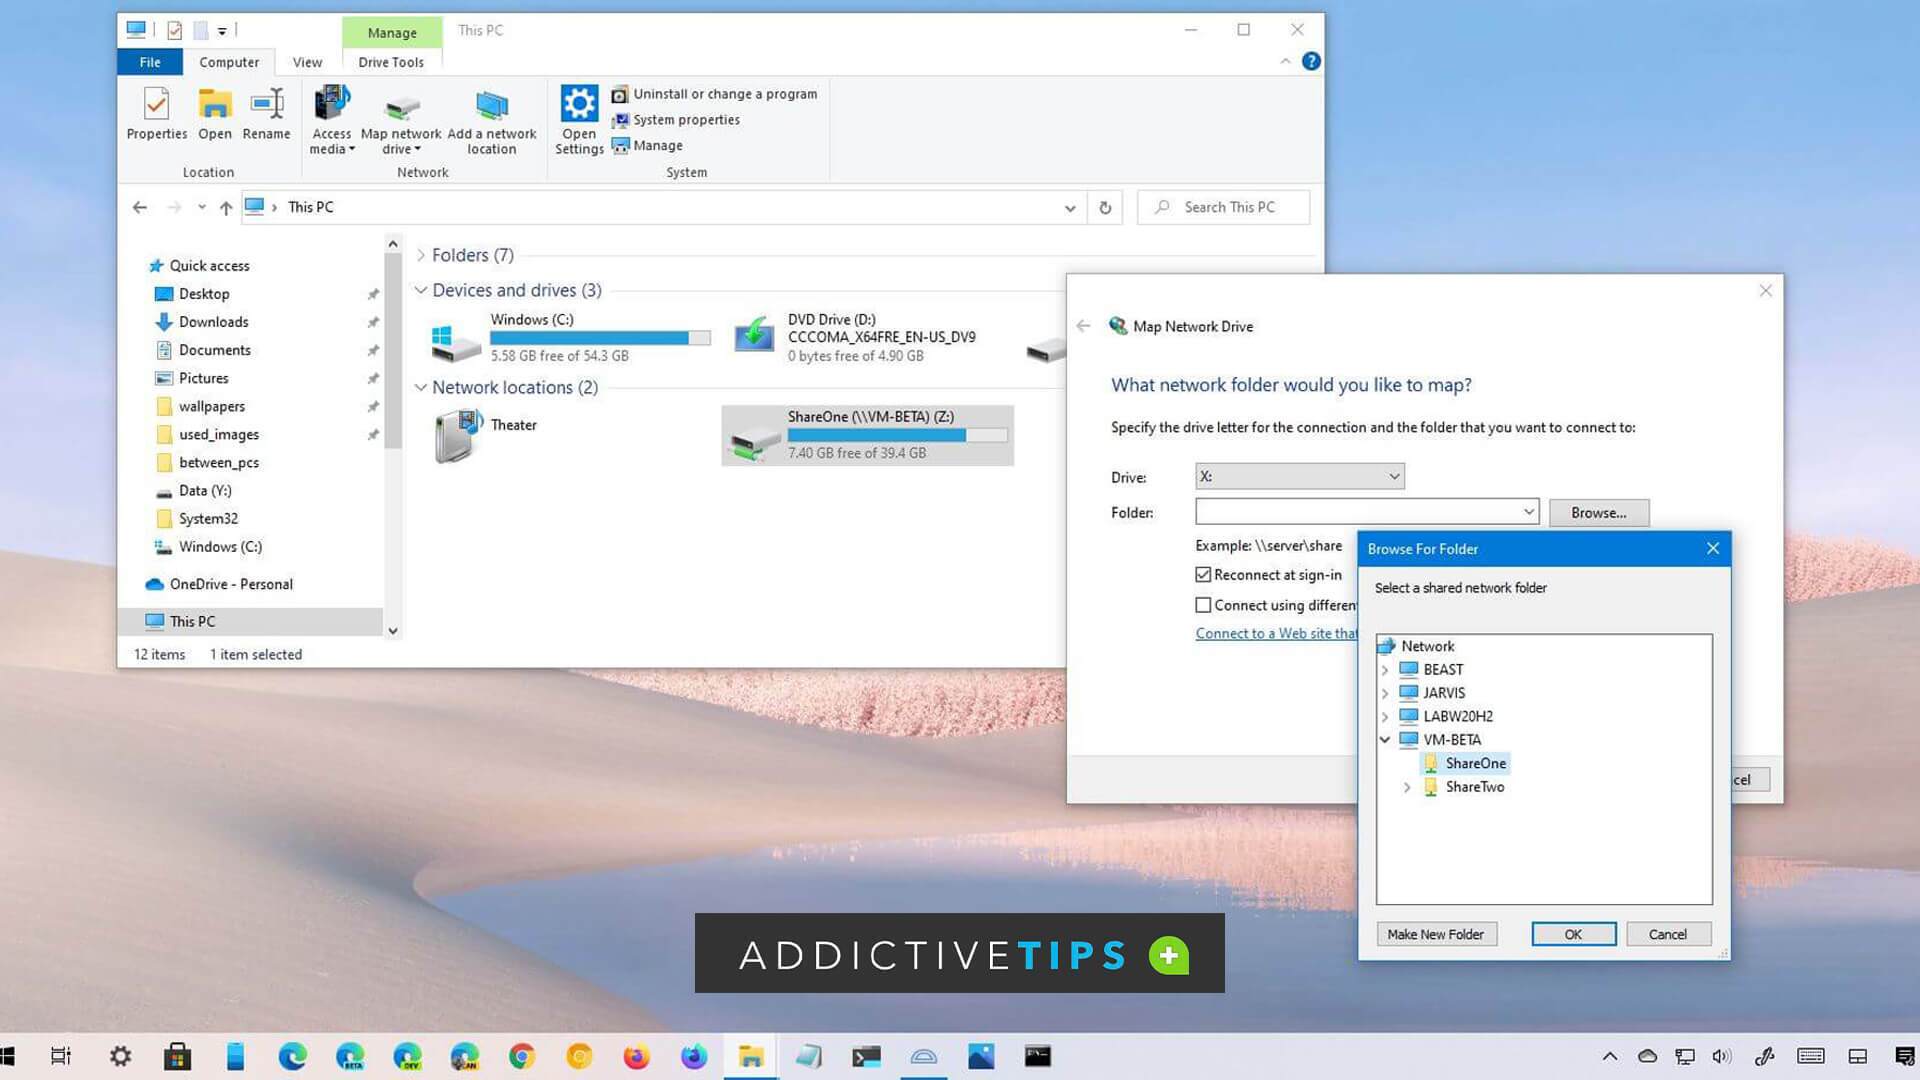
- On the File Explorer window, click on This PC on the left pane
- Next, navigate to and click the Computer tab next to File at the top-left
- Next, select Map Network Drive from the ribbon menu

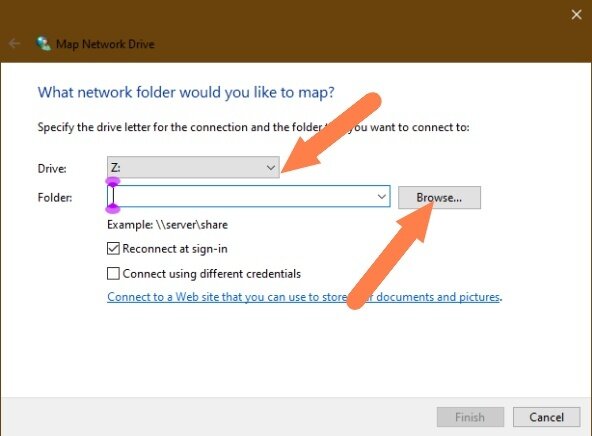
4. You should be on the Map Network Drive window at this point
5. Select the letter for the drive you want to map
6. Click Browse to select a shared network folder
Note: If you get an error message afterward, it’s because you haven’t enabled Network Discovery; you can turn it on in the Control Panel. Press Windows key + R and then type Control in the provided text box followed by the Enter key to launch Control Panel. Then, search for Network Discovery in the search box and enable it.
Navigate to the folder you want to map
Note: You can use the chevrons to rummage through your drive. Regardless, you’ll have to click Users and then the virtual user drive before diving deeper to select the folder you want to map.
- Once you’ve found the target folder, click OK
- Next, choose the persistence option
Note: If you check the Reconnect at Sign-in option, the target folder will reconnect whenever you power on or restart your PC.
3. Click Finish to save all the changes
And that’s how to map network drive on Windows 10. Now, if you go back to File Explorer and click this PC, you will find the mapped drive or folder under the Network Locations section.
In addition, you can access the mapped network folder in command lines and so on by using the drive letter you chose in step 5.
How to Reconnect Network Drive Windows 10
If you enabled the option in step 9 of the previous section and your network drives don’t reconnect, chances are you’re running the 1809 build of Windows 10. Regardless, if your mapped network drives are unable to reconnect on startup, the following workarounds will help fix it:
1. Map the Drives with Command Scripts
With this method, we will create scripts that automatically run at startup and spur the network drives to connect. Use the steps below:
- Open Wordpad on your PC
- Copy and paste the following script into a new note
PowerShell -Command "Set-ExecutionPolicy -Scope CurrentUser Unrestricted" >> "%TEMP%\StartupLog.txt" 2>&1 PowerShell -File "%SystemDrive%\Scripts\MapDrives.ps1" >> "%TEMP%\StartupLog.txt" 2>&1
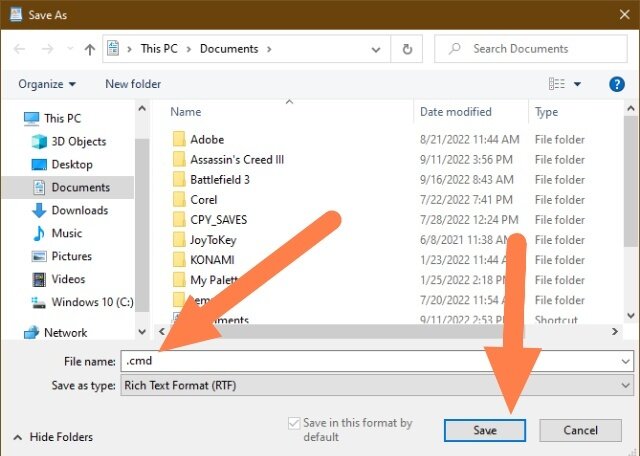
3. Click File in the top-left corner and then click Save As
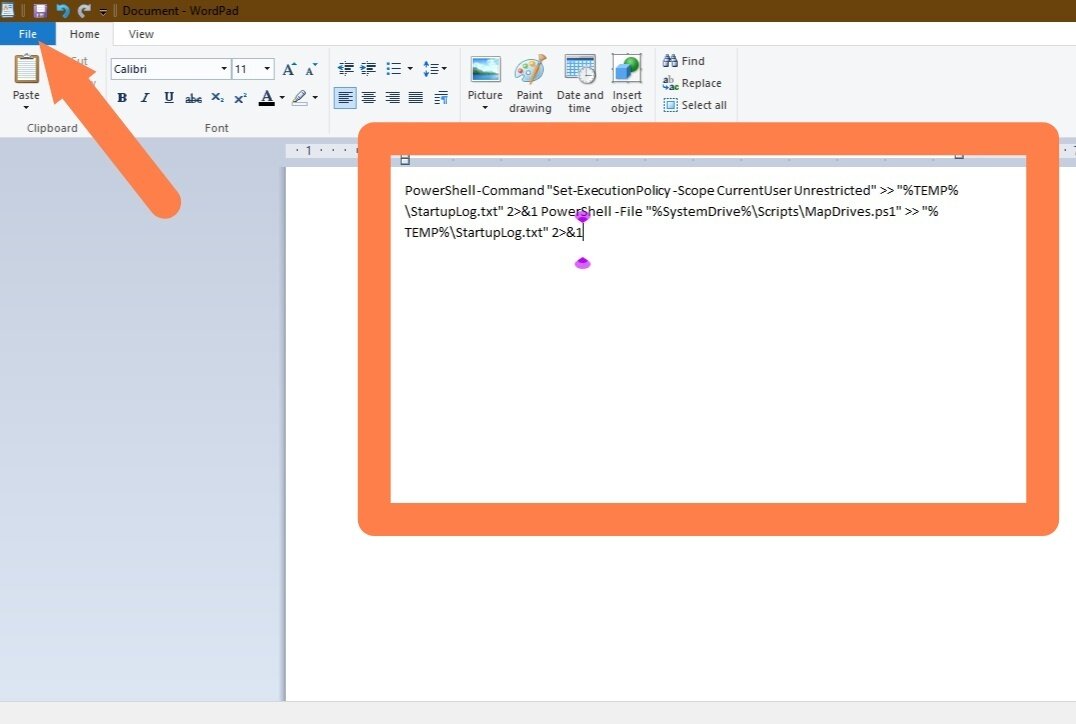
4. Name the file with a .cmd extension and save
5. Next, open a new notepad
6. Copy and paste the following script into it:
$i=3 while($True){ $error.clear() $MappedDrives = Get-SmbMapping |where -property Status -Value Unavailable -EQ | select LocalPath,RemotePath for each( $MappedDrive in $MappedDrives) { try { New-SmbMapping -LocalPath $MappedDrive.LocalPath -RemotePath $MappedDrive.RemotePath -Persistent $True } catch { Write-Host "There was an error mapping $MappedDrive.RemotePath to $MappedDrive.LocalPath" } } $i = $i - 1 if($error.Count -eq 0 -Or $i -eq 0) {break} Start-Sleep -Seconds 30 }
7. Click File in the top-left corner again and select Save As
8. Save the file as DriveMap.ps1
Now, restart your PC for the scripts to run automatically at startup.
2. Force Windows to Wait for Network
Windows may try to map the network drives before they become available, resulting in an error when establishing the connection. You’ll have to change the local group policy if that’s the case. The Group Policy Editor is only accessible to Windows 10 Enterprise, Pro, and Education users.
To do this,
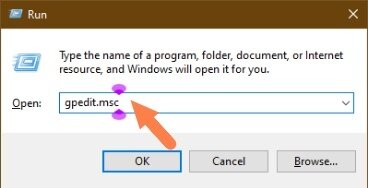
- Press Windows key + R to launch the Run dialog
- Type gpedit.msc in the provided text box and then click OK
3. You should be on the Local Group Policy Editor window now. Click Computer Configuration under Local Group Policy
4. Next, click Administrative Templates > System > Logon
5. Now, locate Always wait for computer startup and Logon network on the right pane
6. Right-click on it and select Edit from the options
7. In the dialog box, navigate to and select Enabled
8. Click Apply and then Ok to save all changes
9. Restart your PC
How to Unmap Network Drive
Unmapping a network drive is just as easy as mapping it. And you can go about it in two different ways:
Edit Local Group Policy
- Press Windows key + R to launch Run dialog
- Type gpedit.msc in the box and hit Enter on your keyboard
- That will open the Local Group Policy Editor. Click User Configuration to expand it
- Next click Administrative Templates > Windows Components > File Explorer
- On the right pane, select Remove Map Network Drive and then Disconnect Network Drive
- Select (dot) Enabled. Click OK
Go to Map Network Drive Dialog Box
- Launch File Explorer
- Click Computer at the top-left
- Select Map Network Drive
- In the accompanying dialog box, click the arrow in front of Drive to select the network drive you want to delete it
- Next, untick Reconnect at Sign-in
- Click Finish to save all the changes
Related: How to delete a network drive on Windows 10
Final Notes
And that’s all you need to map network drive on Windows 10. Once you’ve done it for the first time, mapping other folders over a shared network should come off as a piece of cake afterward. Need any further assistance? Use the comments section below.
