What Is Windows 8 Storage Spaces & How To Create Virtual Storage Pool
Apart from Metro UI, ribbon-based Windows Explorer, Start Screen, fullscreen metro apps, and many other small performance-related changes, Windows 8 comes with an efficient large storage media management feature called Storage Spaces. Supporting the new Resilient File System, casually known as, ReFS, the Storage Spaces allows small and midsize businesses, as well as, home users to easily manage their large (very large) storage pools without having to install expensive devices to organize their data saved across the disks. The Storage Spaces is basically an expandable space that creates a virtual space/ disk of defined data size, allowing users to add as many physical drives as they want until the defined virtual disk’s limit is reached. This makes it easy to include additional storage devices without having to set up and manage each attached physical storage drive.
Today, with the release of Microsoft Windows 8 Consumer Preview, we are bringing you extensive coverage of all the new features in Microsoft’s latest operating system. This post is a part of our Windows 8 Week. To learn more, check out our complete coverage of Windows 8 Consumer Preview.
Before we start looking at different aspects of Storage Spaces, it’s worth mentioning here that Windows 8 Storage Spaces feature is incorporated to better manage the large, external storage mediums, and therefore, you should not try adding bootable external hard drives and USB drives in storage pool created via Storage Spaces.
Since all attached storage mediums are accessed from a single virtual drive (storage drive), you don’t have to mount attached disks to transfer data and perform other disk-related operations. Storage Spaces attempts to implement a RAID model with data mirroring feature, enabling users to automatically mirror disks in order to prevent loss of data when disk failure occurs. If you create a storage space (virtual disk) of 5TB, and then add 2 TB external storage drive to it, you can add remaining 3 TB external storage device anytime to virtual storage pool. However, with 2 TB attached physical drive, it will notify you when the physical storage space is reached, and ask you to add more physical drives to consume the full logical space (5TB).
Storage Spaces comes with multiple resiliency techniques, such as, two-way mirroring, 3-way mirroring and parity, to make your data secure and prevent it from disk failures. The virtual disk created by Storage Spaces behaves just like a local volume, allowing you to perform all basic disk operations, like partitioning, formatting, transferring data from remote and local locations, etc. The resiliency is provided by mirror attribute of Storage Spaces, which ensures that there are at least two copies of your data present separately on physical disks. Since the data saved on the disk is mirrored, you will be able to access the stored data even if one physical storage medium within the logical storage pool fails. Apart from resiliency attributes, it uses thin provisioning concept that makes it possible to create a large mirrored space, say 10TB, on a 2TB of total physical disk capacity.
The Storage Spaces feature is accessible from Windows Control Panel. To begin, open charms bar using Windows+C hotkey combination and use Start Search to open Control Panel, or just move to Start Screen and start typing Control Panel to search it from Apps category.

Clicking the Control Panel will open Category view of Control Panel. Now, click System and Security category to view the all the available System settings and options.
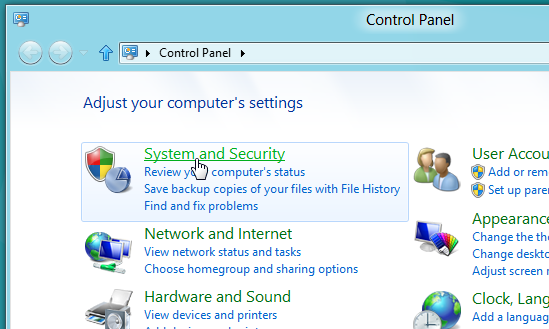
In System and Security, click Storage Spaces to create a virtual space for handling an array of physical disks.

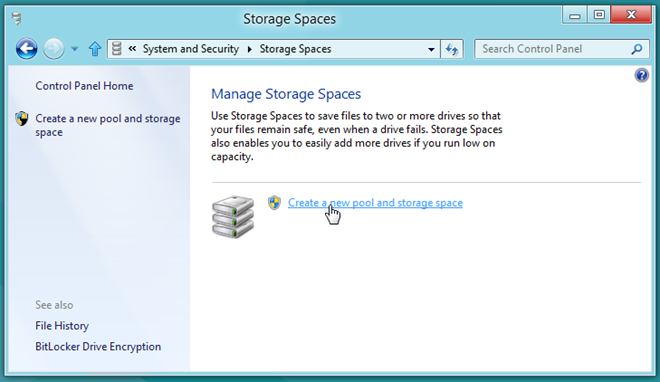
Now attach an external hard drive or USB disk, and then click Create a new pool and storage space.
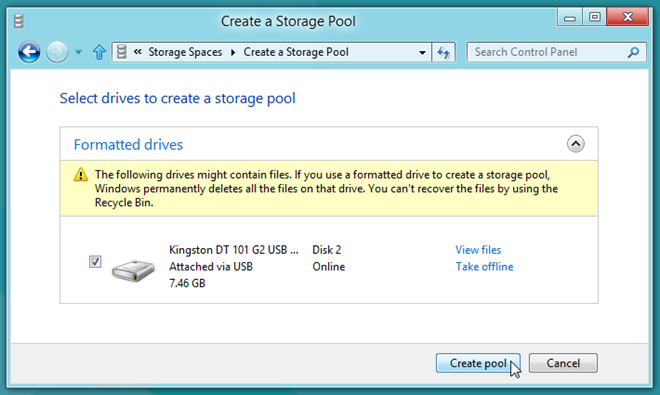
Upon click, it will identify all the attached disks, allowing you to select the disk you want to add to storage pool. Just check the disks, and then click Create pool. This will format the disks, so that you can access them from unified virtual disk.
The Storage Spaces feature lets you assign a custom name to the disk, choose the resiliency type (2-way mirror, 3-way mirror, and parity), and maximum size you want to assign to the pool. It must be noted that if you select 2-way mirror resiliency type and set 10TB pool capacity, it will set 20TB as maximum virtual disk capacity (10 for actual raw data and 10TB for data mirroring).
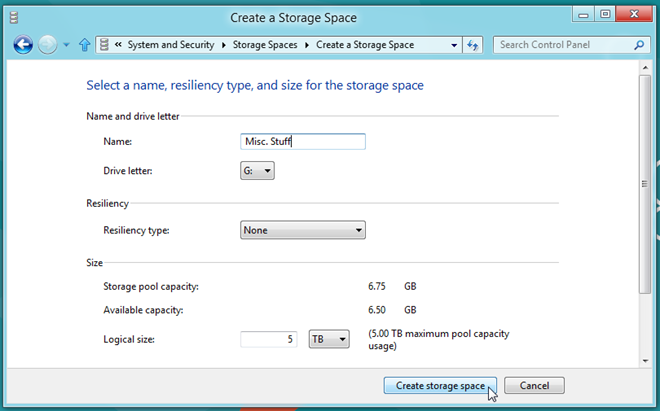
Once all settings are in place, click Create storage space to begin creating the virtual storage pool. Once created, it will show the details of virtual storage pool, such as total virtual space capacity, number of attach physical drives etc. The Storage Spaces dialog will let you rename the pool, add more drives to the storage pool, view files on storage pool, rename and delete the storage pool.
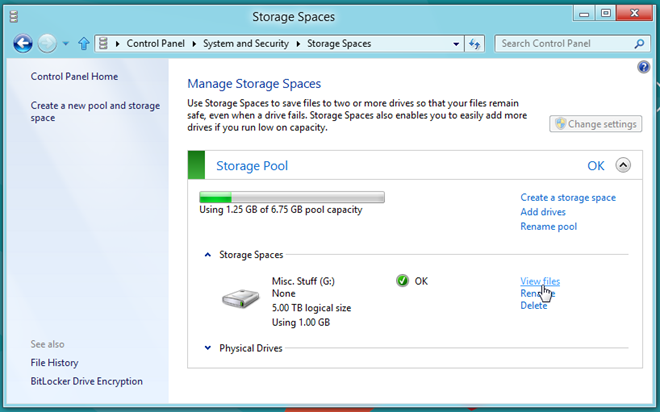
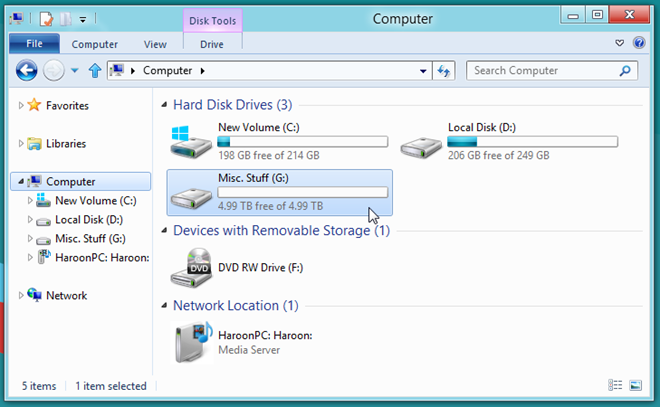
If you want to create a new storage space, click Create a new pool and storage space from navigation bar, and follow the above mentioned steps. As mentioned earlier, Windows 8 Storage Spaces is designed to organize multiple physical disks from a single virtual disk, you can access the virtual storage space from Windows Explorer. The virtual storage pool can be expanded just by adding physical drive(s); it will automatically apply all the pre-configured resiliency settings over the disks.
Storage Spaces may seem a bit hard to configure at first, but once you get a hang of its settings, it will become easy to create a new storage space, as well as, to add new physical drives to existing storage spaces. It surely provides a better alternative to a range of expensive, third party drive extender utilities and devices, which require special knowledge to add and manage multiple storage mediums.
That’s pretty much it for Windows 8 Storage Spaces. Stay tuned for more of our Windows 8 coverage.

most of the images in this article do no display (0 byte-sized files). will have to look for another intro to Storage Spaces 😐
wheres the new file system??
Drives have to be formatted as NTFS to work with storage pools.
Yes, but partition table is GPT