What Are Physical & Logical Bad Sectors Of Hard Drive And How To Repair Them [Guide]
Amongst all the potential hard disk faults and errors, bad cluster is one that doesn’t make it completely non-functional. Hard disk bad cluster, casually known as bad sector, is a small sector which doesn’t respond to read and write requests, and therefore, the device software, which is operating the hard drive, reports it as unusable sector. Bad sectors are usually categorized into two broad types; Physical bad sectors and Logical bad sectors. The former type of clusters on disk need to be mapped out to continue read and write operation on disks, whereas the logical bad sectors are usually reported by the operating system due to its inability to access the cluster on hard disk. In this post, we will briefly discuss each type of bad clusters, and look at some tools that may help you repair bad sectors on hard disk.
Physical Bad Sectors
Talking of physical bad sectors, it’s one of those sectors in hard disk that are physically damaged, and neither OS/disk controller can access them nor any type of read and write operations can be performed. In contrast to logical bad sectors, there are only a few chances that your hard drive will develop physical bad sectors. These type of bad clusters may develop when hard drives are manufactured. As you may know, there are millions of sectors on a hard drive (even billions, depending upon the capacity of storage medium), checking each sector on hard drive for bad sectors and resolving the issues with area having bad sectors is not only time consuming but cumbersome as well. For this reason, bad sectors are mapped out using numerous translator algorithms. It must be noted that physical bad sectors can not be repaired. They can only be mapped out of hard drive via specialized low-level disk repairing utilities. Once mapped out, disk controller or operating system doesn’t attempt to access those sectors for reading and writing data. Since physical bad sectors can’t be mapped out using conventional hard disk diagnostic and repair utilities, it’s recommended to buy a new hard drive, and send the hard disk with physical bad sectors to its manufacturer for recovering data from usable sectors.
Logical Bad Sectors
Unlike physical bad sectors, logical or soft bad sectors may develop on hard drives on account of many reasons. The logical bad sector is a sector which suddenly becomes inaccessible to disk controller software or OS. When an OS attempts to read / write data to logical bad sector, it takes quite a long time to complete the requested operation, and even if the operation gets completed with no apparent issues, users face problems while reading the data written on logical bad sectors. However, unlike physical bad sectors, this type of bad sectors are totally repairable. There are a wide range of hard disk repairing utilities available out there that can detect the areas with bad sectors and attempt to repair them. Unlike physical bad sectors, when logical bad sectors are repaired, users can read and write data to area of hard drive where logical bad sectors were existed. There are various reasons for the occurrence of logical bad sectors on the hard drive, including virus/malware infection, improper shut down, use of low-level disk format utility and more. A logical bad sector may also develop on a hard drive when a user attempts to save the recovered data from the drive where it’s being read from.
The modern storage mediums have an in-built spare sector pool that can help repairing logical bad sectors. The pool is responsible for replacing the bad sector (if developed on a hard drive) with usable, good sectors (in the pool), allowing user to seamlessly read and write data without facing any issues. However, the number of sectors designated to spare sector pool is limited, and if it runs out of spare sectors and then the hard disk develops a bad sector, user can fix them by either re-mapping the logical sectors with physical sectors using hard disk remapping utilities, or using zero-fill programs like DBAN, KIllDIsk etc., to fill the entire hard disk with zero bytes.
Checking Hard Disk For Bad Sectors
Just like its predecessors, Windows 7 comes with a built in disk utility called Check Disk to scan disk for discrepancies, and especially bad sectors. This utility also claims to repair the logical bad sectors via deep, thorough scan mode. While attempting to repair the bad sectors, it may ask you reboot the PC to check those portions of the hard disk which are not used while Windows is running. Additionally, it needs complete access to your PC, and therefore, can automatically quit any on-going process. If you frequently face read / write errors, BSoDs and other like issues, it’s advisable to deep scan each disk partition to check the presence of bad sectors. You can access Check Disk from the disk’s Properties dialog. Just right-click the drive you want to check for bad sectors, select Properties, head over to Tools tab, and then hit Check now.

This will launch Windows’ native Check Disk utility, allowing you to fix file system errors, and scan & recover bad sectors it found during the disk check process. As mentioned earlier, if it finds bad sector on your hard drive, you may require rebooting the system in order to fix them.
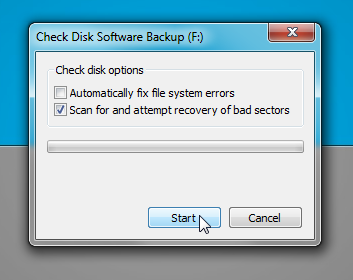
Check Disk offers a limited set of disk repairing mechanisms, and hence, you can’t rely upon it. After it successfully repairs all the bad sectors on hard drive, you should check each disk partition for potential read and write issues via a third-party disk utility, say, H2testw. The application has been designed to check both external and internal storage mediums for read and write errors. It will help you identify the type of exception your hard drive throws while reading and writing data.
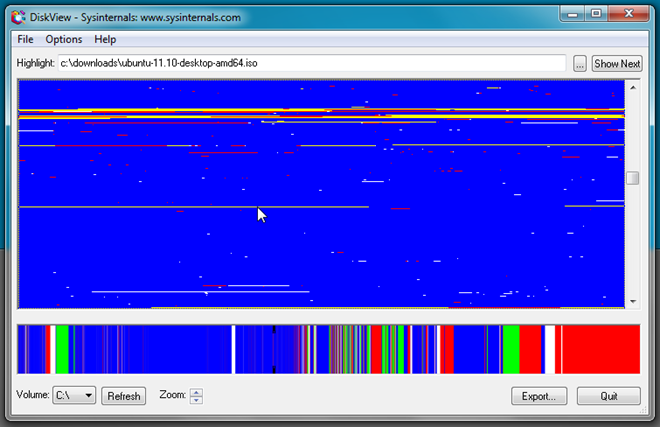
DiskView is another tool that is worth a try. This small application shows a graphical map of your disk, allowing you to visually analyze each sector of disk and also to locate all damaged sectors. Not only does it show each cluster on the disk, it also helps you check the data written on each cluster. In short, it will give you a detailed insight into data distribution across the specified disk partition.
Performing Sector-By-Sector Disk Cloning
Before you perform advance disk repair operations, it’s highly advisable to backup all the data on external hard disk. Since a hard disk with bad sector doesn’t allow backing up all disk volumes, you can’t use conventional hard disk backup utilities to carry out the operation. What you probably need is an application that can clone each hard disk sector. We have previously reviewed HDD Raw Copy Tool that lets you perform sector-by-sector disk cloning. It’s been built to scan each sector of specified hard disk volume for data, and copy it to target drive. Unlike other disk backup tools, it first erases everything from target drive before initiating disk cloning operation. So, it’s advised to use an already empty storage medium.
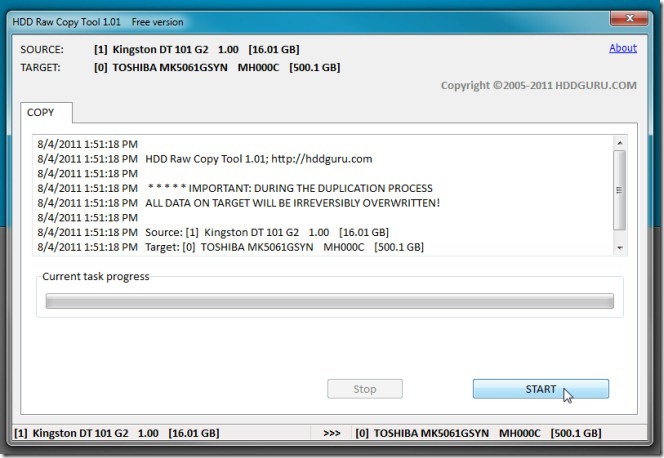
HDD Raw Copy has the ability to auto-skip bad sectors, and therefore, if it finds a sector that cannot be copied to an external drive, it will automatically read the data from next sector and copy it to destination disk. This feature makes it different from other disk cloning tools, which prompt user to first repair the bad sectors to continue the disk cloning operation. Moreover, it attempts to make an exact copy of specified disk, without changing the basic disk structure and folder hierarchy.
Repairing Bad Sectors
As mentioned earlier, physical bad sectors are irreparable, and they can only be mapped out to prevent reading and writing data to them. However, logical bad sectors can be repaired by using numerous techniques. Earlier, the low-level format was considered to be one of the best solution, but with modern disks, it’s strictly not recommended. What you can try is zero-filling the drive. The zero-filling, as name suggests, is an operation that fills each sector of disk with zero bytes, attempting to reinstate the original state of the disk. This, in result, may repair all the non-addressable bad sectors, and the OS can then start reading and writing data to them.
Filling zeroes on entire disk requires you to unmount the hard drive, and then perform the operation using MSDOS utility. However, you can also use Ubuntu Live Disk to perform zero-fill operation over entire hard disk. In our guide to clone hard drive using Ubuntu Live Disk, we used dd command to create an IMG file of hard disk partition to specified location. Apart from writing disk headers, cloning a disk drive, copying files etc., it can be used to write entire disk with zero bytes, enabling users to repair the bad sectors on hard disk.
For those who don’t know how to create an Ubuntu Live Disk, check our post on creating an Ubuntu 10.10 Live Disk. Once created, reboot your PC in BIOS menu to change the boot priority. Navigate to Boot menu and set external hard drive as first boot option. Now, save the changes made to BIOS and reboot the system. It will take you directly to Ubuntu boot menu. Select Run Ubuntu from this USB option to begin loading Ubuntu 10.10. Once Ubuntu is loaded, open Terminal from Applications –>Accessories menu.

Now, mount the drive that is to be filled with zero bytes, from Places menu. You will need to note down the disk identifier of your hard drive. For this, open Disk Utility (accessible from System –> Administration menu), select the mounted hard drive from left sidebar to view the complete disk information in main window. You will find the disk identifier in right sidebar.

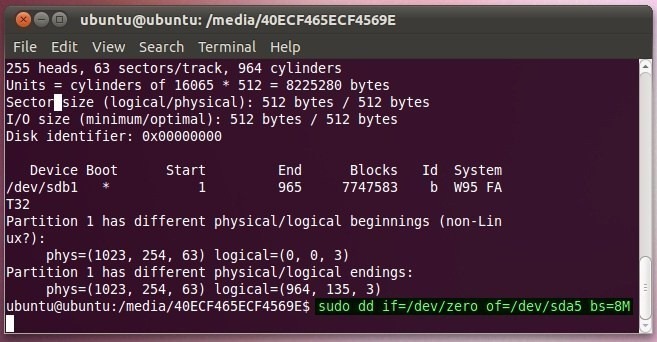
The syntax of writing zeros to disk via dd command is as follows.
sudo dd if=/dev/zero of=/dev/<disk identifier> bs=8M
If the hard disk identifier is /dev/sda, enter the following command to begin writing zeros to hard drive.
sudo dd if=/dev/zero of=/dev/sda bs=8M
DBAN is another utility that does the job quite efficiently for SATA and IDE disks. It is a bootable disk wipe application to completely wipe the hard disk in order to make data irrecoverable. One of the methods it supports is Quick Erase that allows writing zeroes to disk. Using the interactive mode, you can select this method, and then select the drive on which zero bytes are to be written. All you need is to download the DBAN ISO package and burn it to CD/DVD using Windows native disc burner.
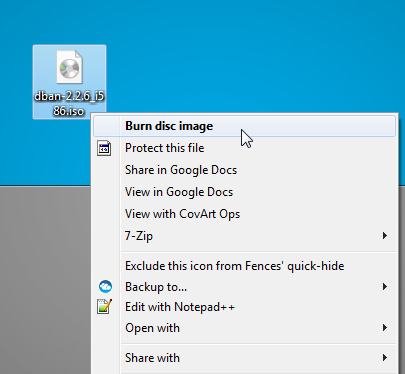
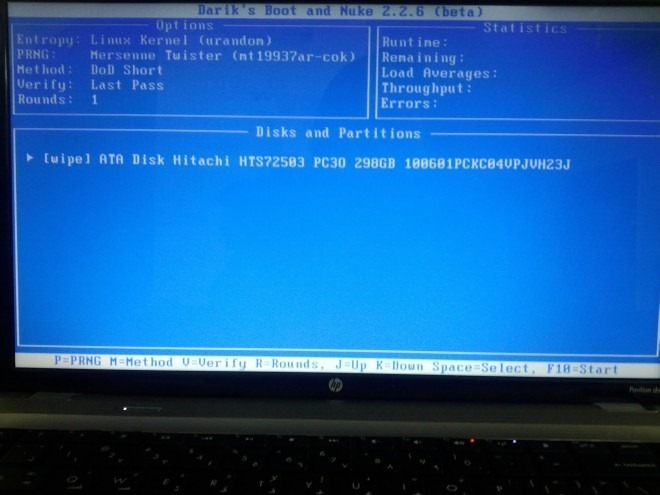
Once the image is burnt to CD/DVD, reboot your system into BIOS, and set CD/DVD as first boot option from Boot menu. Once boot priority has been defined, reboot the system to load DBAN. On the main page, press Enter to start DBAN in interactive mode.

The Interactive Mode lets you choose the method you want to use for wiping disk data. First, select the drive using spacebar on keyboard, and then press ‘M’ to select the method.
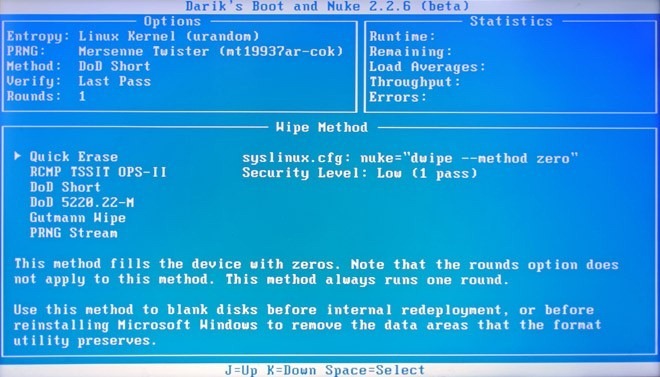
As mentioned earlier, the Quick Erase method allows writing zeroes to entire hard disk. Just select the option, and then press F10 to begin the process. The time it takes to write zeroes to entire disk depends upon the size and speed of your hard drive.
The logical bad sectors can be recovered using above mentioned tools, but this doesn’t mean that you can continue using your hard disk for a long time. When bad sectors (physical or logical) start developing on your hard drive, it is, infact, an indicative of buying a new hard drive to stave off any imminent damage to your storage medium. However, you should take preventive measure to protect your hard drive from bad sectors. It’s recommended to always shut down your system properly, schedule an automatic disk defragmentation to prevent hard disk wear and tear, keep your anti-virus/anti-malware application updated with latest virus definitions, and always use your hard disk manufacturer’s provided disk diagnostic utilities to fix hard disk-related issues.

Very good post about that ‘how can repair bad sector from hard drive’. Don’t worry i have great solution for this problem, try Kernel for windows data recovery software to repair complete bad sector from hard disk and recover also data files for windows NTFS and FAT partition.
thanx man
How about PBD(Partition Bad Disk)? It seems easier to use.
Very well written! But no mention of PList and GList; by name at least.
A rare and informative post. Very good. I also recommend PartedMagic as I have used it.
Great post! Although, I am already familiar with all of the methods mentioned here, I am sure that many other people will find it useful. I would add that SpinRite from Steve Gibson is THE tool to have in your tools, not just for recovery, but for maintenance as well. Also PartedMagic is one of the best live CD’s around. It has great array of applications that have never ever failed me.
Thanks for the appreciation. We’ll definitely check these out, as well!
Why not tick fix file system errors when running Disk Check?
Why not tick fix file system errors when running Disk Check?
Awesome post! I will gonna try it on my hard disks…