Top 20 Windows 8 Tweaks, Hacks & Tips
Ever since Microsoft released the consumer preview of Windows 8, many power users have found registry hacks and tweaks to change the way Windows 8 behaves in certain situations. While most veteran Windows application developers had already started developing Modern UI apps, Windows enthusiasts were excavating deep into Windows 8 Registry Hives and the Local Group Policy Editor this whole time to find native solutions to problems that novice users may face. If you’ve been following us since the release of the Windows 8 developer build, then you may know that we have covered an umpteen number of Windows 8 tips, registry hacks and Local Group Policy Editor tweaks to enhance the overall usage experience. In what follows, we bring you the best 20 Windows 8 tweaks, hacks and tips that you may find handy.
For your reading convenience, we have divided this post into the following sections.
- Local Group Policy Editor Tweaks
- Windows Registry Hacks
- Tips related to Windows 8 features
Before you start tweaking your Windows 8 PC, you should get familiar with Local Policy Editor and Windows Registry editor. The former is a MMC (Microsoft Management Console) snap-in that enables users, with administrative privileges, to customize a wide range of system component settings, and restricts the control a standard user can exercise on the system, whereas the latter is a database that stores preferences, configurations and settings of both system and user applications, and therefore provides you with workarounds to disable certain features and make others work.
Local Group Policy Editor Tweaks
Disable Uninstall Option For Windows 8 Modern UI Apps
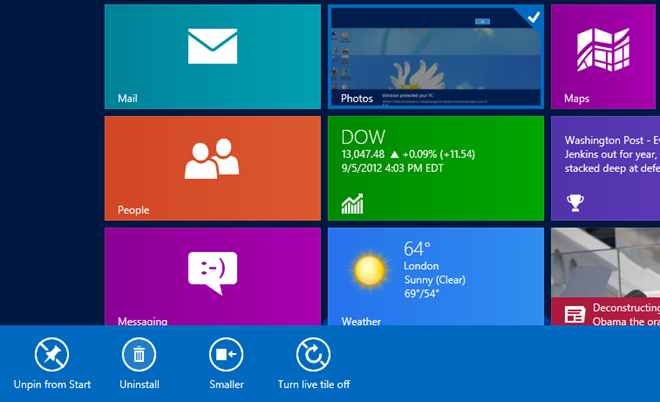
The biggest change in Windows 8 is the Modern UI (formerly known as Metro UI). Now, in addition to the Desktop workspace, you have the Start Screen. The apps that you install from Windows 8 Store can only be accessed from the Start Screen. The Uninstall or Change a Program dialog box lets you uninstall only those applications that are installed from external sources. You can uninstall any Windows Store app from Start Screen by right-clicking it and then selecting Uninstall option from the bottom. Although, it saves the hassle of opening Uninstall or Change a Program dialog box, it provides access to all users to easily uninstall the Windows Store apps from your computer. If you’re looking for a way to keep standard users from uninstalling Modern UI apps, check out our article to find out how to disable the uninstall option from the Start Screen.
Hide Specific Windows 8 Control Panel Tools Or Applets
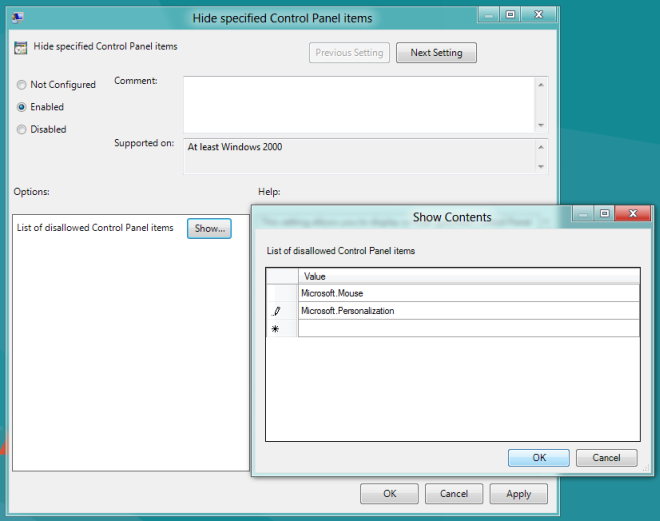
The Control Panel in Windows 8 is just like the one that comes with the previous versions of Windows. It contains different system tools and applets for changing default settings of different PC components. However, there are simple options that allow standard users to disable the settings, meaning that anyone who has access to your computer can change your PC settings using the Control Panel. For instance, the Mouse applet lets users change default settings of the mouse, like its movement and clicking speed. Using the policy settings in the Local Group Policy Editor, you can restrict users from changing the settings of system components. You can follow our guide on hiding Windows 8 Control Panel applets to prevent your PC users from changing the settings.
Turn Off Windows Store
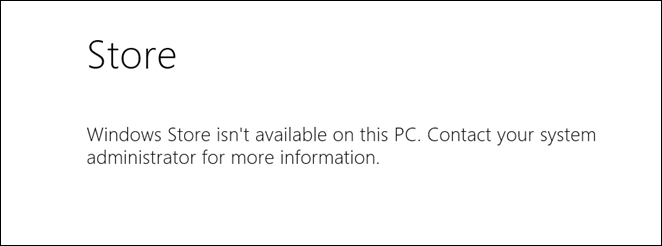
Windows 8 comes with its own app marketplace called the Windows Store. The number of apps available for download are increasing with each passing day, and the Windows Store still needs to go a long way. Just like other app marketplaces, there are both free and paid apps available for download. If you are lending your Windows 8 device to your friend or colleague, then you probably don’t want them to download paid apps, using your credit card information. Disabling the Store is a good way to prevent anyone else from installing any unwanted app to your system, however, there is no default option to disable the Windows Store. You can check out this tip to disable the Windows Store by changing its policy setting in Local Group Policy Editor.
Disable Lock Screen & Lock Screen Image
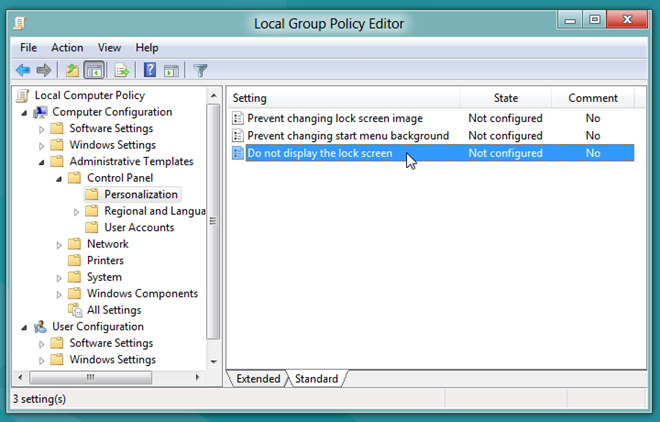
While the Lock Screen in previous versions of Windows adds an extra layer of security to Windows logon and allows you to temporarily lock your system, the Windows 8 Lock Screen offers some extra features; other than the ability to lock your computer with a password, it also lets you view the notifications from different apps such as People, Email, Date & Time, Battery Status etc. If you are using Windows on a tablet, entering the password in order to gain access to the computer every time you login can be a bit annoying. The default settings provided by Windows 8 lets you tweak the elements of the Lock Screen, but does not have an option to completely disable it. However using the Local Group Policy Editor, you can permanently disable the Lock Screen, which in turns gives you direct access to the Windows Logon screen. The Lock Screen policy setting dialog also enables system administrators to prevent standard and guest users from changing the Lock Screen image. Check out the steps for disabling the Lock Screen in this post.
Disable Lock Screen App Notifications For All Users
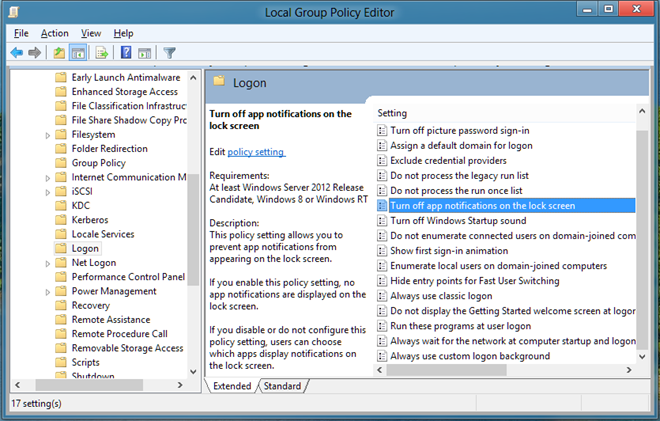
Unlike its predecessors, Windows 8 is optimized to run on both PCs and tablets. Just like the iOS and Android operating systems, Windows 8 also provides you with app notifications right on the Lock Screen. For instance, if you have unread messages, it will send the notification on the lock screen, enabling you to quickly read the message. In the PC Settings menu, there are options to turn the Lock Screen notifications On and Off, but it is applicable only on the current user and other PC users can view their notifications. If you want to disable the Lock Screen notifications for all PC users, the Local Group Policy Editor lets you do it. Follow our guide to disable Lock Screen app notifications for all users in Windows 8.
Enable Account Lockout Policy And Set Lockout Threshold & Duration
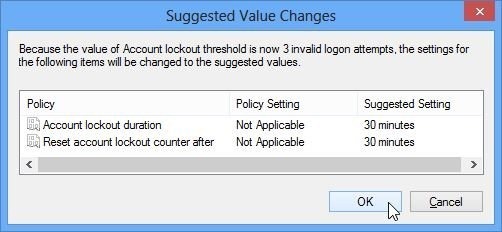
The User Accounts feature lets administrator and standard users create multiple user accounts for other PC users. It equips each PC user with a facility of saving their private information like account passwords, financial information etc., without worrying about data theft attacks. Just like any OS, Windows 8 also lets you protect your User Account with a password to prevent others from accessing your data. However, you might have noticed that if you keep entering the wrong password while trying to log in to your account, it gets locked after some attempts. You have to wait for some minutes before you can make another attempt to log in to your PC. Using the Local Group Policy Editor, you can enable the account lockout policy and customize both the account lockout threshold & the account lock-out duration. This article explains all the steps required to change the settings related to account lockout policy.
Disable Sync Settings For All Users
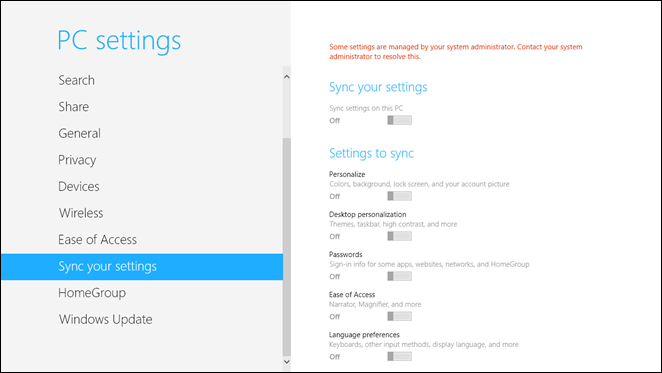
You may know that Windows 8 can be used with both a local account and a Microsoft account, but the advantage of using the latter is that all of your settings, including background, theme, internet history, shortcuts etc, can be easily synced with other devices running Windows 8. For instance, if you have Windows 8 installed on both PC and tablet, you don’t have to manually tweak the settings on both devices, instead, you can just turn the Sync feature on to automatically sync settings, internet history, Start Screen background, color scheme etc., with other Windows 8 devices. However, if you don’t want your devices to sync the settings, you can disable sync from the PC Settings for your user account. You can also enforce system-wide level settings to disable the Sync feature for all users, you may follow the steps from our guide to disable Sync feature for all user accounts.
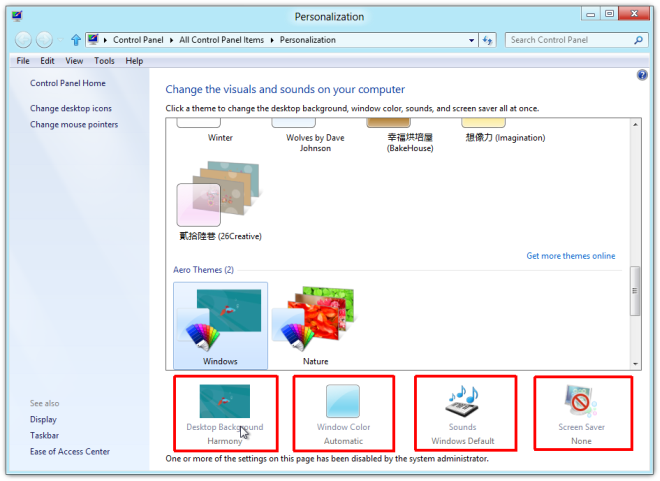
Restrict Account Users From Changing Personalization Settings
The Personalization dialog box was first introduced in Windows Vista. It basically collects all the UI and screen related settings and show them in one location, so that users don’t have to open different menus to change screen and Windows UI settings. If you’re a system administrator, and are looking for a way to restrict your PC users from changing Personalization settings, then you can use Local Group Policy Editor to disable the Personalization dialog box for all users. You can check out our guide on disabling different Personalization settings.
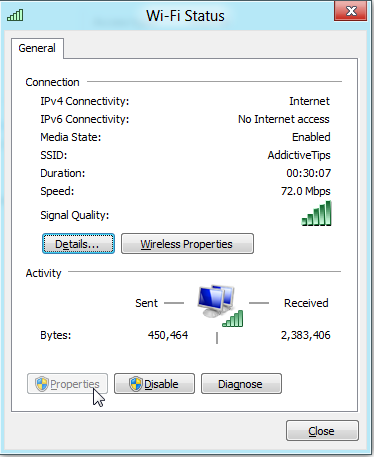
Prevent Users From Changing Internet Settings
The problem with some system wide settings, such as the internet settings, is that when you change them in one user account they get changed for all users profiles. If you are a system administrator, you can prevent other users from changing the internet settings from the Local Group Policy Editor. This article guides you through the process of restricting users from accessing Internet Settings in Windows 8.
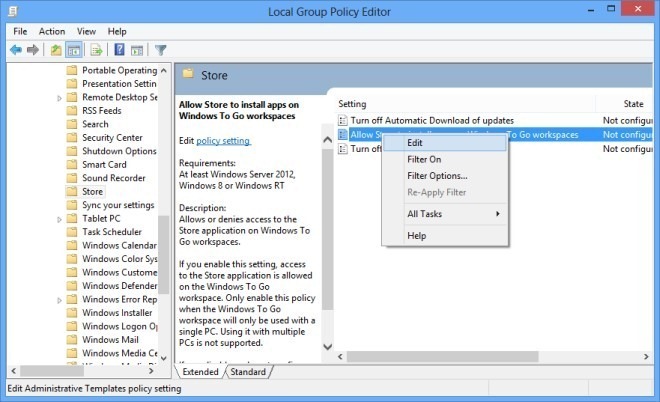
Enable Windows Store On Windows 8 To Go PC
The Windows To Go feature of Windows 8 Enterprise edition allows users to boot the Enterprise edition of the operating system from a USB flash drive. It proves to be quite useful in instances where you need to run Windows 8 temporarily on a system and don’t want to go through the hassle of installing it on your PC. Even though, it offers a complete OS environment from the external USB drive, you cannot use the Windows Store to update installed apps and install new ones, as it is disabled by default in Windows To Go workspace. The fact that it is disabled by default does not mean that Windows Store is not available at all; You can gain access to it by enabling it from the Local Group Policy Editor. Check out our guide on enabling Windows 8 Store on Windows To Go Workspace.
Windows Registry Hacks
Change The Maximum Number of Tile Rows On Start Screen
The Start Screen of Windows 8 displays shortcuts to the installed apps in the form of colorful tiles. The tiles can be used to quickly access your favorite programs. If you install a news app, its live tile will display the latest headlines. You can move the tiles around, create groups for similar types of tiles and resize the tiles. When you open the Start Screen, Windows 8 detects the resolution of your monitor and decides the total rows of tiles that will be displayed on the start screen. There is no default option to control the maximum number of rows, so, if you want, you can not have a fewer number of rows. However, a simple registry hack allows you to control the maximum number of rows that will be displayed on the Start Screen. In order to set a maximum limit for the number of tile rows, navigate to the following registry key.
HKEY_CURRENT_USER\Software\Microsoft\Windows\CurrentVersion\ImmersiveShell\Grid
Right click in the main window, select New, and create a new DWORD (32-bit) Value. Now, rename it to Layout_MaximumRowCount. and then open the key to set the custom maximum number of rows. You can restart or log off your computer to implement the changes. On a monitor with 1920 x 1080 resolution, you can get up to 6 rows of tiles on the Start Screen.
Set Border Size of Desktop Windows
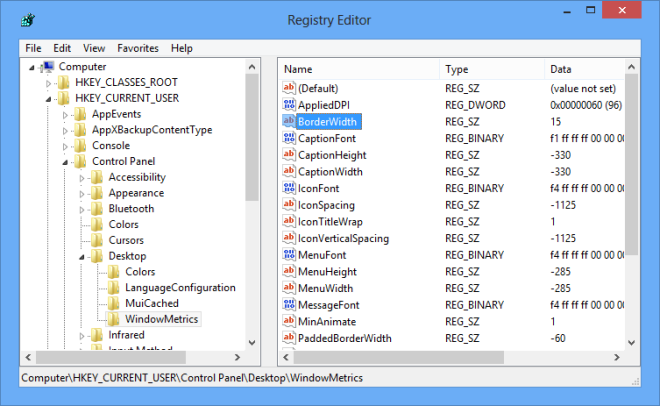
You may already know that Microsoft has dropped the Aero, and Windows 8 wraps windows in non-transparent borders. This move was aimed at making the operating system faster and more efficient by removing heavy UI elements that consume too much of system resources. You can still change the color of Windows borders to match your theme, but since the transparency is no more there, large borders mean that more screen space will be blocked by the active window. By default, there is no simple way to set a custom border size, however, you can change the border size of windows from the Windows registry. To change the border size, first open Windows Registry Editor and locate the following registry key.
HKEY_CURRENT_USER\Control Panel\Desktop\WindowMetrics
Now, look for the “BorderWidth” key and open it. By default, the value is set at –15. You can choose any value from 0 – 50 for the windows borders.
Set Custom Desktop Icon Vertical & Horizontal Spacing
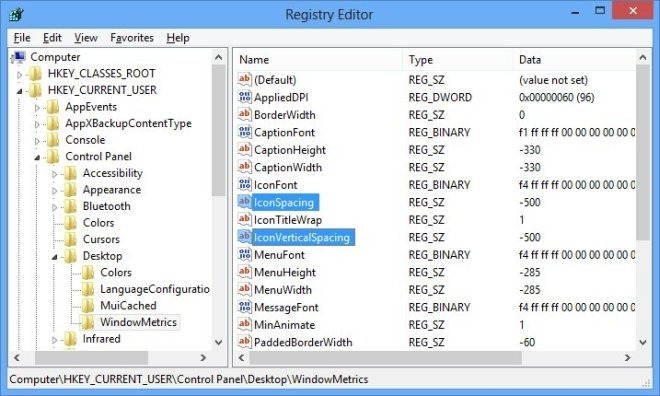
One of the features that most Windows enthusiasts miss in Windows 8 is Windows Color and Appearance. As the name suggests, it is a UI related settings dialog box that allows you to change the size and colors of desktop elements. One of its options allow users to change the vertical and horizontal spacing between the desktop icons. In Windows 8, you can change the default values of vertical and horizontal spacing using the Windows registry editor. In order to change the icon spacing, head over to the following registry key.
HKEY_CURRENT_USER\Control Panel\Desktop\WindowMetrics
Now, from the right side, look for the keys named “IconSpacing” and “IconVerticalSpacing”. By default, the value of both keys is set at –1125. You can increase this number to increase the space between desktop icons.
Windows 8 Start Screen Animation Registry Hack
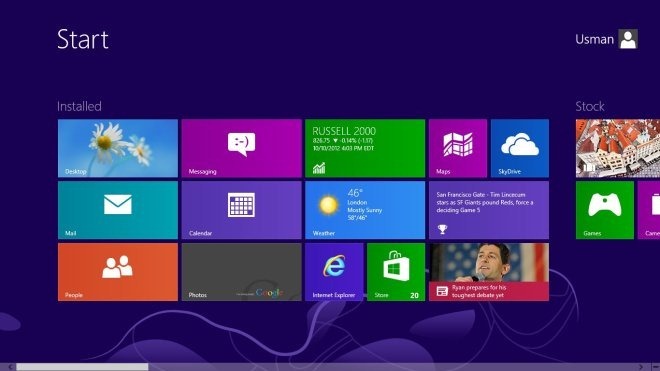
The start Screen in Windows 8 can be customized using the Personalization options included in the PC Settings. It allows you to choose a tattoo to be displayed on the Start Screen and select the main color for the Modern UI. When you open the Start Screen, it displays the tiles in a specific animation. Windows does not provide you with an easy way to change the speed or style of the animation, however, a simple registry tweak can be applied to enable and control the animation. Other than the tiles, this registry hack also work for the animations for User picture, Username, and the Start text (present at the left side of the Start Screen). In order to change the Start Screen animations, open the Windows Registry Editor and open the following registry key.
HKEY_CURRENT_USER\Software\Microsoft\Windows\CurrentVersion\ImmersiveShell\Grid
Now, right-click in the main window of the registry editor to create a new DWORD (32-bit) Value and rename it to Launcher_SessionLoginAnimation_OnShow. Once created, open the key and change the value to 1. Close the registry editor and open the Start Screen. You will notice that the hidden animation is enabled.
As stated earlier, you can also control the animation by creating more registry keys. However, a small tool by WINAERO called Start Screen Animations Tweaker provides the front-end of these registry hacks, making it easier for you to tweak the animations without manually editing the registry.
Tips related to Windows 8 features
Bypass Windows 8 Start Screen On Startup & Jump Directly To Desktop
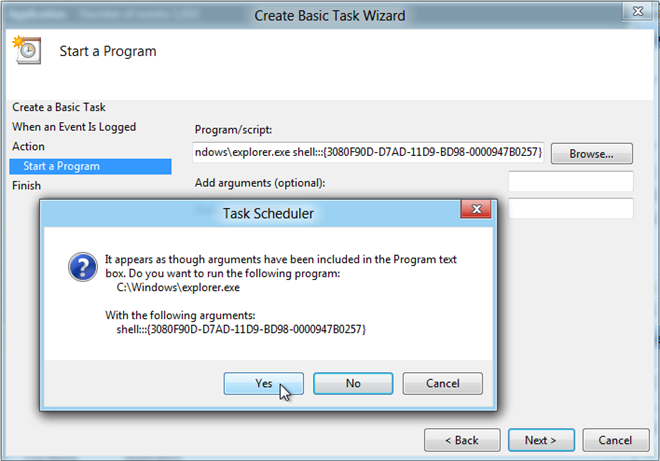
The biggest change in Windows 8 is the removal of Start Orb and introduction of the Start Screen. Now, when you login to Windows, instead of going to the Desktop, you are greeted by the Start Screen. It provides you with tiles for various apps, included Desktop, allowing you to quickly access the required app. A lot of avid Windows users are not happy with this huge change in the UI, and are annoyed by the additional step required to open the Desktop. You can find a number of tools that lets you skip the Start Screen and take you directly to the to desktop, however if you are not fond of installing additional software on your PC, you can manually change the Windows Startup behavior. Check out this tutorial to bypass the Start Screen and jump directly to Desktop after you log in to Windows 8.
Customize Windows 8 Win+X Menu
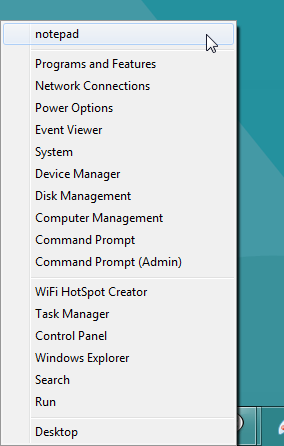
Once you get the hang of all major changes in the UI of Windows 8, you will start noticing the small ones. While Windows doesn’t offer a number of features that were present in previous versions of Windows, it offers some brand new additions. Amongst all the new additions, Win+X menu is the most significant one. In Windows 7, the Win+X shortcut is used to access the Windows Mobility Center, but it can now be used to access a special menu that appears at bottom left corner of the screen. The Win+X menu in Windows 8 lets you quickly access some useful System Utilities, such as Programs and Features, Mobility Center, Network Connections, Power Options, Device Manager, Task Manager, Run dialog box etc, but it doesn’t allow users to customize this menu. In this article, you can find two simple ways to edit the Win+X menu in Windows 8.
Turn Off SmartScreen Filter For Windows 8
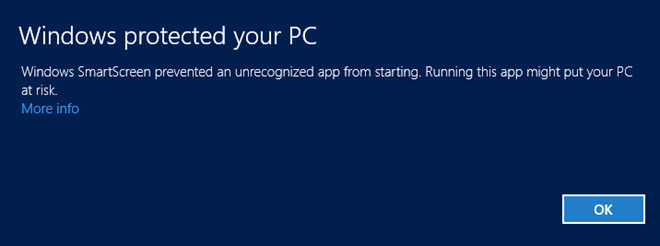
In Windows 8, Microsoft has introduced a brand new security feature called SmartScreen. It warns users about the potential threats and temporarily prevents installation of those third party apps that are considered as unsafe. It is a good feature for enhancing your computer security, since there is a possibility of your computer getting infected with a virus after installing a third party app from an external, untrusted sources. However, it can get quite annoying for some users, who do not like a prompt appearing on their screen every time they install a third party tool. If you’re power user who install a lot of third-party tools, you can choose to disable the SmartScreen filter by following the steps from our guide.
Create Custom Refresh Point In Windows 8 With Recimg Tool
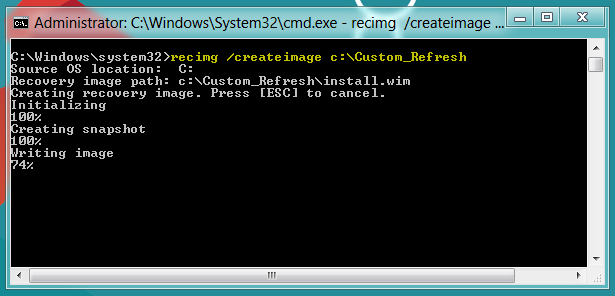
In case your Windows 8 PC is not running smoothly, the Refresh Your PC feature of Windows 8 lets you refresh all the settings of your computer without making any changes to your personal files. During the refresh, your files and personalization settings will not be changed, as it only reverts your PC settings to the default state, and the Windows Store apps will remain intact (third party apps will be removed, however). Although, Refresh Your PC feature quickly takes your PC to the default state, it doesn’t allow you to create a custom restore point. Using a command line tool called Recimg, you can create a custom refresh point in WIM (Windows Installer Image) format. It actually saves the current snapshot of your PC and lets you restore your PC to specific custom refresh point. This enables users to to retain all their settings, files, and desktop applications after using the Refresh Your PC feature. In this post, we have explained all the steps required to create, and restore, a custom refresh point using Recimg command.
Create Wireless Ad Hoc Internet Connection In Windows 8
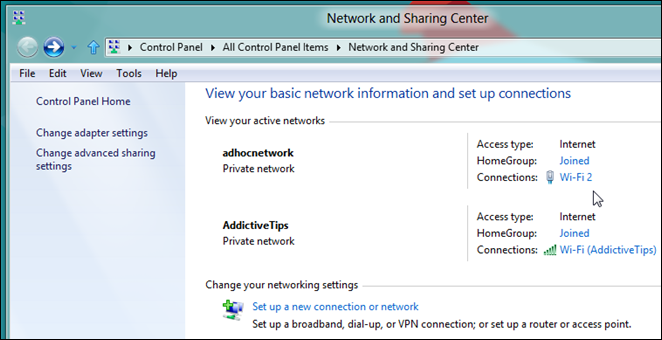
We have talked about a lot of features that were available in Windows 7, but are missing from Windows 8. One of the most used features of Windows 7 is support for creating SoftAP or Ad-Hoc network connection. Windows 8 doesn’t provide an easy way of creating ad-hoc connection to turn the device into a virtual router for sharing internet with other devices, but using the Network Shell console, users of both client and server versions of Windows 8, can easily create SoftAP connection. It allows users to take advantage of the hosted network (Virtualization) feature for creating a virtual wireless connection. The Hosted network plays a vital role in creating a virtual wireless adapter and a lot of applications that create a virtual Wi-Fi hotspot use the same method to create virtual router. In order to create a virtual Wi-Fi hotspot, it is necessary that your network adapter supports virtualization. You can follow our step-by-step guide to create a wireless Ad-Hoc internet connection (SoftAP) in Windows 8 using the built-in netsh utility.
You can also use a third party tool to create the Wi-Fi hotspot. Previously, we have featured some tools that allow you to do that, such as WiFi HotSpot Creator. It turns your system into a virtual Wi-Fi router, allowing you to share your internet connection with other devices, like laptops, tablets, and smartphones. It also supports WPA/WPA2 PSK-based security mode for the ad-hoc/SoftAP connection.
Another hotspot utility worth mentioning here is Connectify. It turns your computer into a Wi-Fi hotspot, allowing Wi-Fi enabled devices in your vicinity to connect to your PC’s virtual Wi-Fi router to share the the internet
Enable Hibernate Option In Windows 8
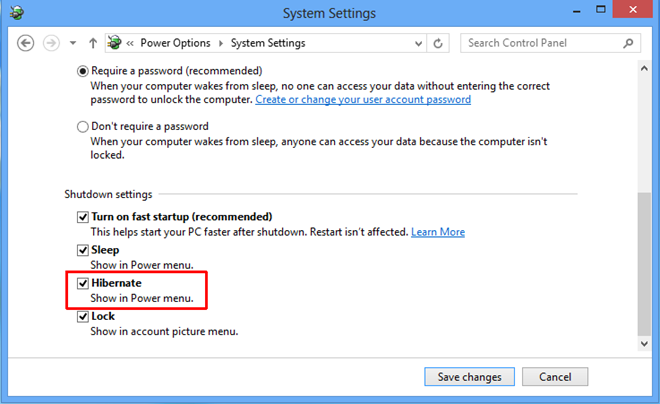
Hibernation comes in handy in situations where you want to quickly access your PC, and prefer not to cold boot the system. Instead of rebooting or shutting down the PC, when you put your computer in hibernate mode, the system is powered down, but the current state of Windows is saved to the hard disk. When you turn on the computer back from hibernation, it returns to exactly the same state. The Hibernate mode is not enabled in Windows 8, and users are required to manually enable it from System Power Settings By default the Power Options in Windows 8 (accessible from the Settings Charms) include only Sleep, Shutdown and Restart options. If you want to enable and add Hibernate mode to the list of Power Options, all you need is to follow the steps from this guide.
All the above mentioned Local Group Policy Editor tweaks, Windows Registry hacks and tips will allow you to use Windows 8 to its full potential without installing any risky software on your computer. If you have any other useful tweaks that we’ve missed in our list, drop them off in the comment section below.
Want to know what makes Windows 8 tick? Read our Windows 8 review and guide.
To learn how to move around faster in Windows 8, check out our compilation of Windows 8 hotkeys.
Fawad Mir and Usman Javaid contributed to this post.
![Start-Screen-Animation-Registry-Hack[2] Start-Screen-Animation-Registry-Hack[2]](https://www.addictivetips.com/app/uploads/2012/10/Start-Screen-Animation-Registry-Hack2_thumb.jpg)

you need permission to perform this action
Show up on my windows 8 pro when trying to delete simple programs. How to disable this?
Thanks,
lt
Turn Off User Account Control aka UAC, but be wise with that 🙂 .
I can see both sides. After upgrading from WIN 7 Ultimate (yes still the best) to Win 8 Pro I experienced tons of problems, especially with certain programs I installed in Win 7.
Most of the problems seem to be related to either the integrity levels
of certain folders and the added support for Touch (i.e the new
desktop). There are definetly issues with the way it has been
implemented seemingly as two separate desktops. I had to modify locations and integrity levels of many folders, programs and App Data.
Microsoft still lives in an isolated world where they think all
programs utilized all these features exactly as they want you to and
moving any common folders to add new security features is very bad.
i can’t create wireless ad-hoc in windows 8, so i can’t playing counter strike via wi-fi. very unfortunate…despite all that win 8 is so much better.
One feature I hate missing from win 8 previous versions thats all and maybe the seach system
To search just go to the start screen and start typing
There is no useful tweaks on this post.
You obviously don’t know much ! Vista was a hog in every sense of the word and in Win’ 8 once you get the hang of the ui etc it’s MUCH faster than 7 ever was. Photoshop etc runs very fast so I guess that you’re the Fag 🙂
Although the speeds are relatively the same according to benchmarks, windows 8 is far better than windows vista in a comparison. I would agree that Hsialin would probably be a 12 year old boy.
Great tips! I have a question. Is there ANY WAY AT ALL to turn off or change those horrid colors when one is hovering over “Close” “Restore” or “Minimize” buttons?? I’m sure there is a registry hack for that somewhere….. I find these additions annoying for some reason. Other than that I think Windows 8 is really great esp with all the tips, hacks and downloadable fixes. LOVE IT!
Call me crazy, but I’m still partial to WIN 7. I’ll wait awhile before I get on board 8.
Go here, I believe Microsoft will let you upgrade still: https://www.windowsupgradeoffer.com/en-US/
I bought a WIndows 7 laptop 7 months ago, does anyone know if I am still eligible for the $15 upgrade?
Yep, I got the upgrade, now, I am performing all of these tweaks. So far, I hate the design difference between the desktop and the start screen, really disconnected feeling.