The Complete Guide To Windows 8 File History Backup
File History is a new file backup and restore feature of Windows 8, which will become the reason to ditch all third-party file backup applications that require configuring complex data backup settings in order to seamlessly save and maintain different versions of files. It works just like Windows Restore Point, allowing you to save the User Profile folders to any external storage devices, so they can be easily restored at any time. Unlike many 3rd-party file backup utilities, it keeps track of file versions to easily identify and restore the file version you want, to its original location. The File History backup replaces the old Previous Versions feature which didn’t have any extra file backup support. It not only lets you better control the way of performing backup jobs, but also allows managing file versions from an overly simplified interface. In this post, we will explore different aspects of Windows 8 File History feature, look at how it works, and let you know how to use local drive to backup file versions.
This guide is a part of our series on detailed coverage of Windows 8 New Features and Improvements.
- How To Install Windows 8 On VirtualBox
- What’s New In Windows 8 Desktop, Start Search, And Start Menu
- The Complete Guide To Windows 8 Explorer, New Ribbon Tools And Options
- The Complete Guide To Windows 8 Task Manager, New Features And Options
- Windows 8 PC Settings [Complete Guide]
- How To Refresh Or Reset Your Windows 8 PC [Complete Guide]
- All About Windows 8 FileName Collisions And Copy/Move Dialog Box
- The Complete Guide To Windows 8 Startup Menu
- Sync Windows 8 User Settings Between PCs & Tablets via Windows Live ID
- Quick Overview Of Windows Lock Screen
- The Complete Guide To Windows 8 File History Backup (Currently Viewing)
File History – Create Backup
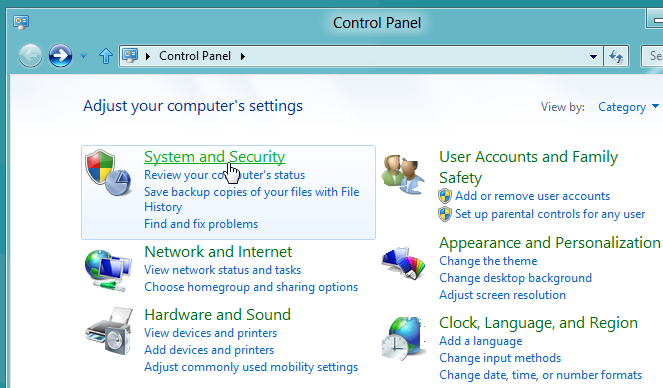
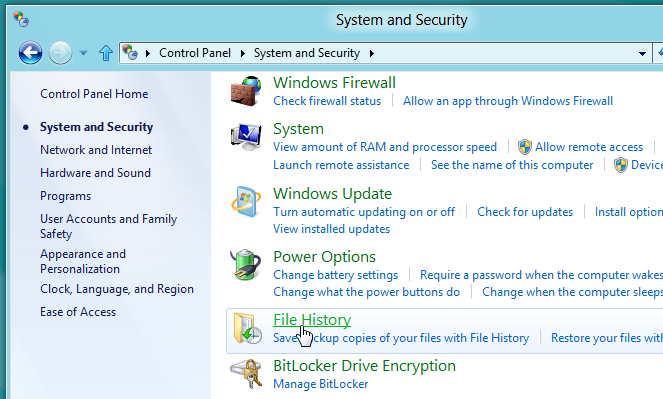
The File History can be accessed from Control Panel Category view. To begin, go to Start Screen, type Control Panel, and hit enter. It will open Control Panel in Category view. Now, click System and Security.
Upon click, it will show all the system and security related tools. Just scroll down the page, and click File History.
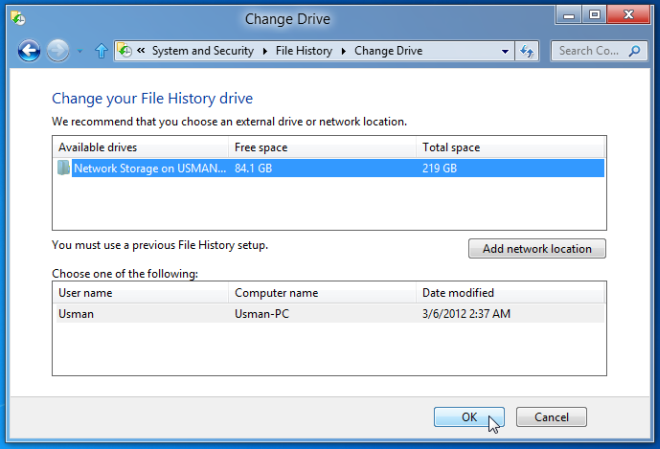
Windows 8 recommends users to specify any external location for creating file backup. First off, plug an external drive or click Change drive to specify any remote network location. Once an external drive path or network drive is selected, it will allow you to set up File History Settings. File History feature is designed to create regular backup of All folders in Libraries, including Music, Documents, Videos, and Pictures, Desktop, Contacts, and Favorites.
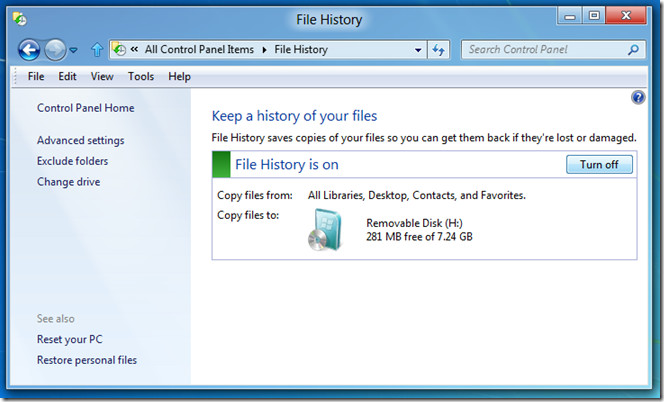
By default, it saves copies of files after every hour and sets file deletion option to never delete the backed up versions. However, you can choose to change the backup time interval, keep backed up files for only specified amount of time, and select the size of offline cache (2 %, 5%, 10%, or 20% of the disk space). If you’ve set up HomeGroup network group to access and share files between home PCs, enable Recommend this drive option present under HomeGroup section. Moreover, you can view File History Event Logs to view the errors it faced during the backup operation.
The File History feature automatically detects the plugged-in external storage devices. You can choose any remote location from Change drive window, accessible from left sidebar. Here, you can add network location where you want to backup files. File History replicates the folder hierarchy of files which you choose to backup, at target location. This helps you quickly find files from backup locations by only identifying their location in source path.
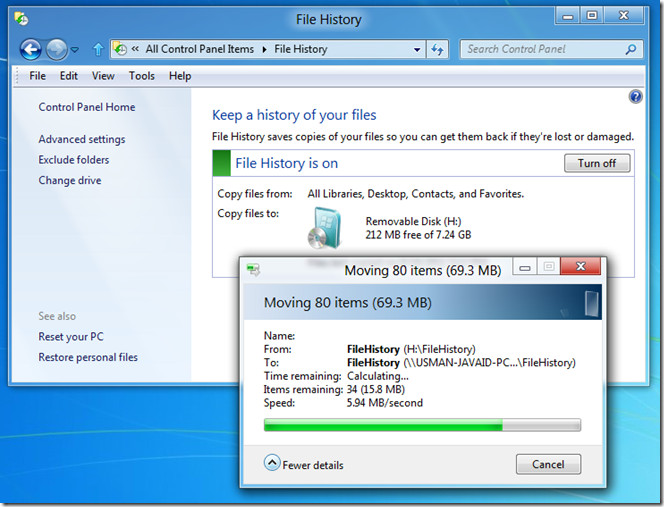
The File History immediately starts moving your data to new target location, when specified from Change drive window. For instance, if you change target location from external USB storage device to Network drive, it will ask you to start moving your data to specified network location. This may prevent you from manually moving data between old and new backup locations.
File History – Restore Backups
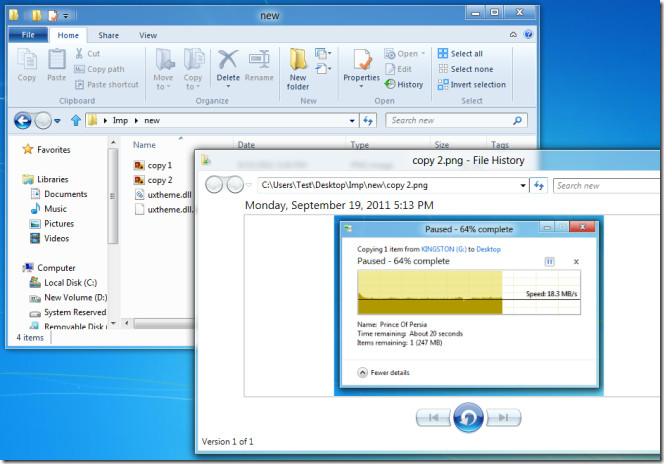
The Restore personal files option present in navigation bar lets you view and choose files which are to restored to original locations. After connecting the backup drive, click Restore personal files and select the libraries and folders you want to restore. Once done, click Restore button (present between the navigation buttons) to start moving or replacing the files with selected version of files. File History Restore feature shows the timstamp of backup folder and files. It’s advised to verify the file version before you start the file restore process.

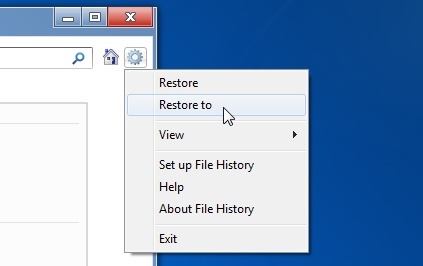
The Settings icon menu includes a complementary option to restore selected backed up folder to any local or remote location. Click Settings icon to select Restore to option. It brings up file browser to choose the target location. All you need is to specify the output location to start restoring files at defined location.
File History features comes integrated with Windows 8 Ribbon Explorer. If backup drive is connected, you can easily view and restore previously saved version of files from History option present in Open section of Windows Explorer Ribbon.
After the first run of File History backup operation, check the destination path to verify whether all the required folders and libraries have been backed up or not.
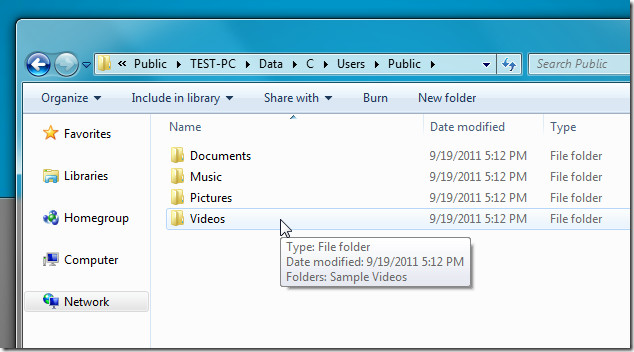
Create Backup through File History On Local Drive
Windows 8 doesn’t include an option to directly create backups through File History feature on local drives. However, if you want to, let’s say, use ‘D’ drive as backup disk, all you need is to enable sharing for required drive from Advanced Sharing accessible from Properties –> Sharing window.
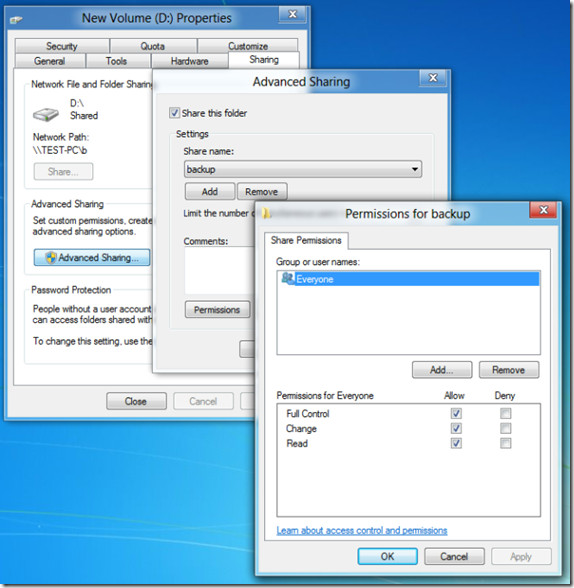
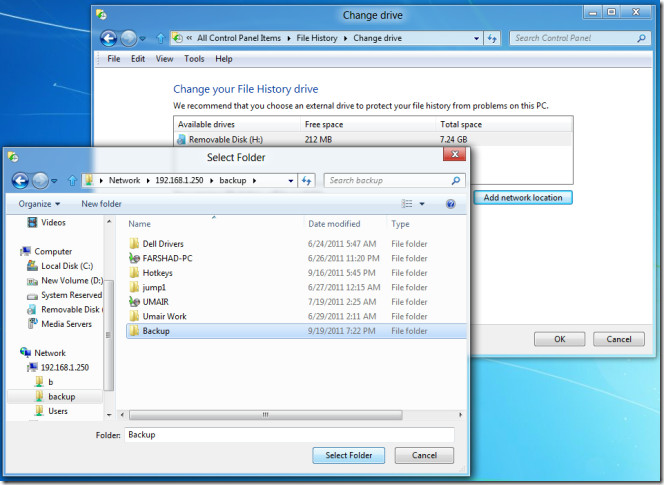
When drive is listed in shared locations, copy the network path of drive location and add it in Change Drive backup drive path list. On clicking OK, it will ask you whether you want to move your existing backed up files to new locations or not. Choose the required option to replace the existing backup drive path with local drive. It will now save your libraries, desktop and other items to specified local drive.
File History will definitely prove to be a handy option for creating regular backups. It not only makes it easy to manage backed up files, but also allows you to view and restore different versions of files. Being an unobtrusive backup tool, it doesn’t disrupt your workflow, as it’s programmed to silently create file backups after defined time interval.


Never again. I’ve had issues with File History since Windows 8. Backups don’t run daily as set, files get duplicated and takes an enormous amount of space, etc. When it came time to restore when I did a clean install of Windows 10, it mixed up two accounts on the pc. Some folders were not restored. Good thing I had Carbonite. I was able to go through the backup and see which folders needed restored. Nope, I’m sticking with Carbonite for off site backup and Cobian for local backup.
Total nonsense right from the first sentence: this will never, I repeat never replace a good backup program. Total bollocks.
Like all previous Microsoft Windows backup schemes, File History fails. It should be simple and transparent, but it is not. I have been using it for a little more than a month now, and a look at File Explorer shows huge gaps in File History’s backuping up of Library subfolders and files. From my past experience .. NEVER TRUST MS PRODUCTS TO BACKUP YOUR FILES!!!
I have to agree. I bought an 8TB Raid0 NAS (I also have regular backups to another drive) and File History doesn’t seem to be doing incremental backups. I’ve filled the entire 8TB in 3 weeks. So disappointing…
Is there a system backup? My documents and such are on a RAID 1 drive so I don’t care about backing them up again. I want to back up the OS and Programs so that I don’t have to reinstall and update everything should my system crash.
does the backup in windows 8 also backup program data files like Excel, Word, Quicken, etc.?
Edit: Last post removed. I just figured it out 🙂
Your tip on how to use a local drive as the store for file history is awesome. But, I’d rather not give “everyone” read+write access to my backup. Is there a particular user the file history service uses that I could give R+W access to in order to make this work?
Windows 7 (and finally I might add) included the native free ability in the Pro, Enterprise and Ultimate editions, to create a FULL and COMPLETE recovery image. With this you could boot from a recovery USB or the native install DVD and restore the system the way you had configured and imaged it. Which is what most people like me – LIKE. Not only for recovery, but to refresh the system quickly, saving time by including my files and settings in the image.
While you can create a “refresh” image, which is handy I guess, it does NOT include ALL your files and profile directories. Of course – now all sorts of third parties are popping up with “image utilities, blah blah blah – when this USED to be a FREE part of the OS offering for the versions above.
Meh…..very frustrating, that is all I am saying.
Yes, I know you can work around this by using the “refresh” WIM image and the new file backup in Win 8 – but now it is two (2) separate processes when it used to be one (1) process.
/rant
The create system image IS included with Windows 8 to create whole recovery disk images like in Vista and Windows 7.
Simply create a shortcut for the following path or navigate to the app in Control panel.
Create a shortcut called SystemImage (or whatever name you like) and use the path below:
%SystemRoot%System32control.exe /name Microsoft.BackupAndRestore
Excellent guide. It helps me a lot!
Is there any way to begin file history over again other than
reinstallation of Windows 8?
Perhaps I am missing something but it looks like the next best way to reduce
unnecessary files/folders that have been stored over time is to either manually
delete them from the “File History” folder or set the “keep saved versions” to
the one month setting and then items I do not want at this moment will
eventually fall out the system after one month. Any ideas?
Yes. Go to File History>Advanced Settings (on the left)> Select “Clean up versions” under the “Keep saved versions” selection
The most effective option is: “Clean everything, but last version” or the one(1month) Frankie already mentioned. Which still leaves about 10Gb of ‘Skydrive’ stuff, while the most recent folder for this is ‘Onedrive’ for quite some time…
I will delete all content by hand from the File history folder, I guess..
This is the ugliest windows I have ever seen. Even uglier than windows 95
how to add a location suppose i have folder named work in d drive and i want to add it in history how can i do it
if i cant den it sucks man
Add the location to one of your libraries or create a new library for that item.