Set AutoPlay Actions for Drives, SD Cards, & iPhone on Windows 10
Windows 10 has made it exceptionally easy for you to set the AutoPlay action you want your PC to take when you connect an external drive, an SD card, or your iPhone to it. You can set only one option for each but not only is the option now much easier to control and change whenever you want, it also offers a lot of different actions for you to set, based on the device you’ve connected. Here’s how to set AutoPlay actions for external drives, SD cards, and your iPhone.
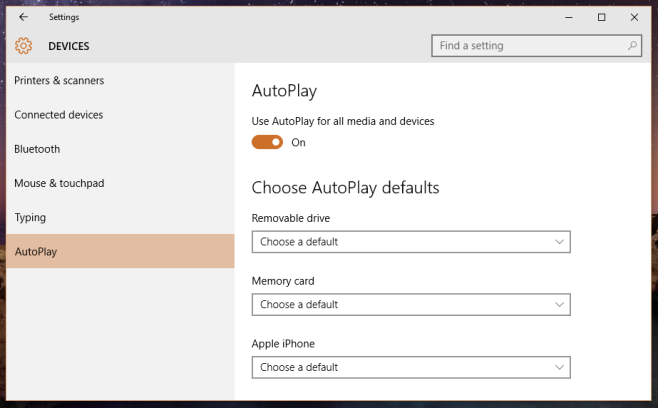
Open the Settings app and tap on the Devices group of settings. Click on the AutoPlay tab where you will see that it is On by default. If you want to stop any and all devices from playing/opening automatically, you should switch this off. Below the AutoPlay On/Off switch, you will see a list of devices that you can connect with your system and a drop-down menu for each one that reads, ‘Choose a default’.
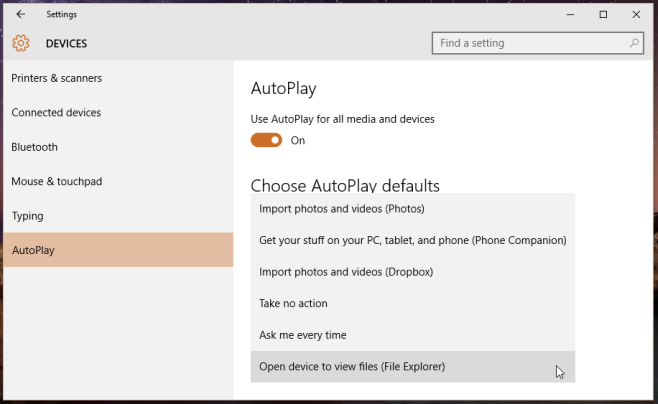
Open the drop-down menu for the device you want to set an AutoPlay action for and then from the listed options, choose the one that suits you best. That’s all it takes.
The AutoPlay is a bit slow to respond for the iPhone and iTunes will still launch automatically but it works fine otherwise. For other devices such as an external drive, the AutoPlay is executed flawlessly and without any delay. If you don’t see a device listed here, try connecting it once to your PC and it should start listing AutoPlay actions for it.


