Secure Windows Server with DNS filtering
If you run a Windows Server, you’re probably familiar with the potential security risks. Windows Server is a popular platform for servers, which means it can attract the attention of hackers and malware. To boost your server’s security, setting up DNS filtering is a great idea.

How to Choose a DNS Provider for Windows Server
There are quite a lot of DNS providers available that you can implement for Windows Server that support content filtering and protection. However, in this guide, we’ll be focusing on NextDNS, as it is incredibly user-friendly and easy to use.
If you wish to use a different DNS provider to set up filtering on your Windows server, feel free to try out the providers. However, it will not be covered in this tutorial.
- Cloudflare DNS: Known for a strong stance on privacy and speed.
- Quad9 DNS: Heavy focus on security and customization.
- OpenDNS: Robust filtering and malware protection.
Using NextDNS requires an account, as the filtering is done in the user dashboard, so you’ll need to sign up for an account. Head over to the official NextDNS website. Once there, click the “Try it now” button to get started with an account.
Once you’ve signed up for an account, you’re ready to use NextDNS. Log in and access the “Setup” tab.
Setting up NextDNS on Windows Server via HTTPS (Recommended)
Start by clicking on the Start menu in Windows Server, then type in “Control Panel” and launch it. Once inside the Control Panel app, find “Network and Internet” and select it. Then, choose the “Network and Sharing Center” option.
Inside the “Network and Sharing Center” area, select “Change Adapter Settings.” Then, right-click on your Windows Server’s default network adapter and select properties.
IPv6
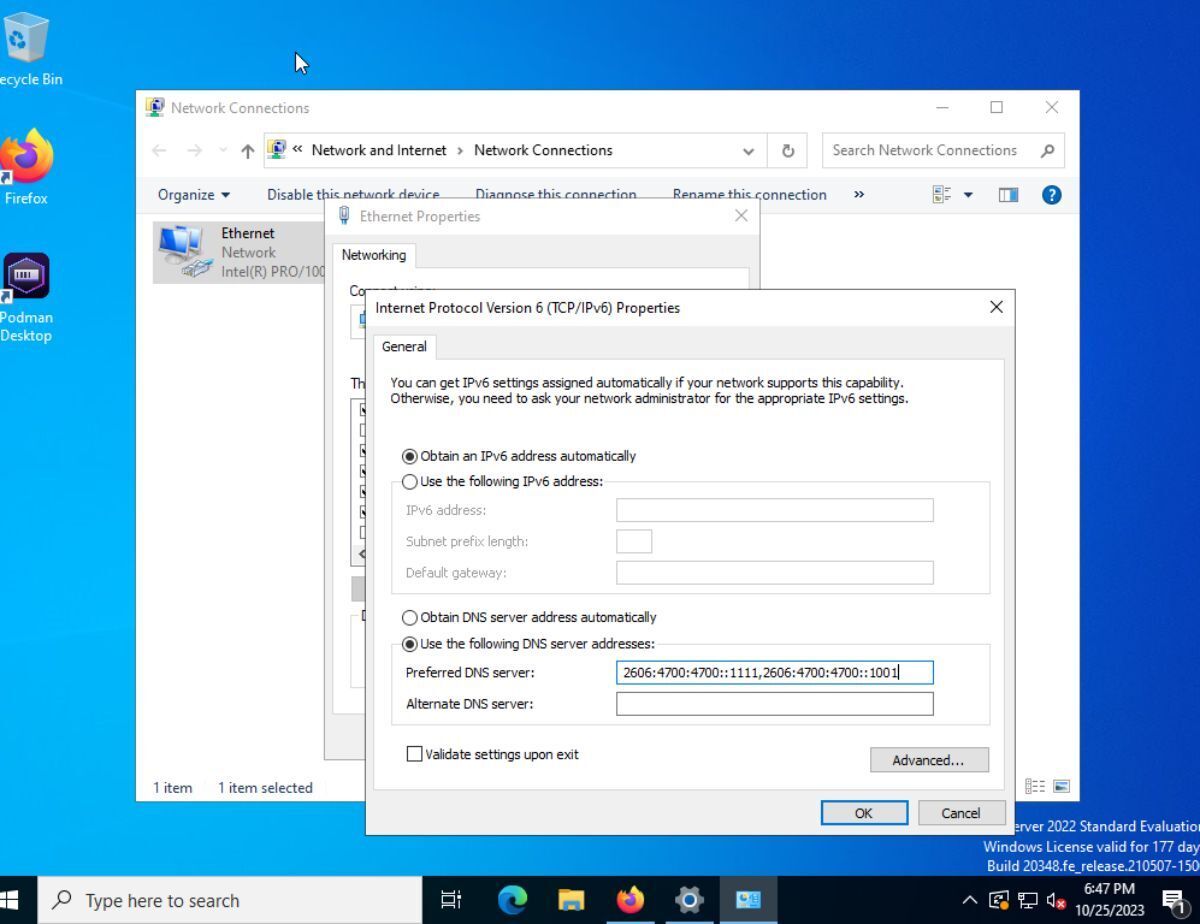
In your network adapter settings, find “Internet Protocol Version 6” and select “Properties”. Once in the “Properties” area, change “Obtain DNS server address automatically” to “Use the following DNS server addresses.”
Go to the NextDNS dashboard in the browser, access the “Setup” tab, and scroll down to IPv6. Then, copy the address to your clipboard. Next, paste this address into the “Preferred DNS server” box.
Copy the second IPv6 address to your clipboard, then add it to the “Alternate DNS server.” Once both addresses are added, click the “OK” button to save the DNS changes for your networking adapter.
IPv4
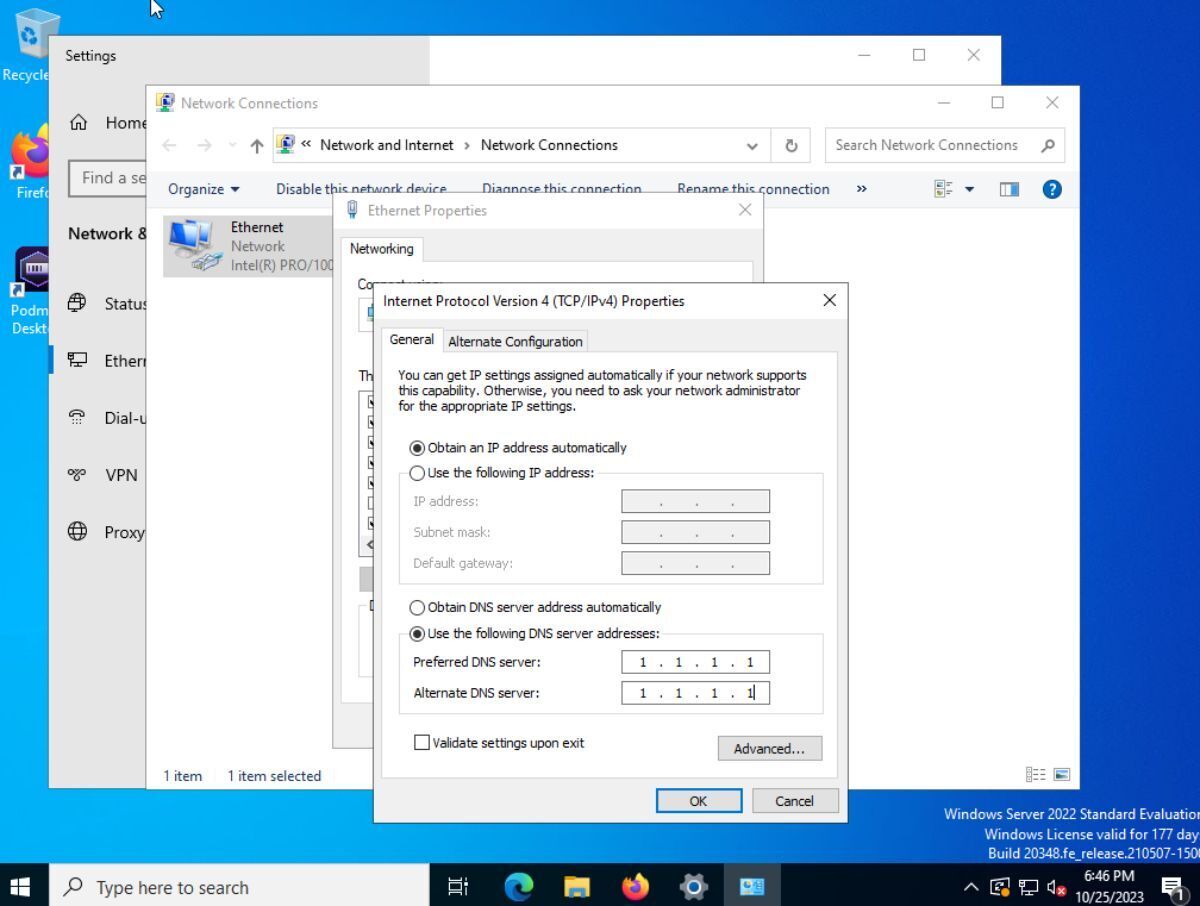
In your network adapter settings, find “Internet Protocol Version 4” and select the “Properties” option. When you’ve loaded up the “Properties” section, change “Obtain DNS server address automatically” to “Use the following DNS server addresses.”
Go to the NextDNS dashboard in the browser, access the “Setup” tab, and scroll down to IPv4. Copy the address to your clipboard. Then, paste this address into the “Preferred DNS server” box.
Copy the second IPv4 address to your clipboard, then add it to the “Alternate DNS server.” Once both addresses are added, click the “OK” button to save the DNS changes for your networking adapter.
Setting up NextDNS on Windows Server
If you don’t want to fiddle with manual DNS assignments on Windows Server, you can get NextDNS up and running on Windows Server with the NextDNS application. Download and install it means you don’t need to configure any network connections, and everything is done automatically.
To get started with the NextDNS app, look for the “Windows” logo in the “Setup” tab scroll down to “NextDNS for Windows,” and select the link to download the installation EXE. Then, launch Windows Explorer and select the “Downloads” folder.
In the “Downloads” folder, double-click on the installation EXE to start it. When it starts up, go through the process of installing the NextDNS app. When it is installed, it will automatically launch. Additionally, it’ll configure itself to launch at Windows Server startup.
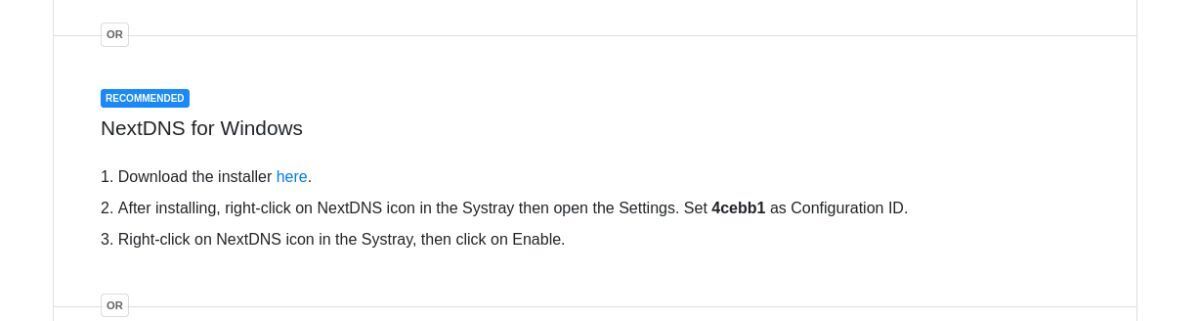
When the NextDNS app is running, return to the NextDNS dashboard in your browser and access the “Setup” tab. Inside the “Setup” tab, find your “ID”. Then, click on the NextDNS icon in the Windows Server system tray to open up the NextDNS app.
Inside the NextDNS app, find the “Configuration ID” text box, and enter your ID copied from the “Setup” tab, and enter it. After entering your ID, click the “Save” button to save the changes.
Right-click on the NextDNS icon in the Windows Server system tray and select “Enable” to enable NextDNS on your Windows Server. Once enabled, Windows Server will be using your NextDNS profile.
How to Secure Your Windows Server with DNS Filtering
Once you’ve got Windows Server using your NextDNS profile, you’ll need to set up filtering so that you can secure your Windows Server. Open up the NextDNS dashboard in the browser. Then, click on the “Privacy” tab.
Inside the “Privacy” tab, you have dozens of DNS filters to choose from. By default, some are turned on already, and these alone will protect your Windows Server. However, if you wish to enable more, look through the various filters available in the “Privacy” tab.
When you’ve successfully enabled DNS filters, you’ll have secured your Windows Server with DNS filtering. Enjoy!
