Record Video And Take Photo With Your Webcam Using AvaCam
So you bought a webcam that did not come with a software? Or maybe you are not satisfied with the software that came with your webcam or came pre-loaded on your computer? In case you are searching for a free software for your webcam, give Avacam a try.
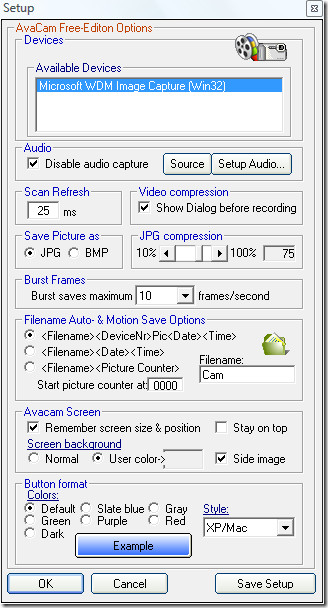
Avacam is a free tool for Windows that lets you take photos, record videos (with/without audio), and lets you take burst shots. Apart from these features, it can also let you autosave the photos after every defined time interval. To begin, first click Setup, select any video device and choose the desired settings.

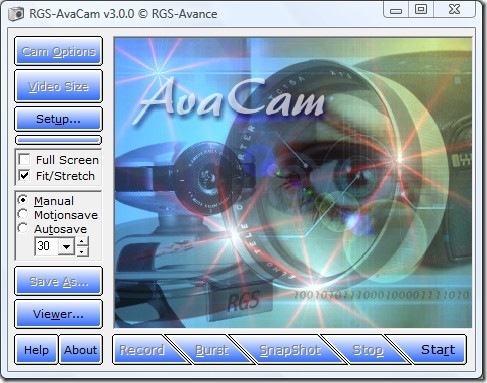
Once done, Click Save Setup. On the main window, click Start.

Note: Clicking Start will just being running your webcam, it will not start recording anything.
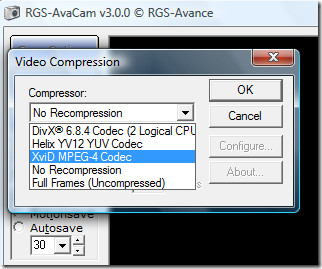
Now to record a video, first select the Video size and then choose the Cam options. Once all is ready, click Record. It will then show you an option to choose Video Compressors, choose any one from the list and click Configure to optimize the settings. Once done, click OK.

You can stop the recording anytime by clicking Stop. You can take photo by clicking SnapShot button, it can also take 10 photos in 1 second using Burst Mode. If you want to take a photo every few seconds, select Autosave from the left sidebar and define the time.

The only downside is that you cannot select the destination where your photos and videos can be saved. By default, they are saved in Avacam’s installation folder. To view your content, click Viewer from the left sidebar. Overall, it does not have an eye candy look, but it does the job pretty well. Enjoy!

so….does this thing really work?????
so….rk, or nahhhh??
what i i do’t download that, would i still be able to record a video ???????
yes
Its awesome
love it
is it very free
thannnnnnnnnnnnnnnnnnnnnnnnnnnnnnnnnnnnnnnks
i really want to try “D