Installing and Configuring Microsoft SQL Server
If you need a reliable database management system for your Windows Server, you will need to install and configure Microsoft SQL Server. This guide will walk you through the process of getting Microsoft SQL Server up and running on your Windows Server system.

How to download Microsoft SQL Server on Windows Server
Microsoft SQL Server is not pre-installed on Microsoft’s Windows Server platform. So, to use Microsoft SQL Server on your system, you need to download it first.
Microsoft offers several choices for SQL Server. If you are a business or have the budget for it, you can opt for the on-premises version. However, this guide will focus on the free Express Edition of Microsoft SQL Server.
To download the Express Edition of Microsoft SQL Server, start by visiting the official Microsoft SQL download page. Once there, scroll past the enterprise options and click on the download button labeled “Express Edition.”
After clicking the download button for “Express Edition” on the Microsoft SQL Server page, your browser will start downloading the installer EXE. This download should complete quickly. Once the download is finished, you can proceed to install it on your Windows Server.
How to install Microsoft SQL Server on Windows Server
Installing Microsoft SQL Server on Windows Server involves using the Windows Desktop. Therefore, ensure that your version of Windows Server includes “Desktop Experience.” Then, open the Windows Explorer app.
Inside the Windows Explorer app, select the “Downloads” folder to access the folder where you downloaded the Microsoft SQL installer EXE. After loading the folder, double-click the EXE to start the installer.
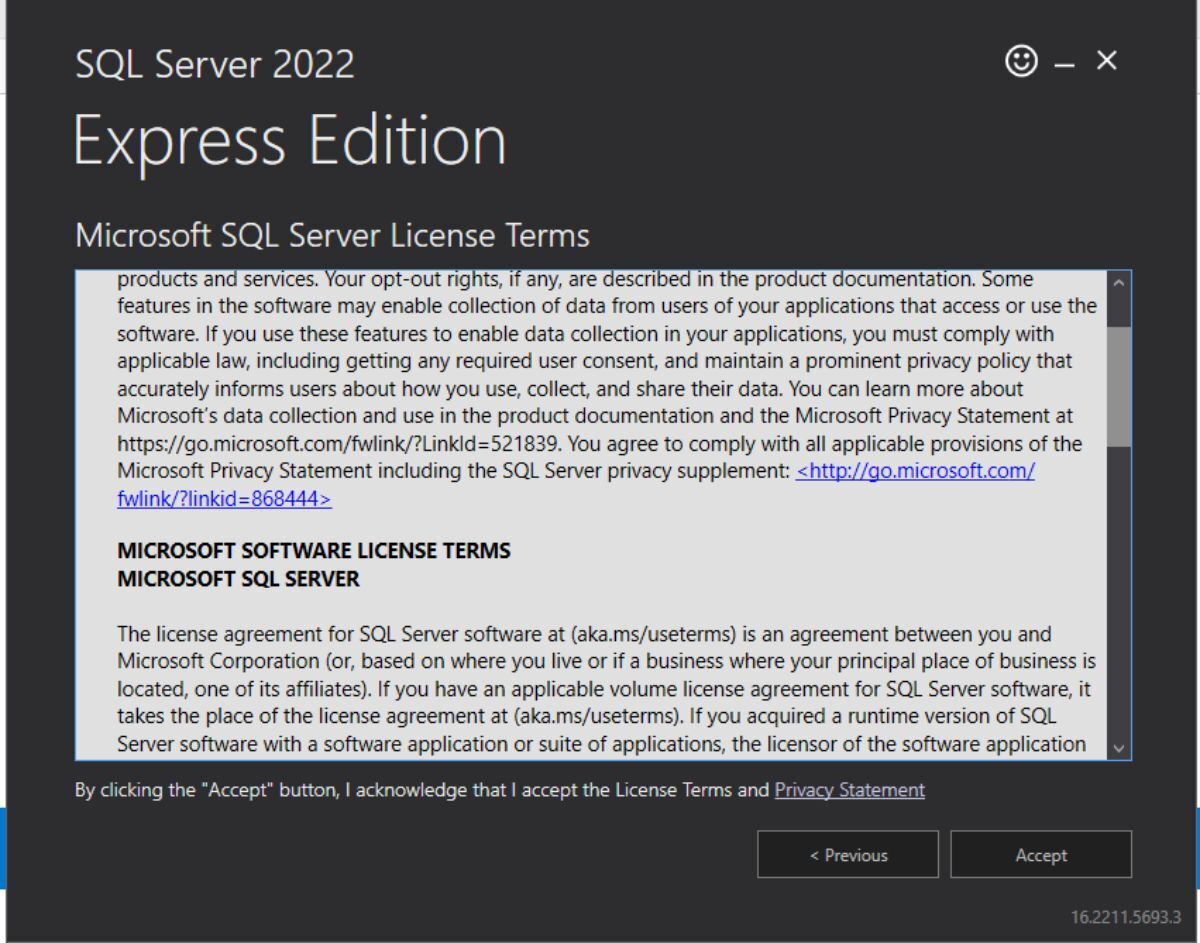
In the Microsoft SQL installer, you will see the Express Edition end-user license agreement. Read this agreement. When you have read it, click the “Accept” button to continue.
Now, you must specify where the Microsoft SQL Server will be installed. By default, it is installed to “Program Files.” If you wish to change this, click the “Browse” button. Once you have made your decision, click the “Install” button to set it up on your server.
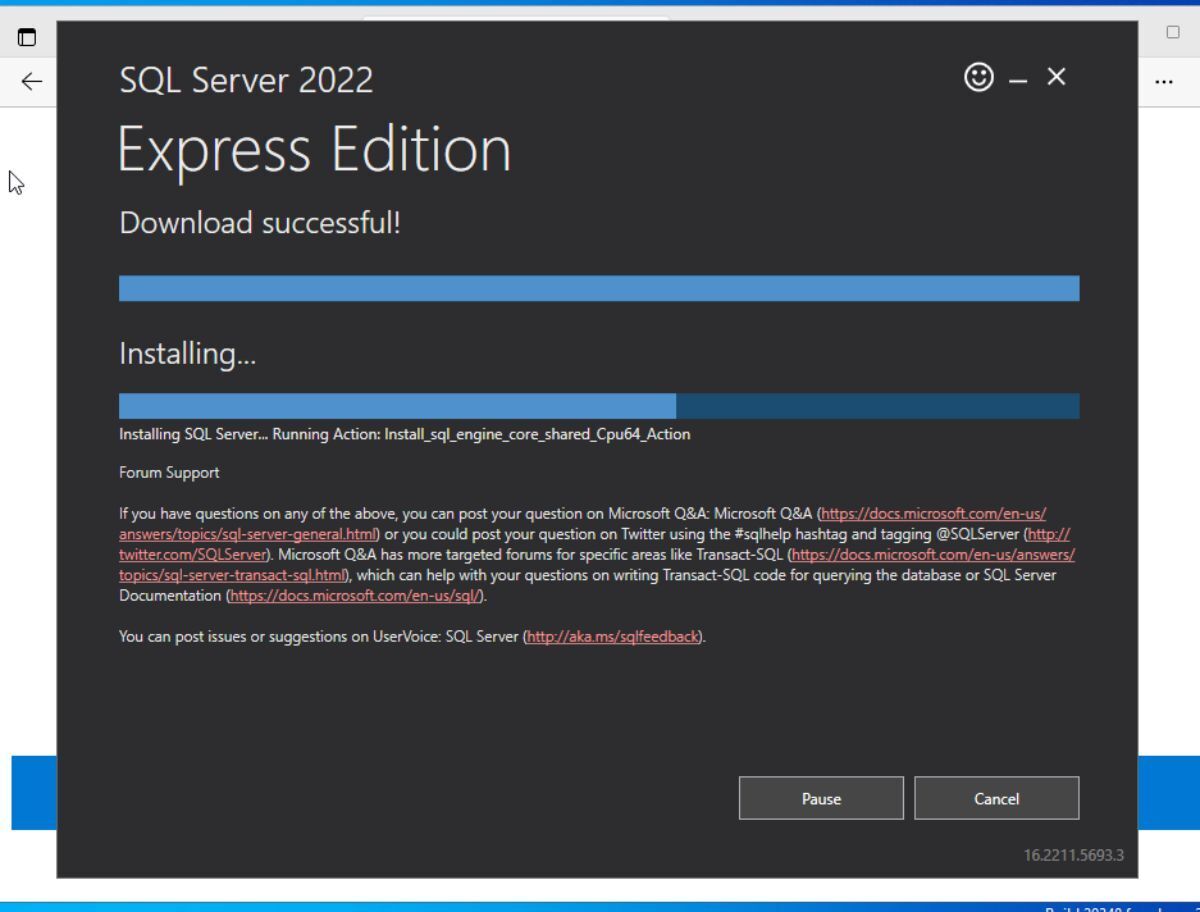
When you click the “Install” button, the installer will download and install several packages. This process should be quick. When the installation is complete, you can close the installer.
How to create a database in Microsoft SQL Server on Windows Server
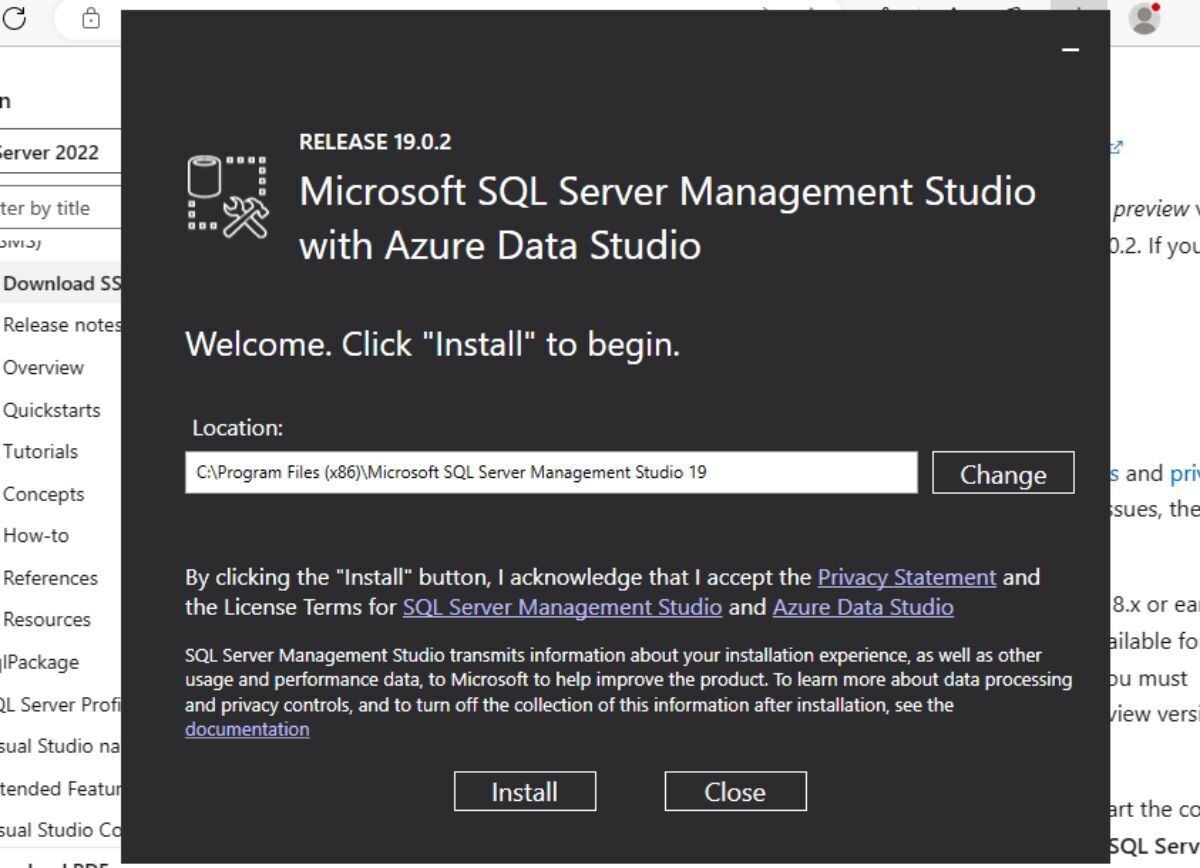
To create a new database in Microsoft SQL, you need to have SMSS (SQL Server Management Studio) installed on your server. To install this software, go to the official Microsoft download page and click on the “Download SSMS” link. Then, proceed with the installation on your Windows Server.
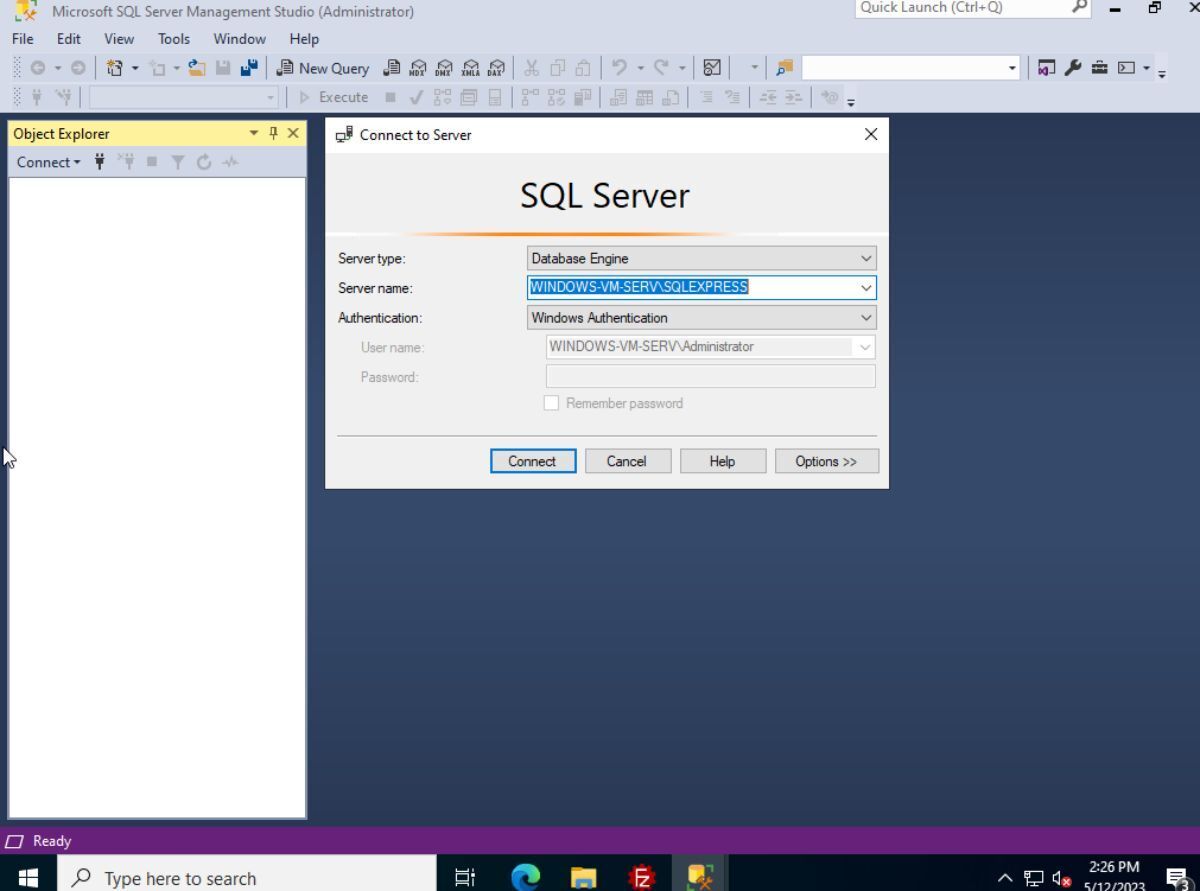
Once SMSS is installed on your system, launch it. When SMSS is open, a prompt titled “Connect to Server” will appear. Select your server from the “Server name” dropdown. Then, click the “Connect” button to log into Microsoft SQL Server on your Windows Server system.
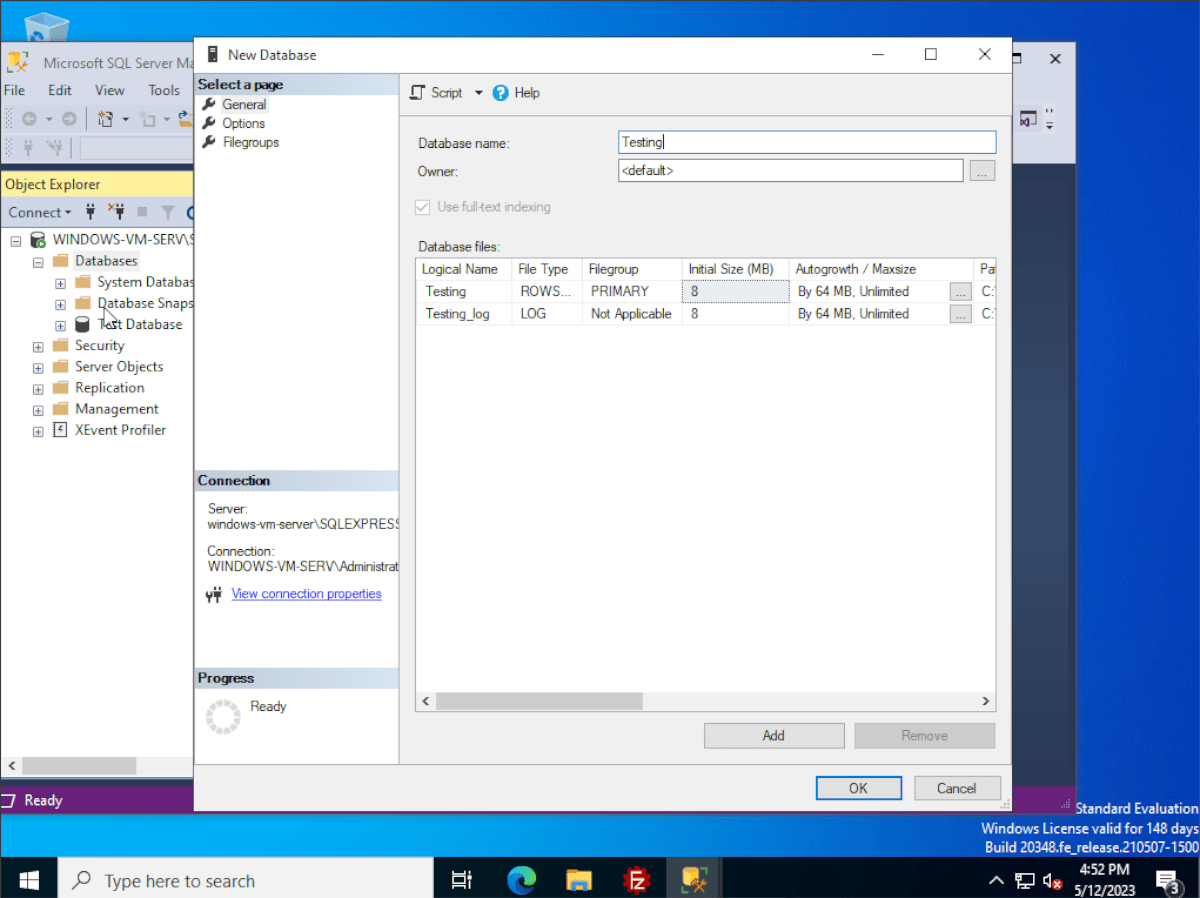
After successfully logging into SMSS and connecting to SQL Server, right-click on the “Databases” node. From the context menu that appears, select the “New Database” option. This action will open the “New Database” pop-up.
Within the “New Database” popup, locate the “Database name” text box and enter a name for your new database. Then, click the “OK” button to proceed. Once you click “OK,” your new database will be created.
Once you have created your database in SMSS, you can access it by expanding the “Databases” folder. To perform various operations on your database, such as backup and restoration, right-click on it and select the “Tasks” menu option.
How to backup your database in Microsoft SQL Server
If you are using Microsoft SQL Server, it is important to create a backup of your data. Follow these steps to do so: First, open SSMS and connect to your Microsoft SQL database.
Once you have successfully connected to Microsoft SQL, locate the “Databases” folder and click on the expand button to view its contents. After expanding the folder, find your specific database and right-click on it. From the resulting context menu, select the “Tasks” option.
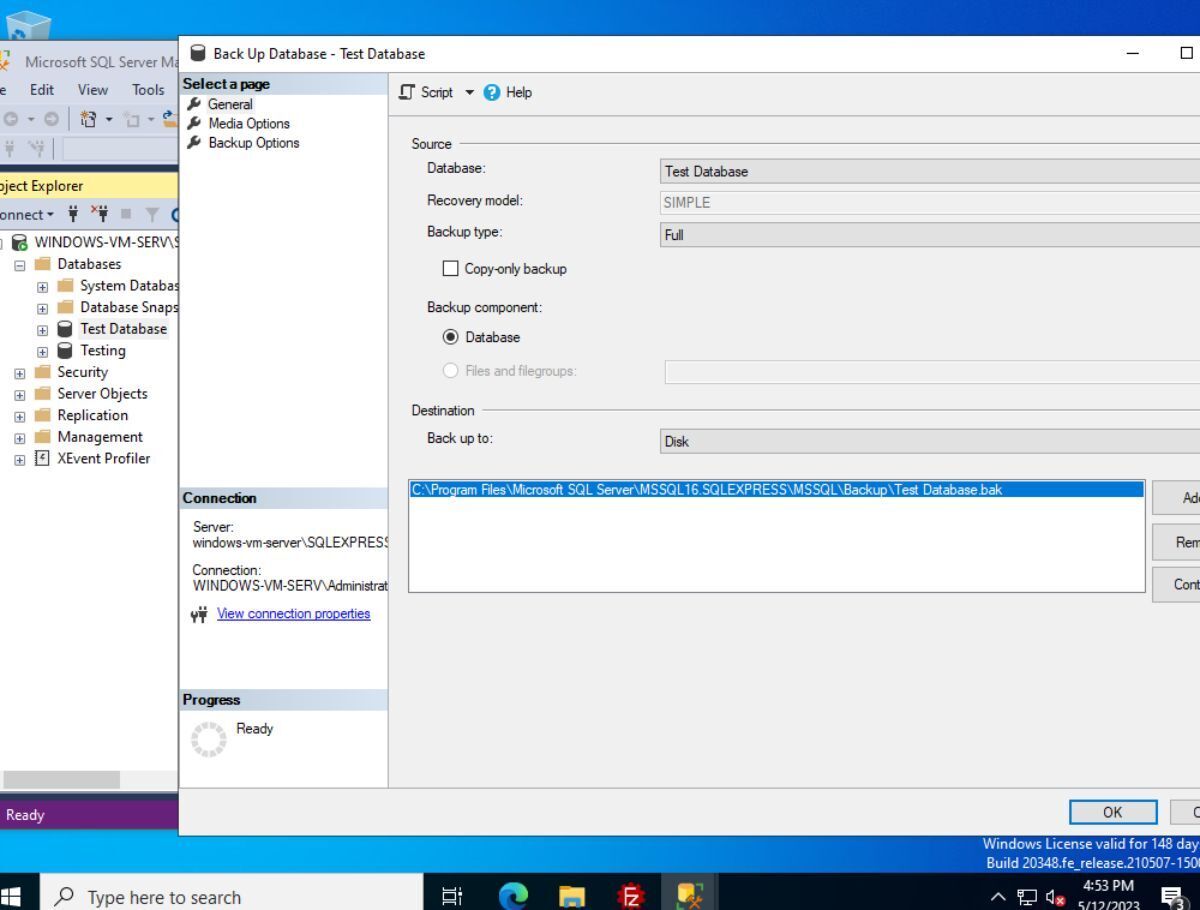
Within the “Tasks” menu, choose the “Backup” option. This selection will trigger a pop-up window to appear. Configure your backup settings accordingly, and then click the “OK” button to initiate the backup process.
Restoring your backup
To restore your database backup in Microsoft SQL Server, follow these steps: First, open SSMS and expand the “Databases” folder. Then, right-click on the database you wish to restore. From the context menu, select “Tasks” and choose the “Restore” option.
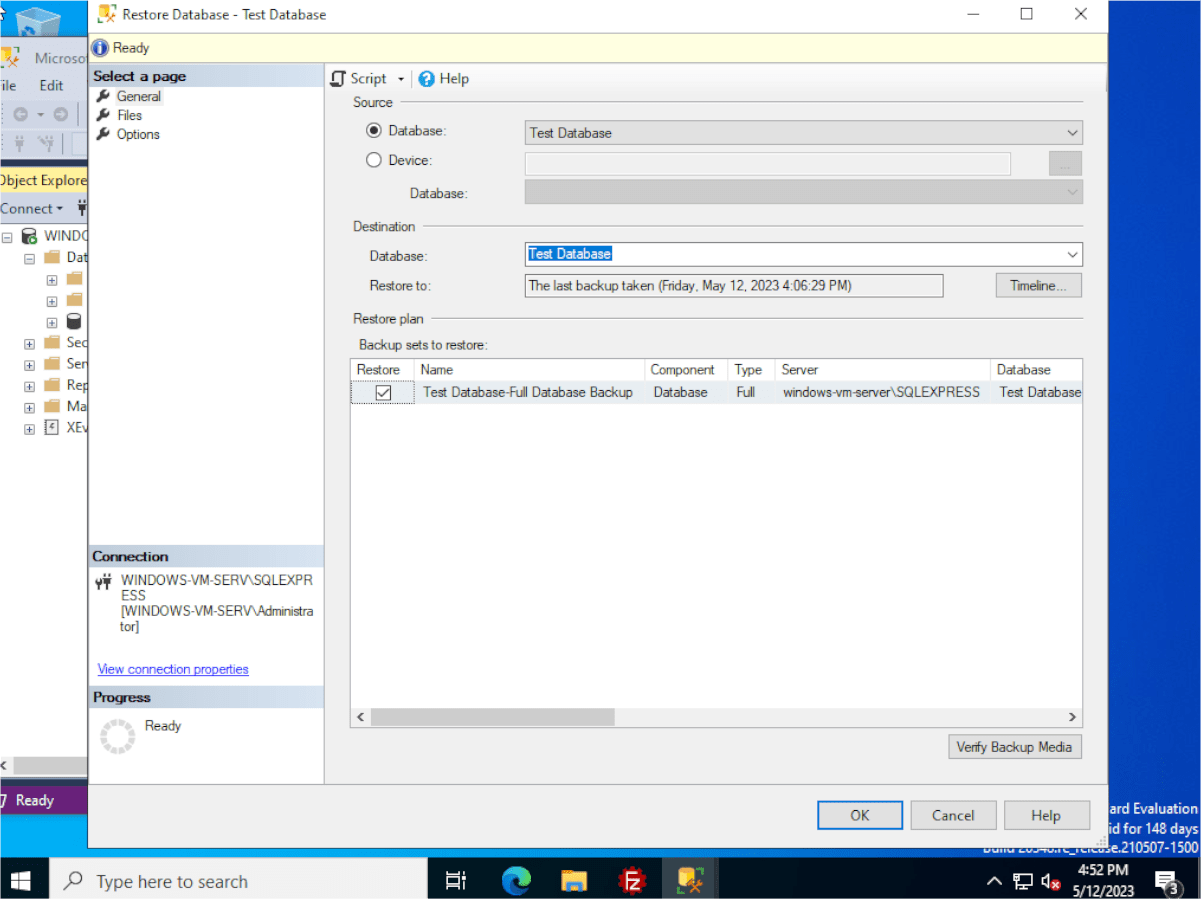
Once you have selected the “Restore” option, a GUI will appear in SSMS. Within this GUI, locate and select your database backup. Finally, click the “OK” button to initiate the restoration process and restore the backup database to Microsoft SQL Server.
