How To Improve The Quality Of A Scanned Image
The average office scanner hasn’t improved much in quality or in speed. Most small offices make do with the flat-bed scanner that is part of their printer. A good, industrial use scanner costs quite a bit and if you don’t plan on using it regularly, it’s not worth buying. If you aren’t satisfied with the images that your scanner scans, you can now substitute it with a good smartphone. Most mid to high end phones have excellent cameras that can serve as scanners. That said, if you’re scanning something with text, and later intend to use an OCR app, you might want to improve the quality of a scanned image first. Here how to do just that.
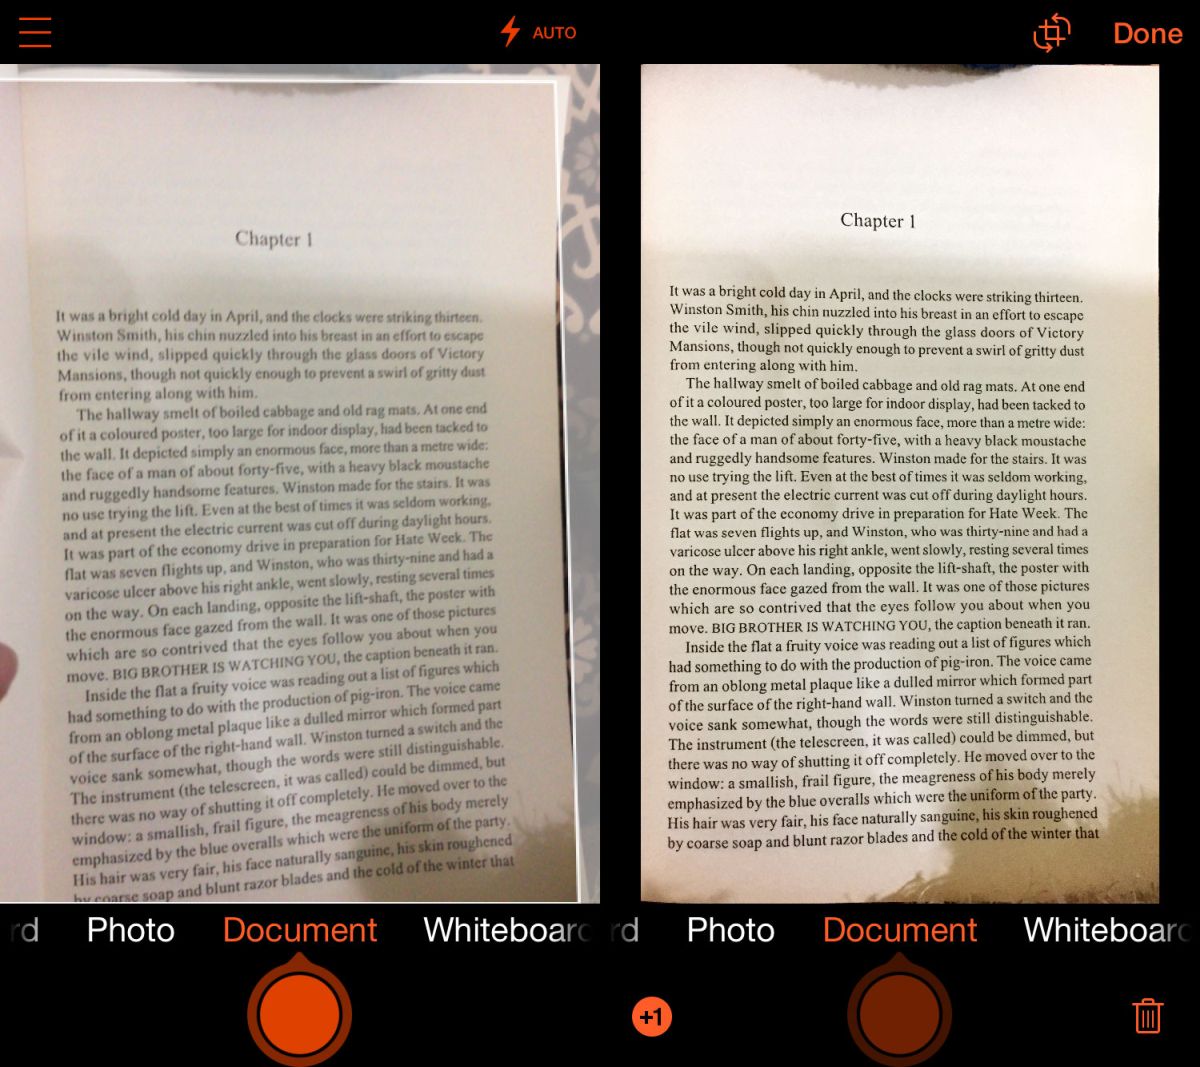
Microsoft Lens
There are a lot of great scanning apps available for both iOS and Android but if you’re looking for one that is free and can scan documents then Microsoft Office is the best option there is. The app can detect a page and separate it from the surface it’s lying on, and it’s excellent at detecting edges and straightening the document, post-scan. It can scan to an image file or to a PDF. If you’re scanning paper that is thin, help your app of choice or your scanner by placing a black page behind the paper.
Editing Image Levels
This requires an advanced image editing app. You can use either Photoshop or GIMP, or anything similar so long as it lets you change the color levels in the image. On Photoshop, it is under Image>Adjustments>Levels. On GIMP, it is under Color>Levels.
Knowing where to find the tool is just the start of it. You will need to manipulate the levels, and at times the saturation to improve the quality of a scanned image. As a general rule, you don’t want to change the levels of the individual color channels so make sure you have RGB selected. The levels tool can adjust the brightness of the black and white in your image, as well as the mid-range i.e. the grey tone in the image.
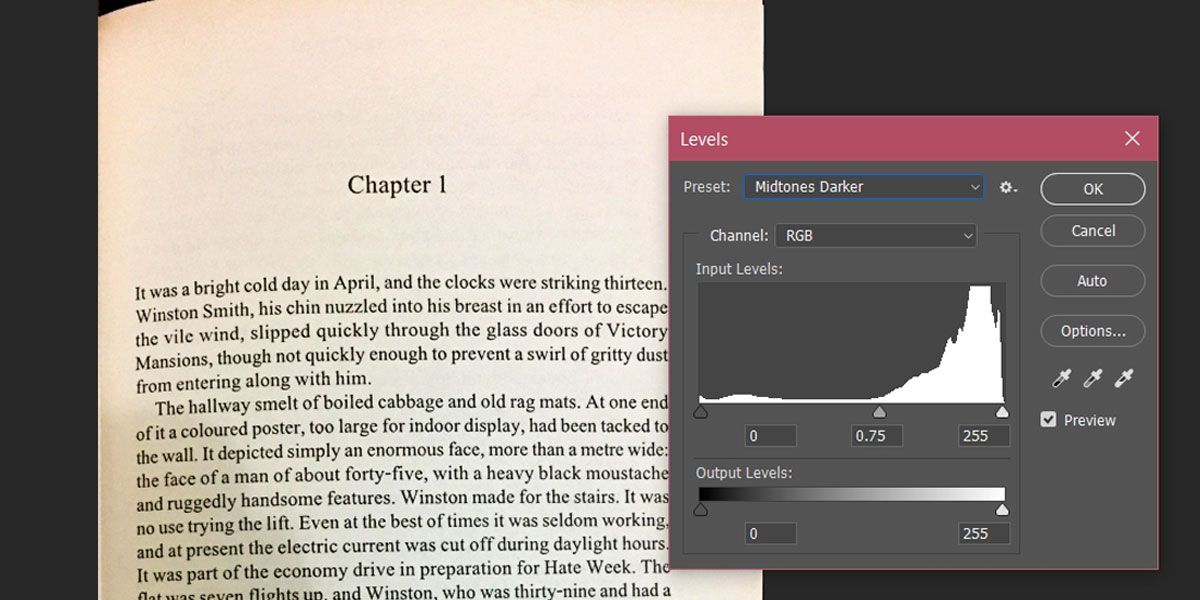
Play around with the black and white point slides under Input Levels, and if needed, change the output levels as well. You can see the image above originally has a yellowish tint from the parchment like paper that books are printed on. This paper, and the quality of the scan will not work well with OCR apps.
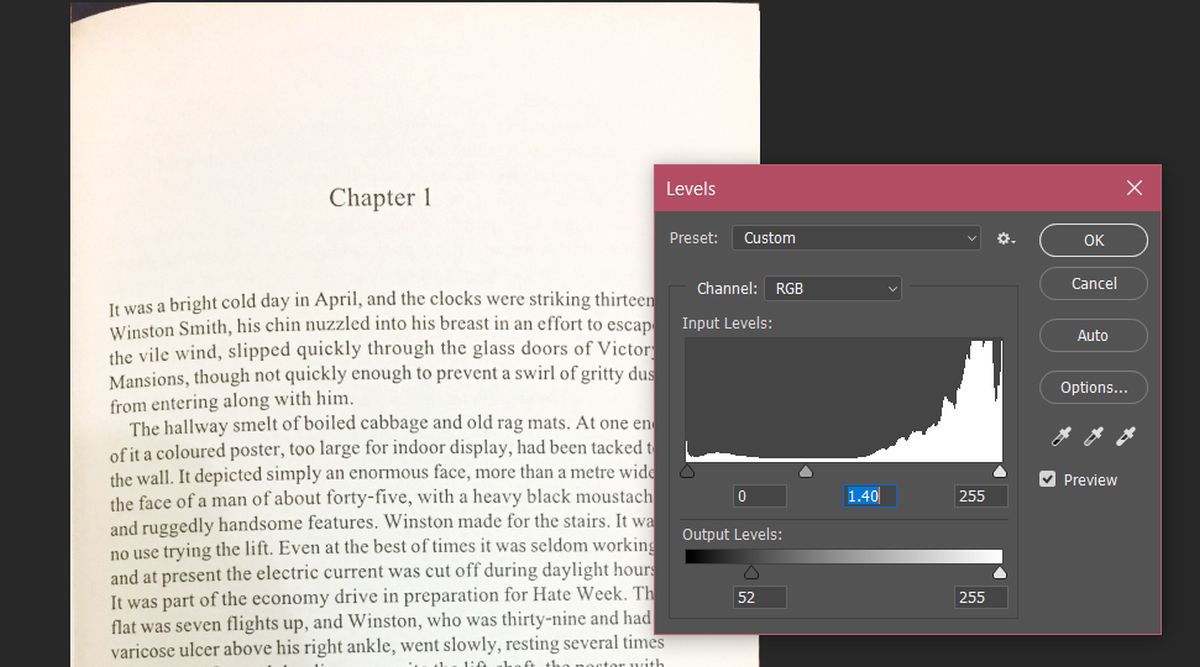
A few minor adjustments to the levels however gives a better image with clear black text on white paper. Note that the midtone has changed from 0 to 1.40. You can use the saturation tool and auto-contrast to make the text sharper.
This same trick can be used with photos but it will take longer to get the image to look good and you should consider changing the levels of the individual color channels to get a better image.

Very useful. Thank you.