How To Extend Your Windows Desktop With The Chromecast [Guide]
The Chromecast is considered a device meant for entertainment purposes. Most apps that are developed for it tend to be geared for entertainment but it has actual productive uses, for example, you can use it to give presentations from your phone. Another great use you can put your TV and Chromecast to is as an extended display for your system. You can do this with Windows 7, 8, and 10. Here’s how.
This guide assumes the following things;
- You have a Chromecast connected to your TV and it is properly set up
- You have the Chrome browser installed on your PC and the Google Cast extension installed on it
- Your copy of Windows is genuine
Step 1: Adding a second screen
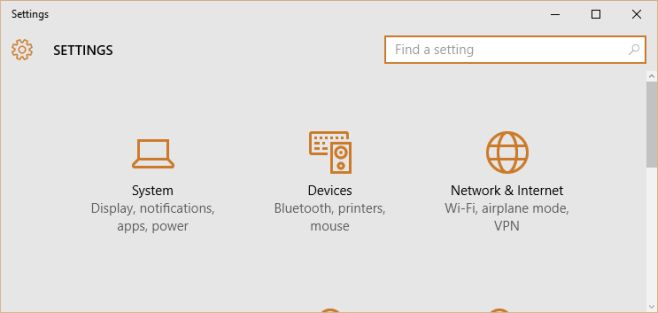
To get started, open the display settings on Windows. On Windows 10, go to the Settings App and click the System group of settings. Here, go to the Display tab.
On Windows 7 & 8, right-click on the desktop and select Screen resolution from the context menu.
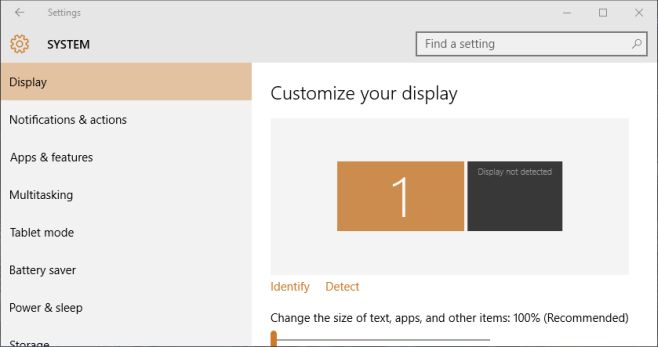
Click Detect and it will tell you that no other display has been detected. This is normal and that’s exactly how it should work. Once it tells you no other display has been detected, it will add a second ‘undetected’ display next to the default one that it has detected.
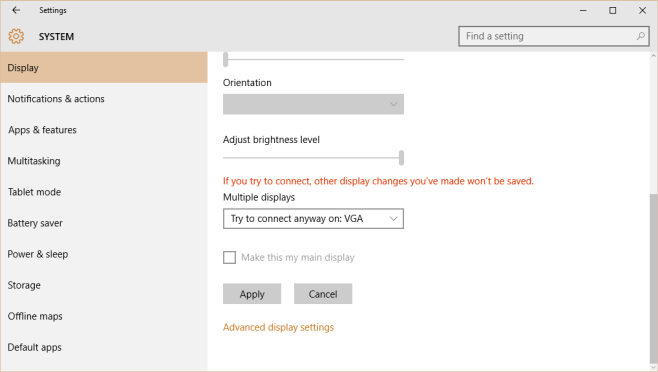
Click this second display so that it’s selected and then scroll down to where it says ‘Multiple Displays’. From the drop-down menu, select the ‘Try to connect anyway on: VGA’ option. This will effectively add a second monitor to your system. Click ‘Apply’.
Step 2: Extend the display
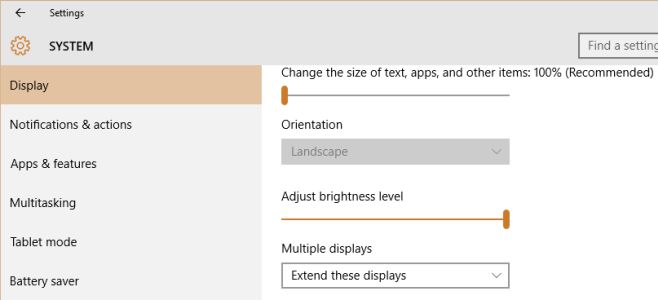
Once you have two displays set up, look for the ‘Multiple Displays’ option in the Display tab and open the drop-down. Select the ‘Extend these displays’ option. You can drag & drop the displays to reorder them on this screen.
Step 3: Cast your second display to Chromecast
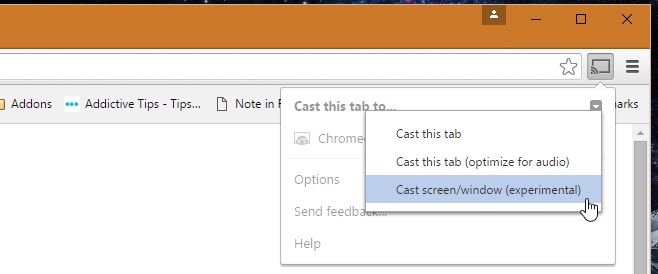
Open Chrome and click the Google Cast extension. Click the little arrow button and select ‘Cast screen/window (experimental)’ from the drop-down menu.
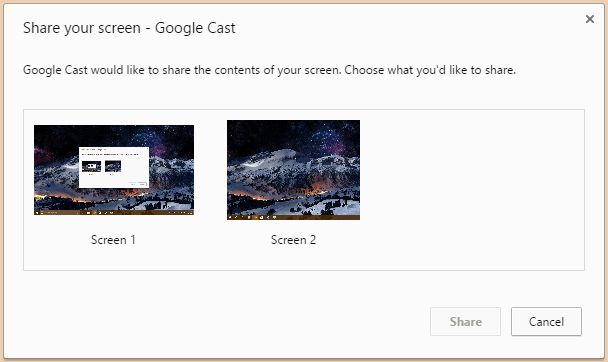
You will be asked to select which screen it is you want to cast to the Chromecast. Select the second one you added to Windows.
Step 4: You now have a second screen
There is obviously lag between the two but you can still use it to display a window that you want to keep on top of all others, monitor a feed, and more.

Just disable Windows Firewall on the Private network
Go to Chrome browser
Click on the 3 dots and select Cast
It will now detect the Chromecast device
Select it and you can cast to the TV.
Note : Enabling the Firewall will disable the cast option in Chrome.
It is not working on my pc with windows 10
I have 1709 update in my windows 10. So I am not getting above option in my Laptop. Is there any work around
I don’t know if you have gotten a answer for this, but I was able to successfully use Chromecast as a second monitor.
I used the command windows button+P and it brings up a project to screen window. I then chose extend.
I did however, have to restart chromecast and then chose cast desktop. Not sure if that part is required for all instances of doing this, but it is required for mine.
Hope that helps some.
That worked for me – simple and easy. Thanks.
This option is not showing after creators update’. Is there any alternative solution
There is!
Open your notification panel, click expand at the bottom and there will be a button that says “project”. Click that and choose extend. You will then see the second display in your display settings. You can then simply cast your second desktop to the Chromecast.
Hi Lunged,
Thank you for your reply.
I am not getting “try to connect anyway : VGA” option after Fall creators update.
Earlier this solution was working fine.
Thank you very much! Your comment helped me! 😀
This looks to be the right path, but doesn’t work if you already have a second monitor and are looking to add a third. (“projecting display” only gets you up to 2, it seems like.)
I’m able to setup my TV as a third monitor using the steps from the article. I have the latest update to Windows 10. The screens are a bit different looking, but works exactly as described.
Chrome however does max out my i5 cpu when doing this.
This !!!!
For Windows 10
Thanks !
Nope, didn’t work for me either.
Similar to other comments, this unfortunately doesn’t work for me, either.
The author of this guide has a software that is allowing him/her to see this setting… if you get a stock win 10 pc with google chrome and google cast installed, it will not show.
I’d like to someone make an app for the PC that will work as an HDMI emulator and install to windows as a 2nd screen, but be “native” to windows as a monitor. It would also have an audio device associated with it for the “HDMI” connection, so would allow you to cast both the screen AND the audio to the TV w/out having a little pre-echo from the computer.
Thanks.
If you don’t show a screen grab for every step, why bother? Windows would never add a second ‘make believe’ monitor after pushing ‘detect’ where do you get this stuff? It didn’t do anything you said…
Except for those of us it did work for.
It’s a Windows 10 issue… Worked fine for month on both 7 & 8. After the Upgrade to win10 the setting’s are gone.
thak you
“My copy of windows is genuine”?
Hahahahahahahaha
Yes, genuine. As in not pirated. Which happens, a lot. But plenty of people still purchase their copy genuinely.
only a fool trade time for money (looking for alternatives of Windows programs on their OS)
This is useful, except that when I try to detect another monitor (on Windows 10), it says “Didn’t detect another display,” but it does not give me the 2nd monitor box you show in step 1. Any ideas why that wouldn’t appear? Do I need to toggle a setting somewhere for that to appear?
I have this same issue – unresolved. Did you work it out?
Not as of yet. :-/
Have exactly the same problem and haven’t found a solution either…
Go to Control Panel and click on “Adjust screen resolution” under the “Appearance and Personalization” heading and then do the detection.
Unfortunately it doesn’t work…
I took aailer’s advice but went in a different direction.
In Control Panel I clicked on “Appearances and Pesonalization”.
Then “Display”.
On the left hand Side click on “Project to a Second Screen”.
A menu will pop up on the left hand side of the screen Click “Extend”.
This took me back to Display under the settings app, the second screenshot from the article. I was able to then follow the steps in the article up to the point where you actually cast.
When casting click on your cast extension.
Click on the drop down “Cast to”
Click “Cast Desktop”
Choose your Chromecast name
The final screenshot in the article should pop up. And you can “share” your desktop to screen 2.
I tried what you said and it’s still not showing the other screen.
Same here. When I find “Project to a second screen”, the choice of “Extend” (or any other for that matter) doesn’t seem to do anything. No new window opens. The only change I can get to happen from here is to click “Second screen only” which brings up the Keep/Revert changes countdown as though the display has been changed to another screen but in actuality it’s still showing on my original screen. No phantom monitor is created in the Display menu (which is never brought up by my selection).