How to use Linux on Windows
Linux is an excellent operating system, but not everyone wants to use it on their computer. Thankfully, there are ways users can run Linux directly on Windows. Here’s how to do it on your system.
How to use Linux on Windows – Windows Subsystem for Linux
Perhaps the easiest way to use Linux on Windows is with WSL, AKA Windows Subsystem for Linux. WSL is a framework that Microsoft has created for Windows 10 and 11 that allows users to run everything from Ubuntu to OpenSUSE and virtually every other Linux OS right on the Windows desktop.
Note: WSL (Windows Subsystem for Linux) is only available for Windows 10 and 11 users. If you are on an older release of Windows and wish to use this feature, consider upgrading your version of Windows first.
However, WSL isn’t enabled by default on Windows 10 or 11. It is an optional feature. You must enable WSL support on your computer beforehand. Here’s how you can enable Windows Subsystem for Linux on Windows.
First, open up the Windows start menu by pressing the Windows key on your keyboard. Then, type in “features.” What follows should be “Turn Windows features on or off.” Next, select the “Turn Windows features on or off” search result to launch the Windows feature selector.
Scroll through all the available features inside the Windows Features area and locate the “Windows Subsystem for Linux” option. Once found, check the box next to it and click on the “OK” button.
After clicking on the “OK” button, the Windows Features window will enable the WSL components on your system. You’ll then be prompted to reboot your system. Select the “Restart now” button to reboot.
Once you’ve rebooted Windows, log back in. Then, launch the Microsoft Store, and find the search button. Type in “Ubuntu” if you wish to use Ubuntu on your Windows PC.
Other Linux WSL options in Windows include:
- Fedora Remix
- Debian
- OpenSUSE Leap 15.2, 15.3
- OpenSUSE Tumbleweed
- Alpine Linux
- Alma Linux 8
- AOSC OS
Make your Linux choice by searching for one of the WSL options on the Microsoft Store. Once you’ve decided, install it to your system by clicking on the installation button in the store.
When the “Get” button is selected, Windows will install your Linux WSL app. Once the installation is complete, press the Win key on the keyboard and open up the Windows start menu.
Type in “Ubuntu” (or whatever Linux OS you installed) in the Windows start menu and click on it to launch Linux on Windows. You will get a full-featured Linux terminal to use on Windows when launched.
How to use Linux on Windows – Virtualization with VirtualBox
If WSL (Windows Subsystem for Linux) isn’t enough, and you want a Linux GUI on your Windows system, you can virtualize it. There are many ways to virtualize Linux on Windows. However, we’ll cover VirtualBox in this guide.
Why VirtualBox and not Microsoft Hyper-V for virtualization? Hyper-V, while nice, only works on specific releases on Windows. VirtualBox works on any version of Windows with ease.
To get your hands on VirtualBox, open up your favorite web browser, and head to VirtualBox.org. Once there, find the “Downloads” button on the left-hand side. Then, select “Windows hosts.”
Selecting the “Windows hosts” will download the VirtualBox installation EXE to your computer. When the download is complete, open up the VirtualBox installation EXE and set it up on your computer.
Once VirtualBox is installed on your Windows PC, follow the step-by-step instructions below to run Linux.
Step 1: You must create a virtual machine in VirtualBox. Creating a VM in the VirtualBox app is not hard, but you may get confused if you are new to the process. Please follow our in-depth guide on creating a virtual machine in VirtualBox on Windows.
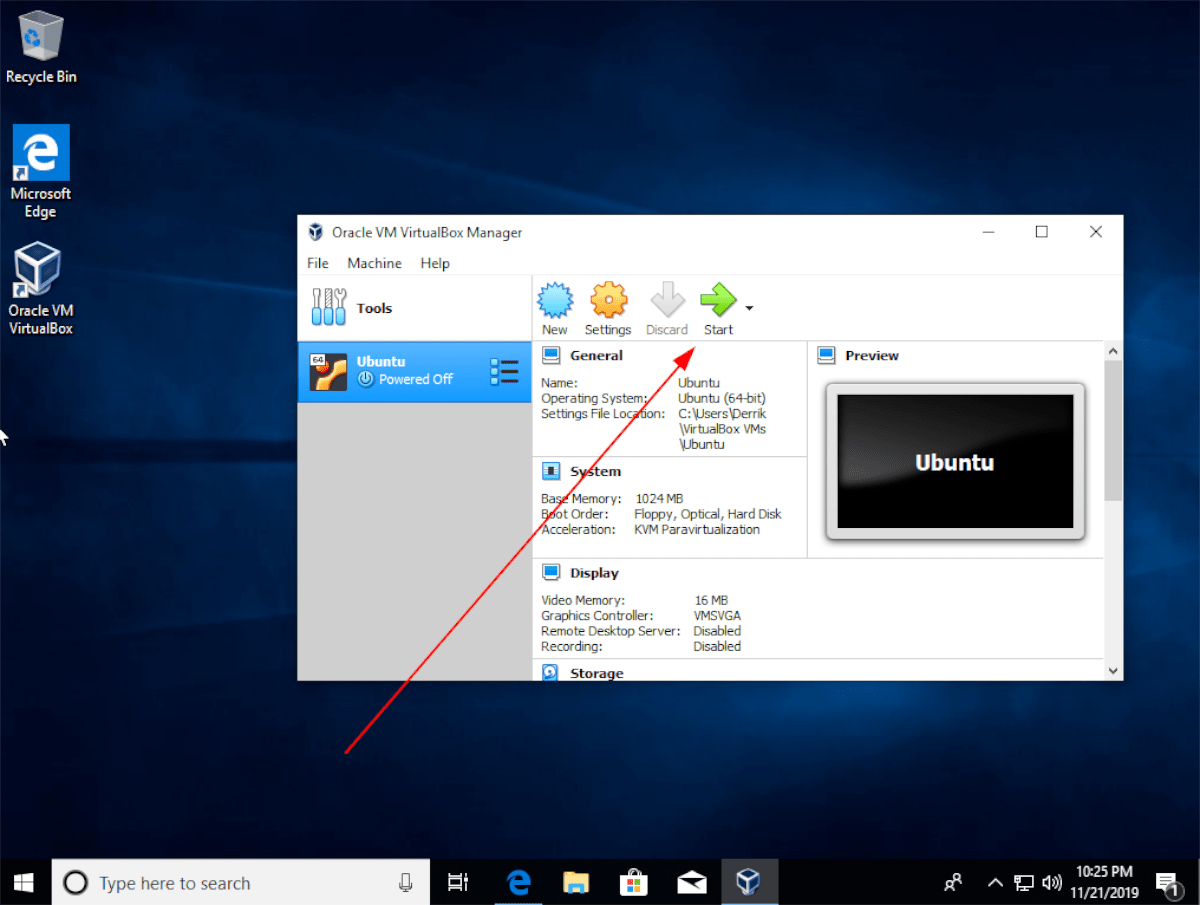
Step 2: After creating your VM in VirtualBox with our setup guide, find your Linux VM in the list of machines in VirtualBox. Once you’ve found your VM, select it with the mouse.
Step 3: Once you’ve selected your VM with the mouse, click on the green “Start” button to start the VM on Windows.
Step 4: Select the ” View ” button in the VM window when your Linux VM starts up in VirtualBox on Windows select the “View” button. After selecting the “View” button, click on the “Fullscreen” button.
By selecting the “Fullscreen” button, your Linux VM will be in fullscreen mode, allowing you to use Linux on Windows in an exclusive window.
Saving your Linux VM on Windows
Do you want to save your Linux VM’s current progress on your Windows PC? Try snapshots. What are snapshots? Snapshots are backups of your running VM that can be restored whenever.
Unsure about how to create a snapshot in VirtualBox? Check out our in-depth guide on how to backup VirtualBox VMs to learn how to create a snapshot.

