How To Share Windows 7 System Folders Across The Network
Unlike previous versions of Windows, including Windows XP and Windows Vista, Windows 7 allows you to easily share files and folders over network without having to follow tedious process of setting up IP address on network PCs. The inclusion of network groups, such as Homegroup, Work and Public type of networks make is easy to share files with others on same network. In Windows 7, you can easily share files and folders over Network from right-click context menu, but what if you want to share system-wide locations like Programs Files, AppData and other core system folders with others? Since Windows 7 applies strict security policy over system folders, users on network can’t gain access to such folders when shared from a Windows 7 PC. In this post, we will guide you through the process of sharing system files and folders on a network, so that you can easily access them from other PCs on the network.
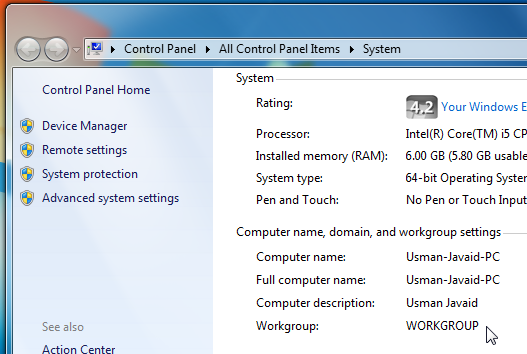
Before you start configuring Windows Share settings, make sure that you’ve required administrative privileges to change default Share settings, and all the PCs are on a same workgroup. To check the workgroup, right-click Computer, and check PC’s workgroup from Computer name, domain and workgroup settings section.
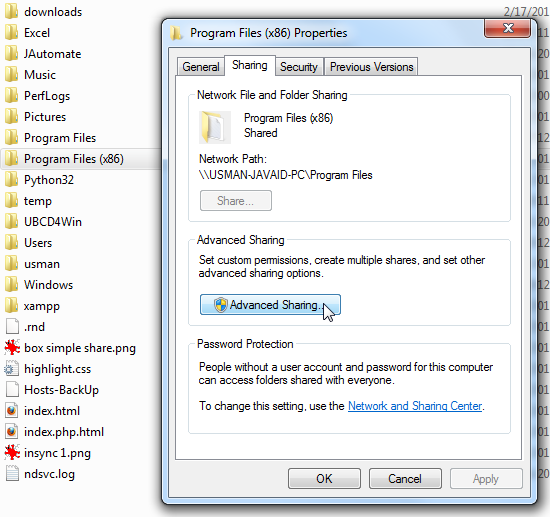
Now, move to folder which you want to share over network. Right-click it, and select Advance sharing option from Share with menu. This will open Sharing tab of folder’s Property dialog. Now, click Advanced Sharing...
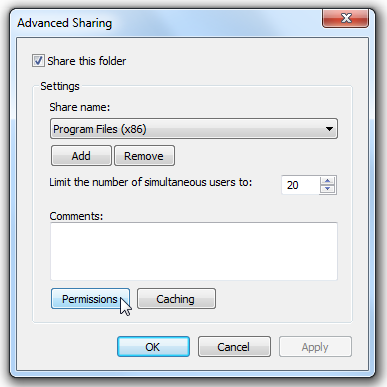
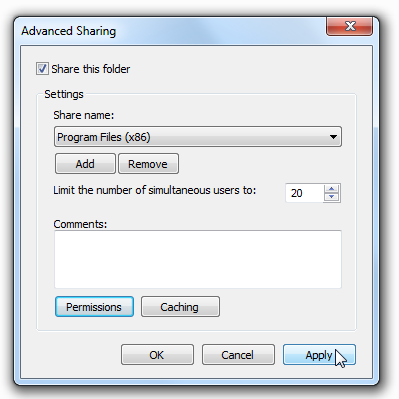
In Advanced Sharing dialog, enable Share this folder option. It will automatically add folder’s name as Share name. However, if you want to choose a custom name, click Add and enter a share name for the folder. Once done, click Permissions.
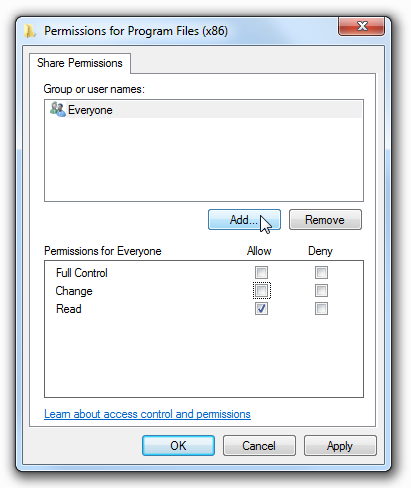
This will open Permission dialog, letting you change file access permissions for user groups and individual users. You need to permit HomeGroupUser object to access the folder’s content. For this, click Add.
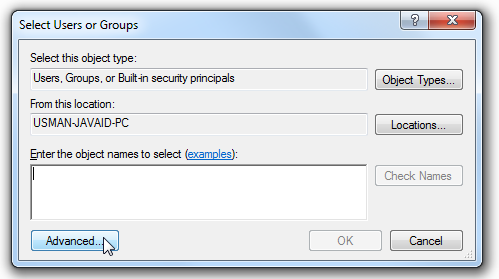
Upon click, Select Users or Groups dialog will open. Now, click Advanced.
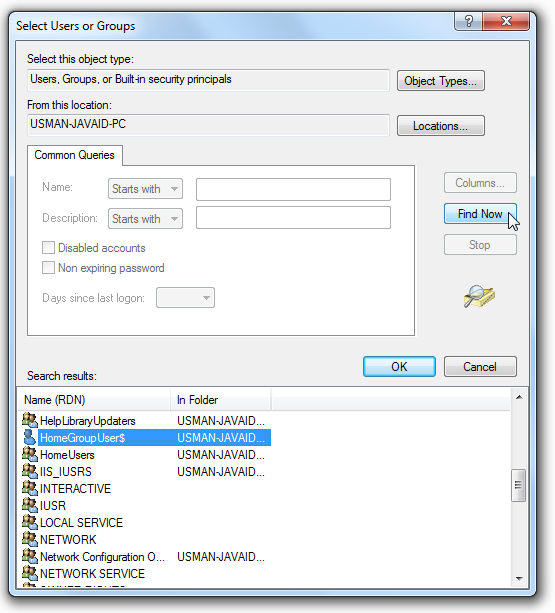
You can enter the HomeGroupUser object, but it is easier to select it from the list. Just click Find Now, and scroll down the Search results section to select HomeGroupUser$ object. Once done, click OK.
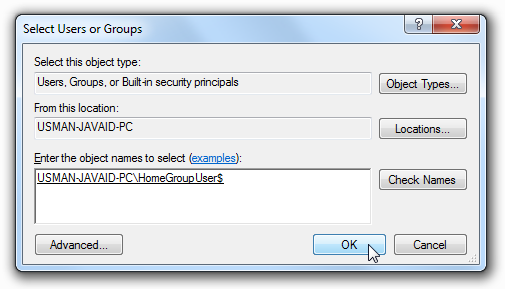
It will add HomeGroupUser$ to under object names section. Clicking OK adds folder access permission for homegroup user, and takes you back to Permissions dialog, allowing you to configure the permissions for newly added users.
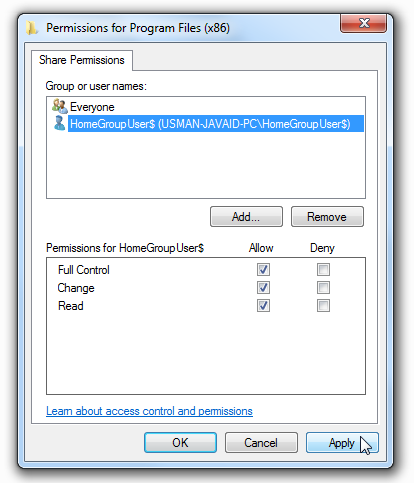
Now, select HomeGroupUser$, and from Permissions section, check Full Control. Once done, click Apply followed by OK.
It will take you back to Advanced Sharing dialog. Now, simply click OK to share the folder across the PCs connected in homegroup.
It must be noted that you may have to reboot your PC, or disable and then enable network connection, to share system folder over the network.
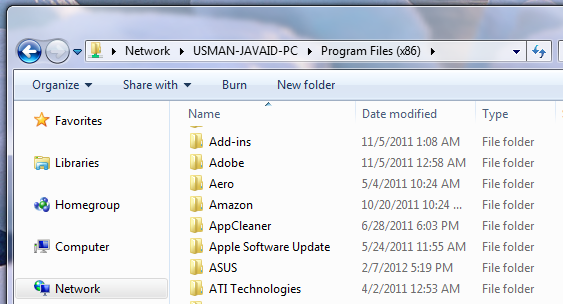
The above mentioned steps can also be followed to bypass Network Error message that says “Windows cannot access <share location name>” while accessing the shared location. If it fails to grant access permission to shared system folder from remote location, move to Network and Sharing Center—>Advanced sharing, and enable both Network Discovery and File and Sharing options from Home or Work profile.

u are the man Usman, very very good tutorial. After spending hours on windows official help got acros this , kudos man
I have a problem that there is no HomeGroupUser$ on the list.
This is great
I actually don’t explicitly share any folders. I pretty munch only ever use administrative shares by going to Run (WinKey + R) and entering “\MyComputerNameC$” (or whatever drive letter I am trying to access). Since my username and password are exactly the same across my Windows PCs, I am not prompted for a username and password, but if they are different, I would be given a dialog to enter them.
Nope. Use “Authenticated Users” group, and you’ll be asked to authenticate with your
username/pass/whatevs in every session! :X