How to set up a WebDAV server on Windows Server
Are you looking to set up a WebDAV server on your Windows Server system but unsure how to do it? Let us help you! In this guide, we will show you step-by-step how to set up a WebDAV server on your Windows Server.
How to Install the WebDAV Publishing Feature on Windows Server
To use WebDAV on Windows Server, you must first install and set up the WebDAV Publishing feature. Open the “Server Manager” in Windows Server and locate the “Add Roles and Features” button. Select it to continue.
After selecting the “Add Roles and Features” button, click “Next” to select your server. Once you’ve selected your server, locate the “Server Roles” section and click on it. Then, look for “Web Server (IIS)” and check the box next to it.
Note: you may also need to enable “WebDAV Redirector” under “Features”.
When you check the box next to “Web Server (IIS),” Windows Server will prompt you to add various features in the form of a pop-up window. Find the “Add Features” button and click it to add the new features.
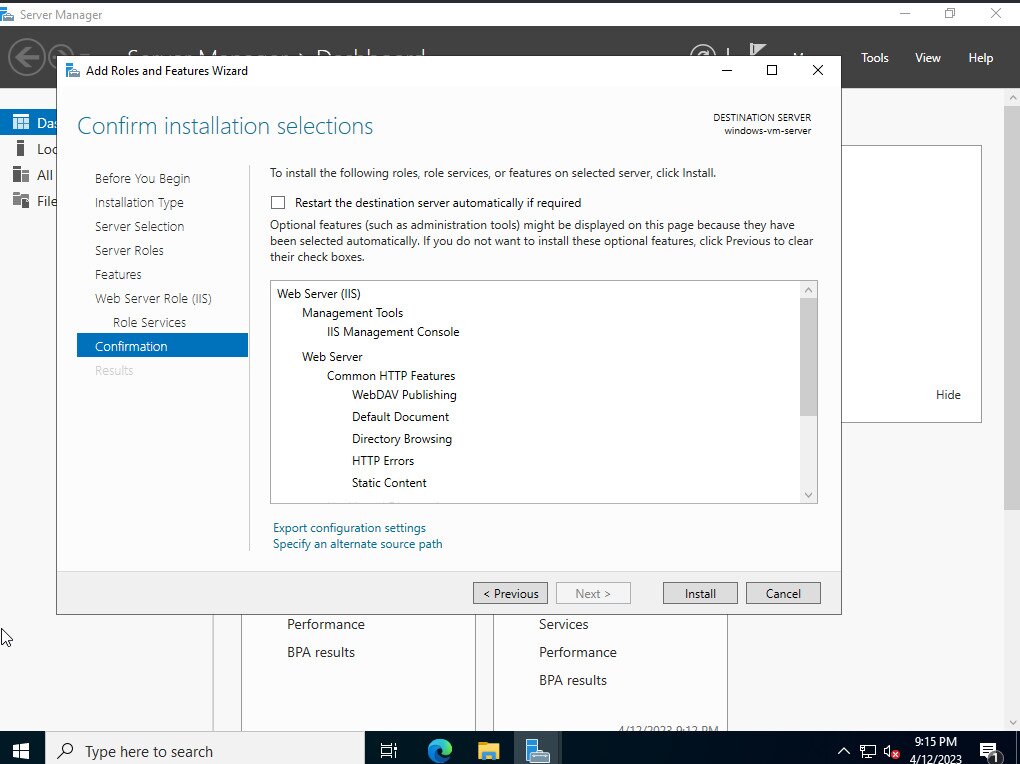
Next, you need to add “WebDAV Publishing” to your Windows Server. In the “Select Role Services” window, locate “WebDAV Publishing” under “Web Server” and check the box to enable this feature.

After checking the box next to “WebDAV Publishing,” click the “Next” button to continue. The “Add Roles and Features Wizard” will ask for confirmation. Click the “Install” button, and be sure to also check the box next to “Restart the destination server automatically if required.”
Once you click the “Install” button, Windows Server will begin setting up Web Server (IIS) as well as WebDAV Publishing on your Windows Server. When the process is complete, click on the “Close” button to exit the wizard.
How to Create a WebDAV Website on Windows Server
To use WebDAV, you need to create a WebDAV website on Windows Server. First, open the Internet Information Services Manager in Windows Server, which was installed in the previous section of this guide.
To launch IIS Manager, search for “IIS” in the Start Menu. Once IIS is open, right-click on the “Sites” folder, and select the “Add Website” button. After clicking this button, enter a site name in the “Site name” area.
Next, find the browse button next to “Physical path” and select where your website’s physical files will be located on Windows Server.
After adding a folder to the Physical path area in the “Add Website” page, you’ll need to set the correct permissions to allow WebDAV access through the website. To do this, launch PowerShell and enter the following commands. Make sure to replace “username” with the username you wish to add to IIS_IUSRS.
Note: You will need to run “Add-LocalGroupMember” for each user you wish to add to IIS_IUSRS.
New-LocalGroup -Name "IIS_IUSRS"

Add-LocalGroupMember -Group "IIS_IUSRS" -Member "username"
Once you’ve entered the commands, open Windows Explorer and navigate to the folder you specified in the “Physical path” area. Right-click on the folder and select the “Properties” option. Then, click on the “Security” tab and click the “Edit” button.
When you’ve clicked on the “Edit” button, select the “Add” button, and add “IIS_IUSRS.” Click the “OK” button when done. With “IIS_IUSRS” added to the WebDAV folder, anyone in the “IIS_IUSRS” group will have full access to the physical path.
With the physical path set, go to the “IP address” section and set the IP address for the WebDAV server. You can also add a hostname (domain name) if you wish.
Once everything is configured on the “Add Website” page, click the “OK” button to continue.
Configuring WebDAV Authoring Rules
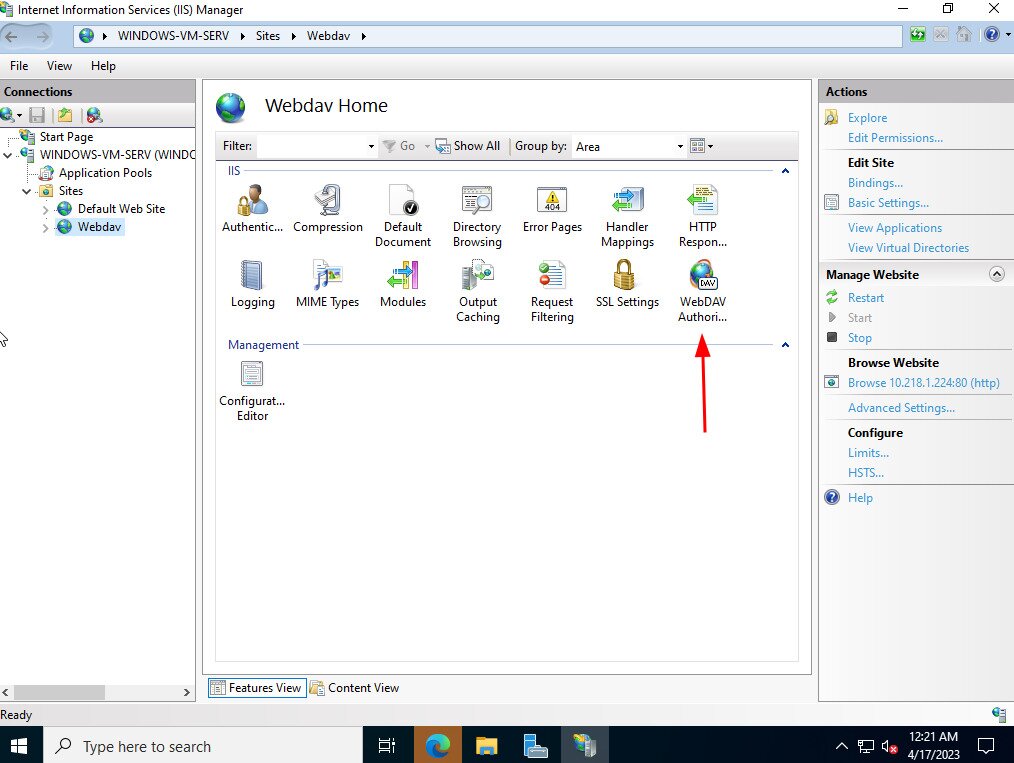
WebDAV authoring rules need to be configured in IIS for your newly created website so that users can access your WebDAV server. To start, launch IIS Manager, and select your website under “Sites.” After selecting it, find “WebDAV Authorization” and click on it.
Inside the “WebDAV Authorization” area, click “Add Authoring Rule”. Then, under “Allow access to,” choose “All content.” Next, find the “Allow access to this content to” area, and select “Specified roles or user groups.” In the text box, enter “IIS_IUSRS” as the specified group. This means that only users who have been added to the “IIS_IUSRS” group may use WebDAV.
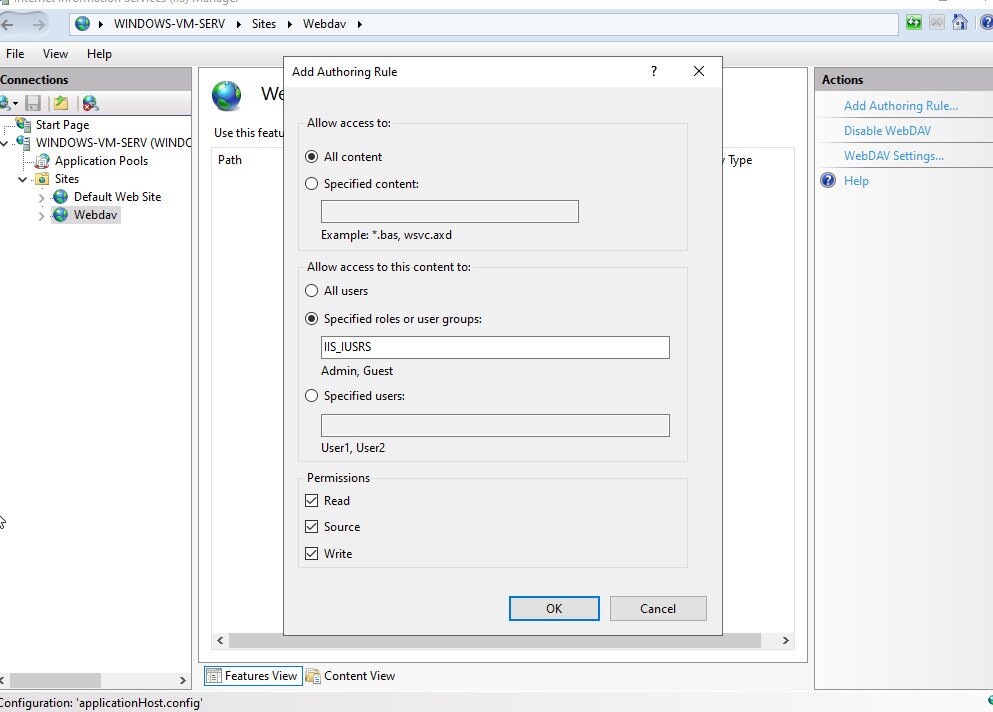
After adding the group, find “Permissions”. Check “Read,” “Source,” and “Write” to configure permissions for those who access your WebDAV server.
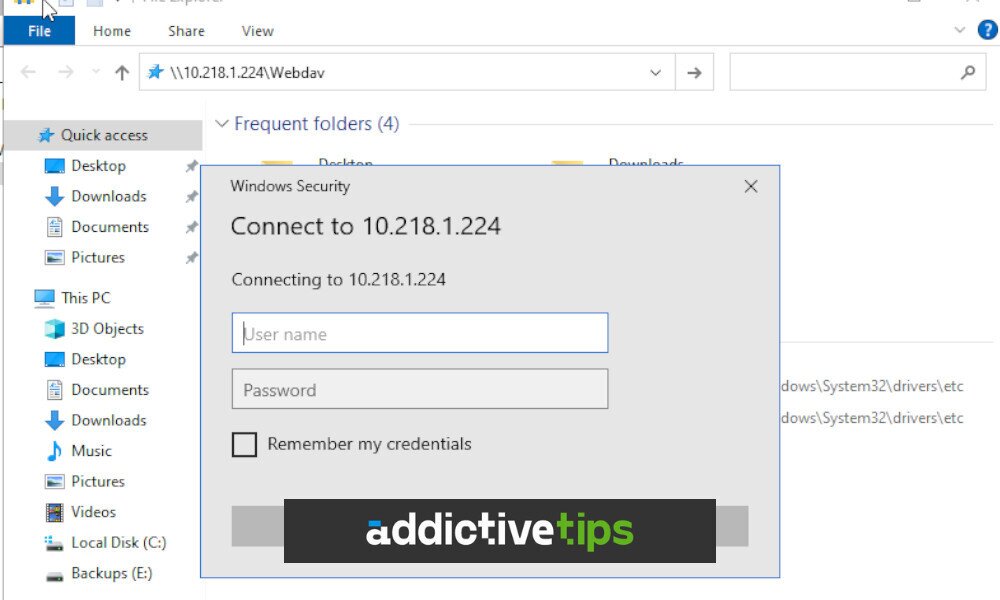
Connecting to Your WebDAV Server
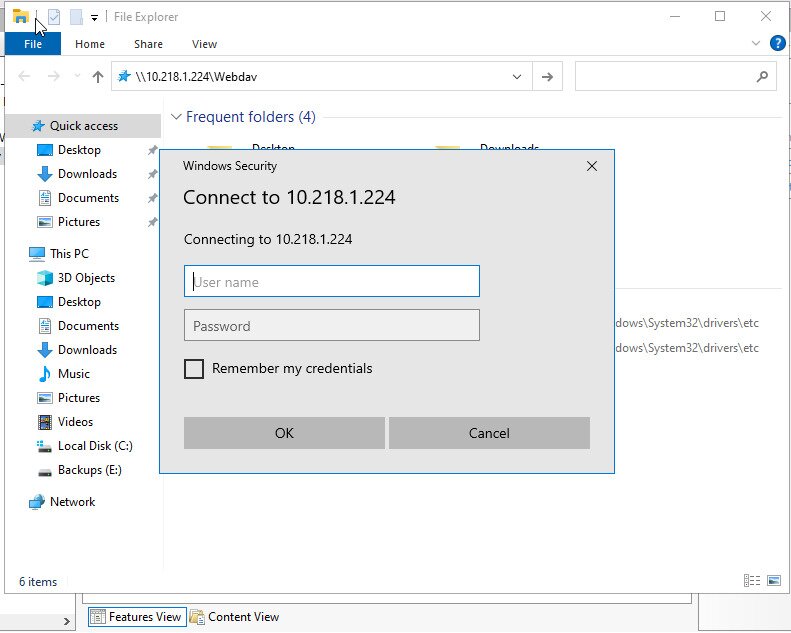
To connect to your WebDAV server on Windows, you’ll need to log in using specified users. Open up Windows Explorer on a Windows PC, and enter the address:
\\server-ip\webdav
Press enter to initiate login. Then, enter your WebDAV user credentials to log in. Once you’ve logged in, you’ll be able to read, write, and access files on WebDAV running on your Windows Server.
