How To Set A Custom Date Format In Windows
There are two widely used date formats in the world; one that puts the day first, followed by the month, and then the year. The second puts the month first, followed by the day, and then the year. These formats are a regional thing so when you install Windows, it automatically sets the date format to the popular/default one for your region. If, for any reason you feel the default date format, whether it’s the long date or the short one, should be different you can easily change it. Here’s how you can change the default date format in Windows and set a custom one.
Open Control panel and go to Clock, Language, & Region. Click on Change the date, time, or number format. Alternatively, just open Control panel and paste this in the address bar: Control Panel\Clock, Language, and Region.
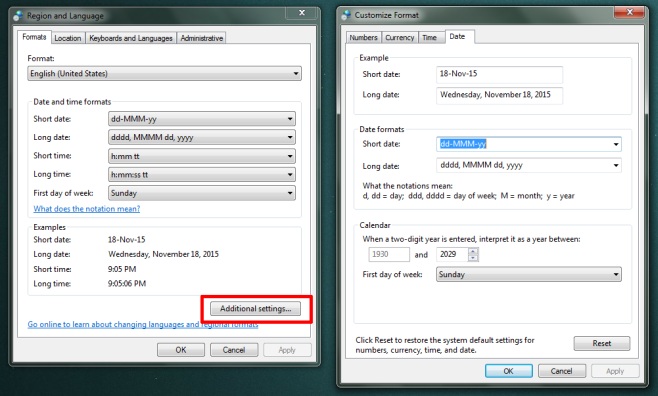
In the window that opens, click the ‘Advances settings…’ button at the bottom of the Formats tab. A new window called ‘Customize Format’ will open.
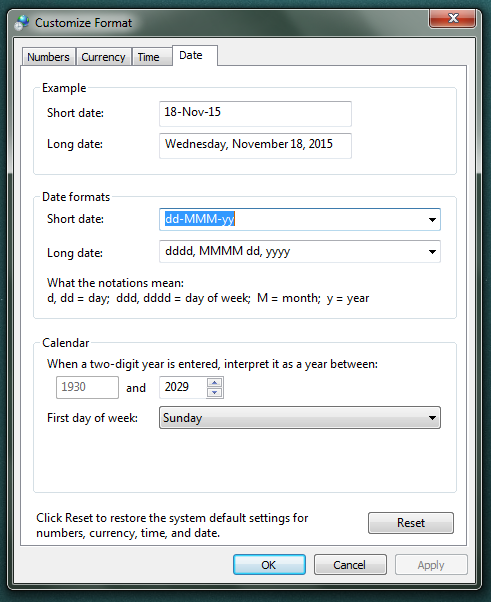
In the Customize Format window, go to the Date tab. Under the Date Formats section, edit the short and long dates by defining the order the day, month, and year should appear in. Click Apply.
All dates will be updated automatically to the new format you just defined. In the screenshot below, we put year first, followed by month, and then day.
The date is changed not just in the taskbar but across all apps. If, for example, you hit Ctrl+semicolon in Excel to input the current date in a cell, it will be input in the format you just set in Windows. This works in Windows 7 and up.


The only problem I have with doing this is that it changes the date in Windows Explorer, making sorting by date useless, unless you use “yyyy-mm-dd”