How To Select Fill Color For A Centered Wallpaper In Windows 10
Windows has quite a few customization options for the wallpaper. They’ve been a part of Windows since Windows 98 though they grew somewhat restricted in Windows 10. One feature to go missing from the wallpaper customization options was the ability to select the fill color for centered wallpaper images. This feature is making a comeback in the Creators Update for Windows 10. The Windows Insider Build 15014 already has the feature up and working. You can now use either Hex or RGB codes to select the fill color for a centered wallpaper in Windows 10. Here’s how.
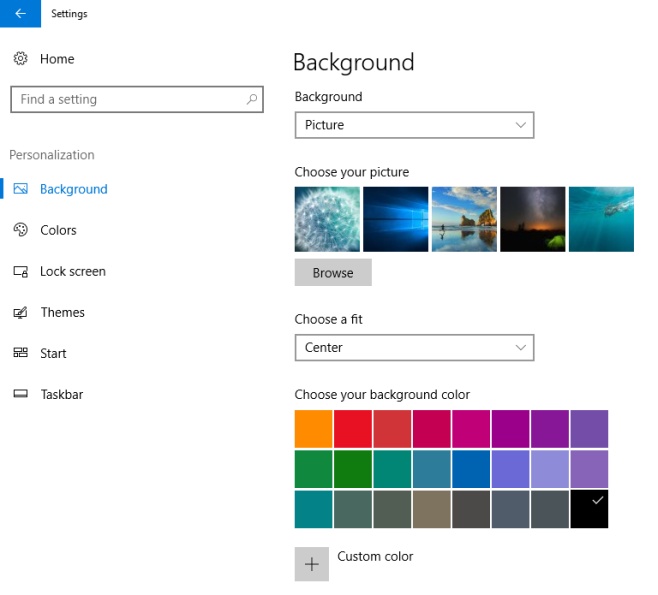
Open the Settings app and go to the Personalization group of settings. Select Background and choose ‘Picture’ from the Background section. Use the Browse button to look for and select the image you need. To center it, open the ‘Choose a fit’ drop-down and select ‘Center’.

With the image centered, a ‘Choose your background color’ section will appear under the ‘Choose a fit’ drop-down. There is a selection of colors that you can pick from if you’re in a hurry. Alternatively, you can set a custom color by clicking the ‘Custom color’ button under the presets.
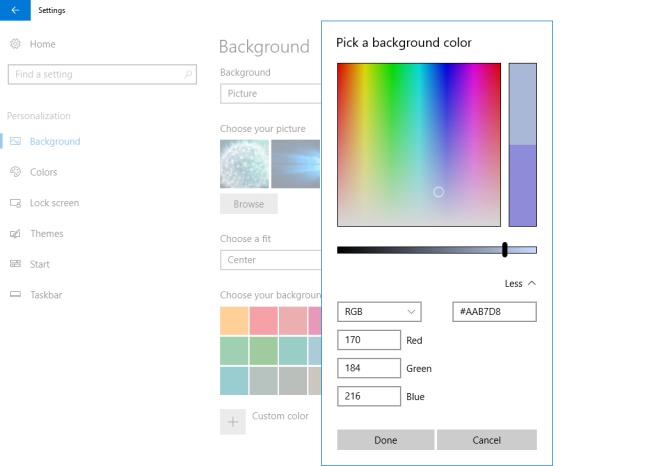
The Custom color option opens a color picker. You can select a color and manage it’s shade via a brightness slider under the color selector. If you have the Hex or RGB code for the color you want to use, you can paste it in the respective fields. Click ‘Done’ and the color will be applied.

These rich color selections will be available in the ‘Colors’ tab as well. Setting the accent color will be much easier and far more flexible with the new selector. It’s a shame Microsoft didn’t add this in Windows 10 when it was first released. It’s possible the company was trying to keep the UI looking a certain way by limiting the color selection but has had to give in to user demands.
