How To Repair Virus-Infected PC When Windows Fails To Boot Up [Guide]
Although Antivirus suites including MS Security Essentials, Avira, Avast, Norton AntiVirus etc., help us protect the system from malwares, viruses, spywares, keyloggers and other like potentially harmful programs, sometimes malware infected applications manage to slip through deployed antivirus security cracks and attack the system booting process. In such a case, anti-virus suites can’t identify and remove the infected application/processes unless the you repair the infected system boot sectors, and then boot into Windows to perform the virus removal operation over entire disk. In this post, we will show you how to clean your system from viruses when you can not boot into Windows.
Using Ubuntu Live Disk
Earlier, we brought you guide on how to create a persistent Ubuntu Live USB and then use it to reset Windows 7 admin and standard account password, wipe hard disk data, and recover hard disk data and repair lost partitions. Since Ubuntu Live Disk doesn’t require booting the installed OS to access primary hard drive, we could use it to scan the system for virus infected applications and scripts.
First off, follow the steps to create Ubuntu Live Disk. Once done, move to virus-infected PC and change the boot priority option from BIOS menu. All you need is to reboot the system, and press F2, F10, DEL, or other system defined key to enter into BIOS menu. Now, move to boot menu and set External USB/Hard Disk as first boot option. Now, plug-in the Ubuntu Live Disk, save the changes made to BIOS and reboot the system. It will take you to Ubuntu Live boot menu, select Run Ubuntu from this USB option and hit Enter to begin loading Ubuntu OS.
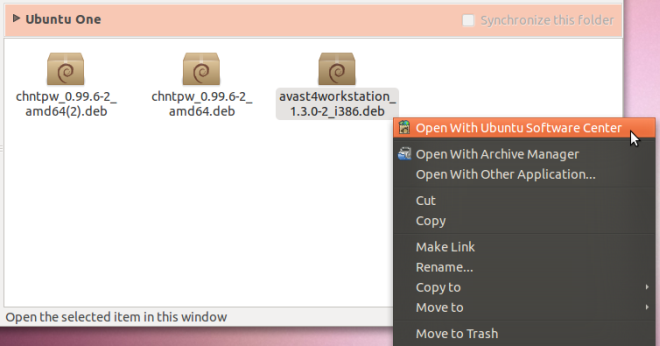
Just like Windows, Ubuntu supports a wide range of anti-virus suites including Avast, Bitdefender, F-PROT antivirus etc, but since Linux based OS are not vulnerable to malwares, virus and like attacks, many users don’t install on their Linux systems. Avast Workstation is available for free, and provides an easy way to scan not only only auxiliary storage mediums, but also the external hard drives. Download Avast Linux Home Edition (DEB package), right-click the DEB package, and select Open With Ubuntu Software Center.
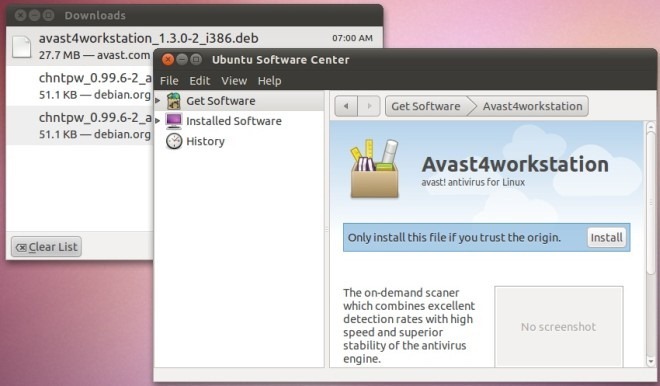
It will open Ubuntu Software Center. Now, just click Install to begin installing Avast Linux Home Edition. When installation is completed, close the Ubuntu Software Center.
Before launching avast!, you need to mount the hard disk, which is to be scanned for viruses. For hard drive with multiple partitions, mount the partition where Windows is installed. Click Places on panel, and click the hard disk to mount.

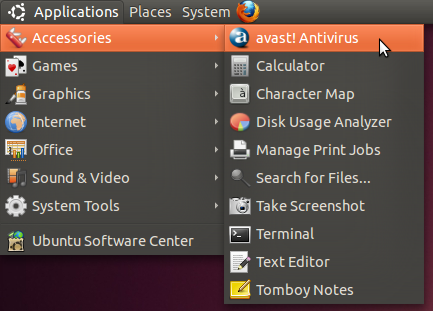
Once you’ve identified the hard drive, move to Applications –> Accessories menu, and select avast! Antivirus.
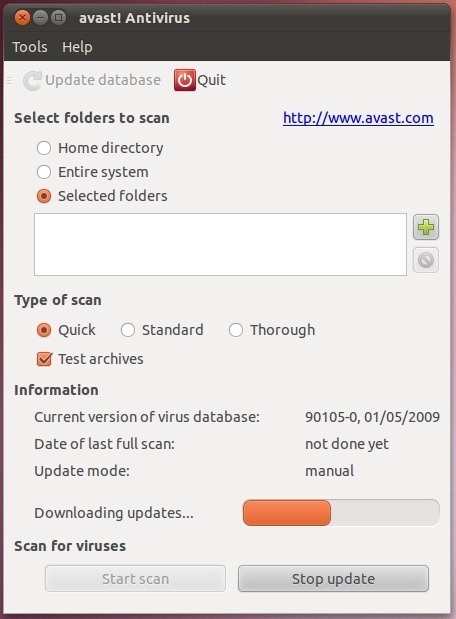
Before you start the scanning process, you need to update virus definition database; just click Update database to download all the essential virus definitions. Now, enable Selected folders option, and then click Add button.
You will find the hard disk under media folder; expand location with home icon followed by media folder to select the required hard disk/partition folder.
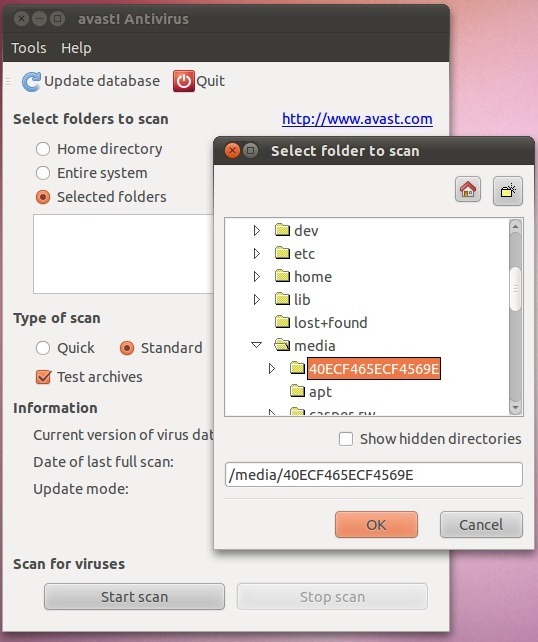
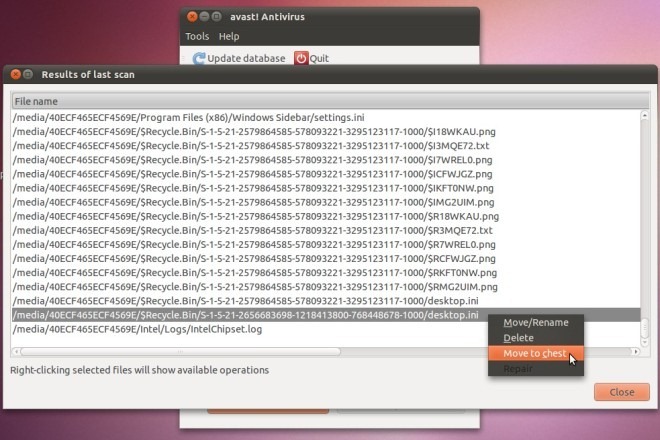
Clicking OK will add the hard disk to scan locations list. Similarly, you can add more locations to the list from different hard disk partitions. When all locations are added, hit Start Scan to begin the virus scanning process. It will open the scan result report after scanning all the specified locations. From Results of last scan window, you can move the files to chest, move or rename them, or delete them from your hard disk via right-click context menu.
Using SARDU (Shardana Antivirus Rescue Disk Utility)
When it comes to fixing system issues and scanning hard disks for viruses without booting the OS, SARDU offers a simple, yet powerful environment to perform numerous system repair operations. For those who aren’t familiar with SARDU, it can burn a number of bootable anti-virus suites, system repair utilities and Live Operating Systems on a single USB/CD, letting users perform all the essential operations to fix the issues. Since SARDU has been specifically designed to scan the system for viruses and identify OS boot up issues, you can use it to burn your favorite anti-virus rescue disk (if available) to USB, and then boot it to thoroughly scan the system for viruses and malwares. To begin, you need to first create a SARDU disk. It must be noted that you can choose to add multiple anti-virus utilities to your USB.
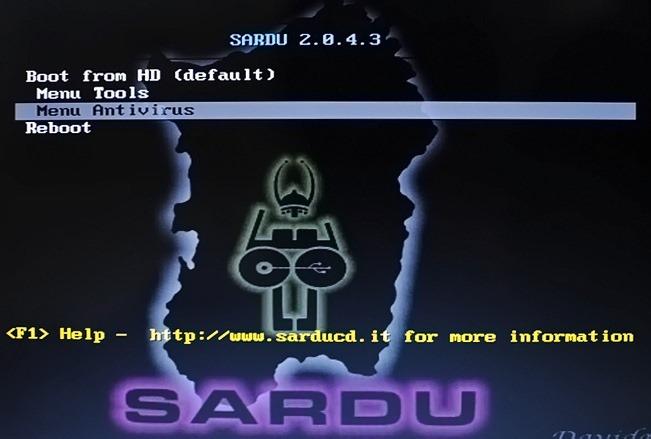
Once bootable antivirus utilities are burnt, plug-in the disk into virus infected PC, and open BIOS menu. Now, set External USB/Hard Disk as first boot option and reboot the system after saving changes made to BIOS. It will open SARDU boot menu, containing the selected anti-virus and system repair utilities. If you, for instance, chose to select AVG rescue disk while making SARDU bootable USB, navigate to Menu Antivirus, and then select Boot from AVG.
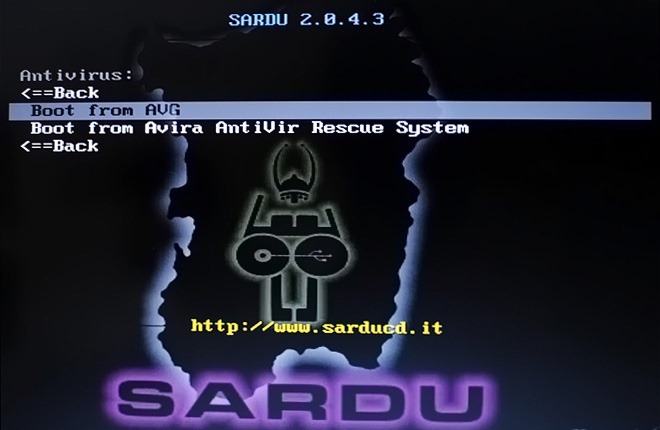
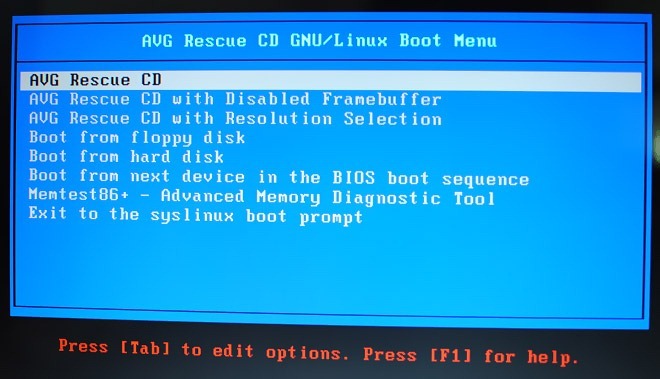
It will start loading AVG boot disk, and take you to AVG boot menu. Now, select AVG Rescue CD for performing virus scan operations.
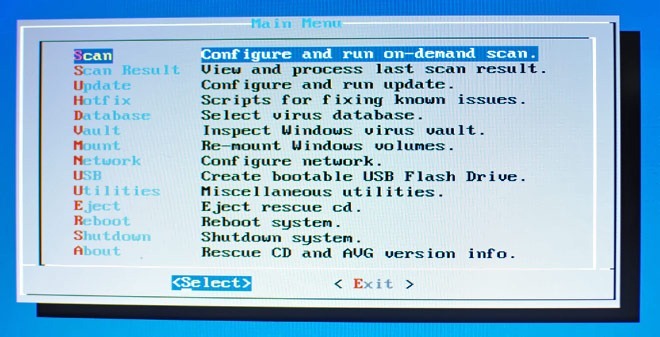
When you select the AVG Rescue option, it will start mounting all the partitions. Once done, you will see the main menu, containing options to perform on-demand system scan, view previous scan results, configure anti-virus options and download essential update, run scripts for fixing known issues, change virus database and so on. To perform the virus scan operation, navigate to Scan option, and hit Enter,
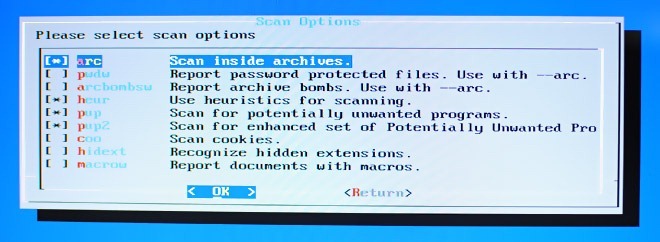
It will ask you to select either the volumes or specific directories within the mounted partitions to scan. We recommend selecting all the hard disk partitions in order to find the viruses and malwares. When volumes are selected, it will present the scanning options including scan inside archives, report password protected files, report archive bombs, use heuristics for scanning, scan cookies, recognize hidden extensions etc. To include additional scanning operations, navigate to the option you want to enable and hit Spacebar.
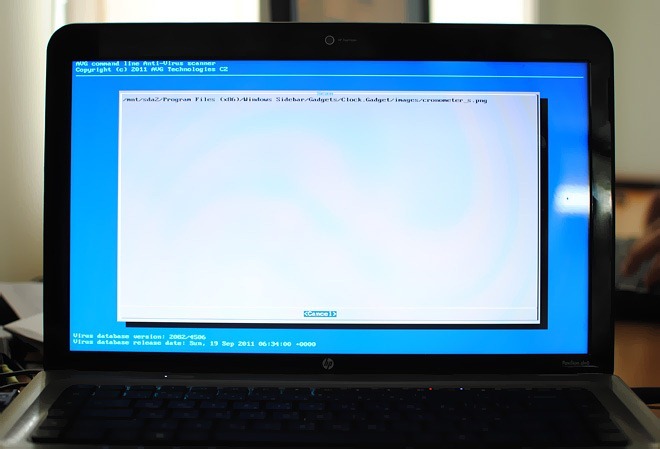
Once done, hit Enter to start the scanning the specified mounted volumes.
Hopefully, after following above steps, you will be able to completely remove system boot viruses and malware from the PC. If none of above methods work out for you, we recommend using Hiren’s Boot CD to perform boot-sector virus removal operations.

Windows Defender Offline worked just fine for me, just another option
WDO… how long did it take? I’m curious because AVG takes forever
:))
u can use hiren`s boot cd with live xp…..
why don’t you have “sharing of this article by EMAIL option”?
Because, that’s what copy and paste is for?