How To Rename Your PC In Windows 10
Installing Windows is pretty simple and requires very little input from the user except maybe one or two little things. One of those little things is what you want to name your computer. It’s not as big a deal as naming your kid and it’s a lot easier to do because most people just name it after themselves. If you later decide to give your computer a different name, you can change it. Windows Vista, 7, and 8/8.1 made this something of a task but Windows 10 turns it back to the simple process that it was in the XP days. Here’s how you can rename a computer running Windows 10.
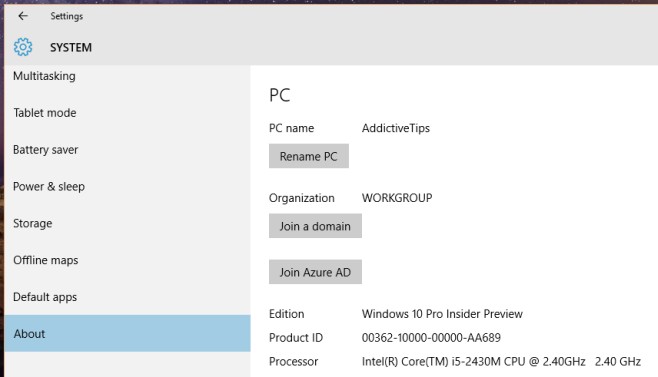
Open the Settings app and go to the System group of settings. Click the About tab where you can view basic information about your system such as its name, what version of Windows it’s running, and your product key. To change the PC’s name, click the ‘Rename PC’ button.
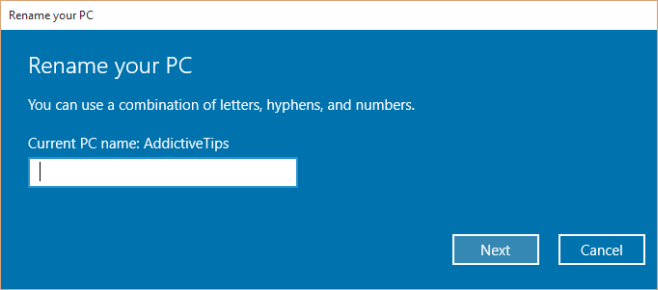
In the ‘Rename your PC’ window that opens, enter a new name for your computer and click Next. For the change to take effect, you will need to restart your system. Windows will give you the option to restart right away or to restart your system later.
I’m not sure how often a user needs to rename their system, or how common it is for users to end up with the wrong name for their system and the need to change it but Microsoft has taken the option to do so out of obscurity and made it easier to access as well as simple to do.


