How To Remove The Profile Picture From Your Microsoft Account
Windows 10 insists you connect your Microsoft account with your PC. It nudges you to do so often and locks you out of using certain features if you don’t. When you eventually cave into Windows 10’s insistence, you are given the option to add an image to your account. This image greets you on your lock screen and appears in the Start menu. And it also appears everywhere else you use your Microsoft account. The image is added via the Settings app but there is no way to remove it. That doesn’t mean it can’t be removed; it just can’t be done from the Settings app. You need your browser to remove the profile picture from your Microsoft Account.
Visit Microsoft and sign in with your account. At the top right, click your user account picture and select ‘View Account’ from the drop-down.

On your Account page, click your profile picture to edit it.

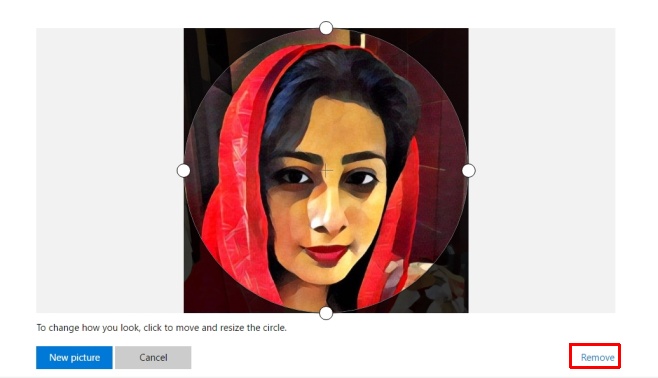
At the bottom of the edit profile picture page, you will see a ‘Remove’ button. Click it and the photo will be removed from your account. This will replace or remove the photo from all your connected devices. Unless you have a back-up of the photo in question, there is no way to recover it. It is possible that a cache of it exists somewhere on a Windows 10 PC but we’re speculating.

Any time you upload a new photo, it will sync through your Microsoft account (if you’re signed in) and appear across all your devices.
Strictly speaking, this isn’t a big deal if you’ve used your own account on your personal PC. If however, you’re using a company account on a company-provided device, you might want to remove the profile image before returning your device.
It’s also interesting to note that when you upload a photo to your Microsoft account from the Settings app in Windows 10, you don’t get any crop options. The web version lets you select how much of the photo you want to include and crop the rest out.
