How To Fix PCIe NVMe SSD Boot And Driver Problems
The struggle for astronomical storage spaces has slowed down. Society, it seems, has settled on a few TeraBytes of storage and are sticking to using more drives as/when needed. This pushed storage technology in a different direction; namely speed. Traditional mechanical hard drives measure speed on RPM and cache storage, and now we have Solid State Drives. These drives take the mechanics out of the equation and as a result are exponentially faster. Right now connecting SATA cable connecting drives to motherboards has became an issue. So we’ve turned to PCI Express based storage devices. These drives plug directly in to a motherboard and the speed is off the charts (as high up as read speeds of 3.5GB/s in some cases). However, with new technology comes new problems to troubleshoot. For example, missing drivers, unresponsive/slow drives and/or drives that simply do not appear after being connected. Here’s how you can fix common PCIe NVMe SSD boot and driver problems.
1- Drive Not Showing
If your drive fails to show up altogether, then our first step is to verify if it is even connected. In Windows search, type Disk Management and select the ‘Create and format hard disk partitions’ option. This will open the Disk Management window. Count the number of listed Disks. Does it match the number of installed storage devices? If so, that means this is an issue with the incorrect driver. If it does not, that means the drive was not installed properly.
Power off and unplug your PC/laptop and remove the drive and put it back in again (in a separate slot, if available).
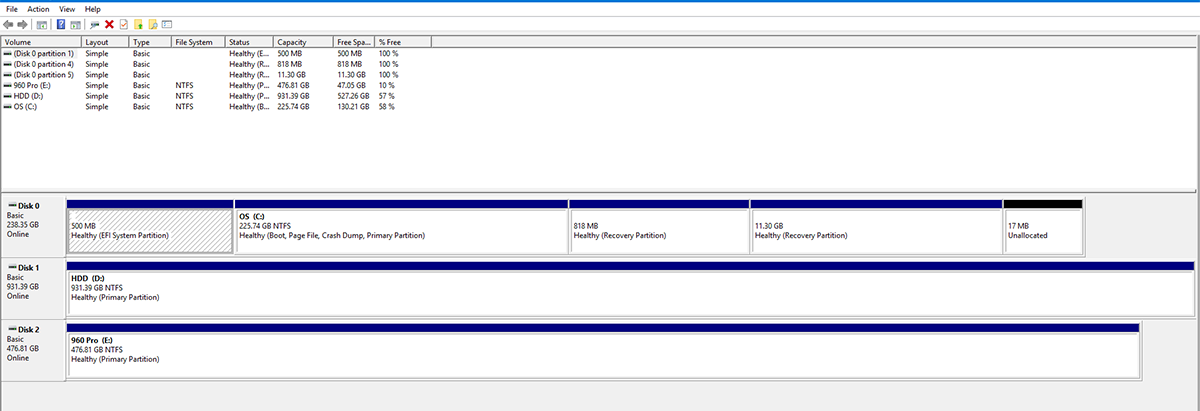
2- Drive Detected But Not Showing
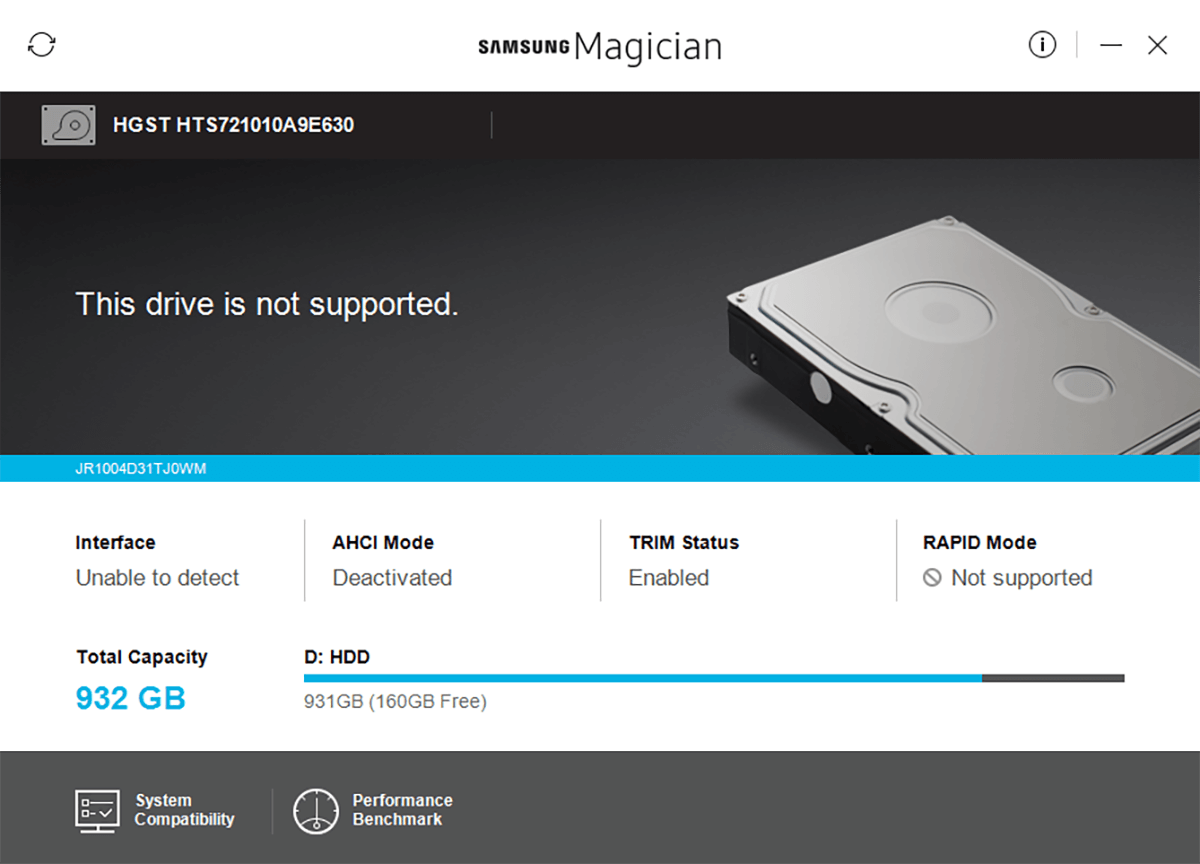
If your drive is detected (same test as above), but is not showing in File Explorer, go to Disk Management and find your disk. Right click in the colored area in front of this disk and select ‘Format’.
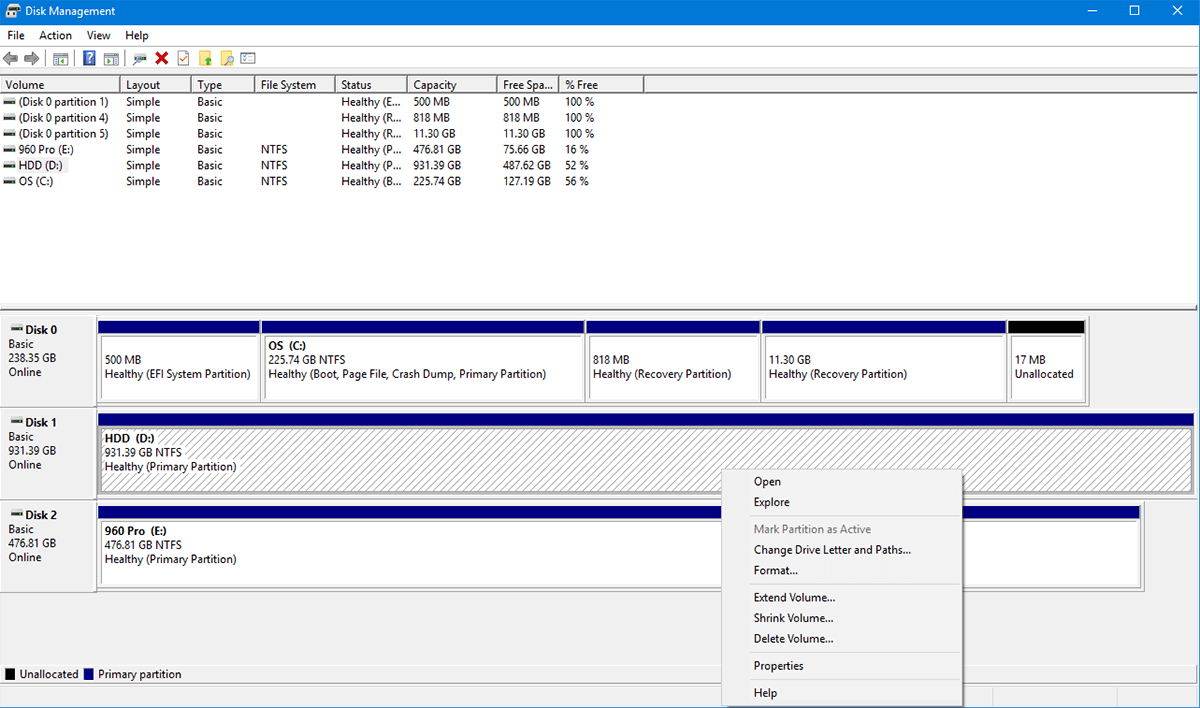
Give it a name (optional), leave it at NTFS (if you don’t know which file system you want) and check ‘Perform a Quick Format’, with an SSD, it should format and appear in no-time.
3- Drive Showing But Has The Wrong Drivers
If you have tried installing this drive but either are unable to install the official drivers (instead use Windows defaults), or are not getting the advertised speeds, then you might have a driver problem.
These drives are the latest technology on offer. Most BIOS/UEFI are configured to accept older HDD or SATA based SSDs, the PCI Express based drives require a slight modification in the BIOS and booting into Safe Mode.
1- Download The Drivers
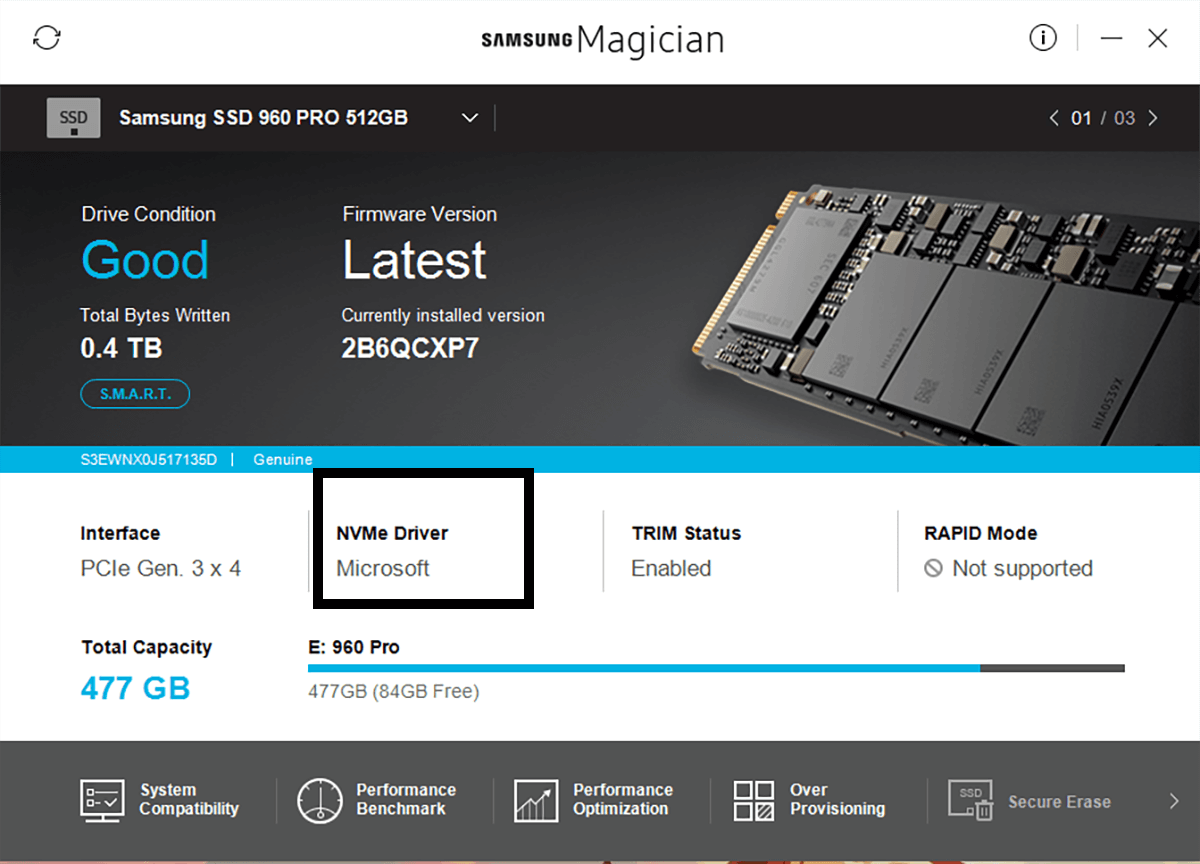
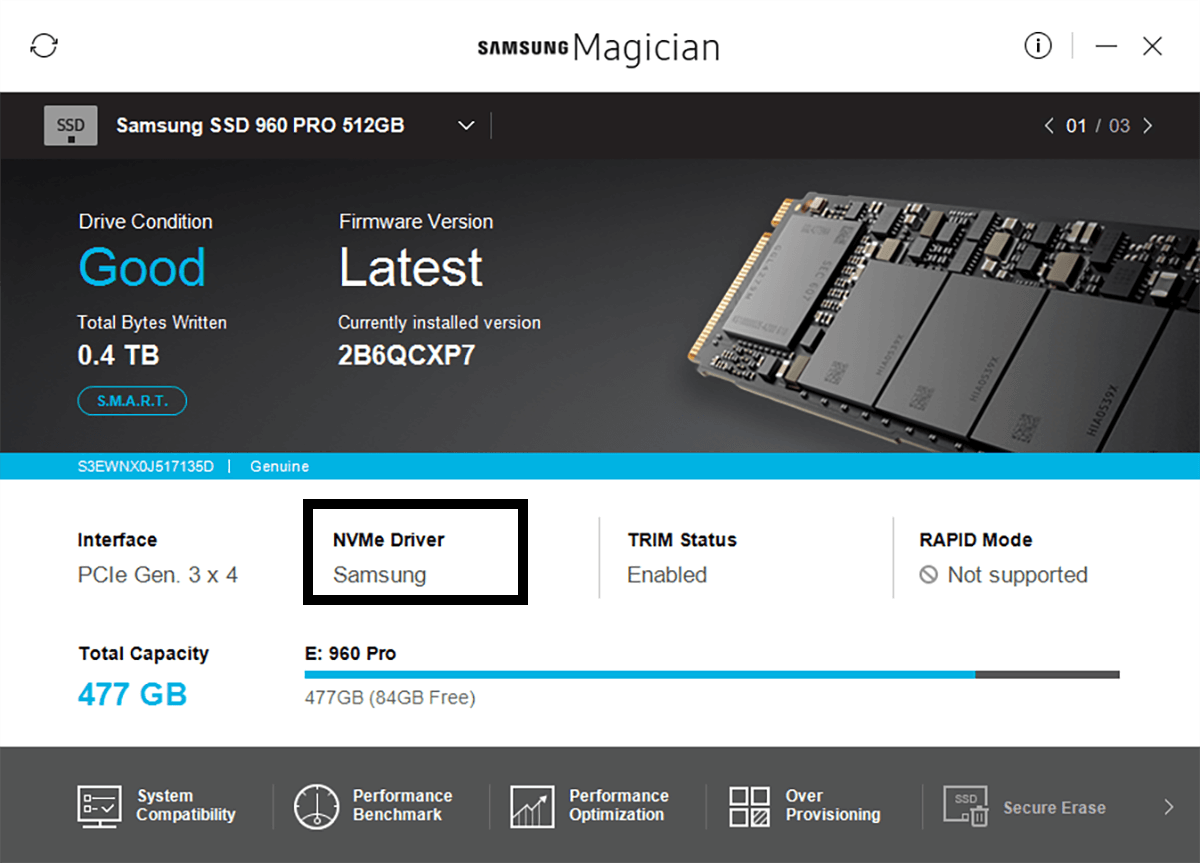
Go to the manufacturer’s website and download all the drivers, tools and firmware updates that you will need for your drive to function fully.
2- BIOS/UEFI Configuration
Anytime you boot up your PC, it shows an instruction on how you can enter your BIOS. This varies from system to system, but it is usually the F2 key. In case you don’t see a clear instruction on how to access your BIOS, visit your motherboard’s manufacturer’s website to find out exactly how (likely in the FAQs section). In the BIOS, you will need to find ‘SATA Operation’ (usually under ‘Advanced’) and change it from RAID to AHCI. This should both pick up your driver and enable full speed. However, if you are still not able to install your drivers, try the next solution.
3- Boot Into Safe Mode
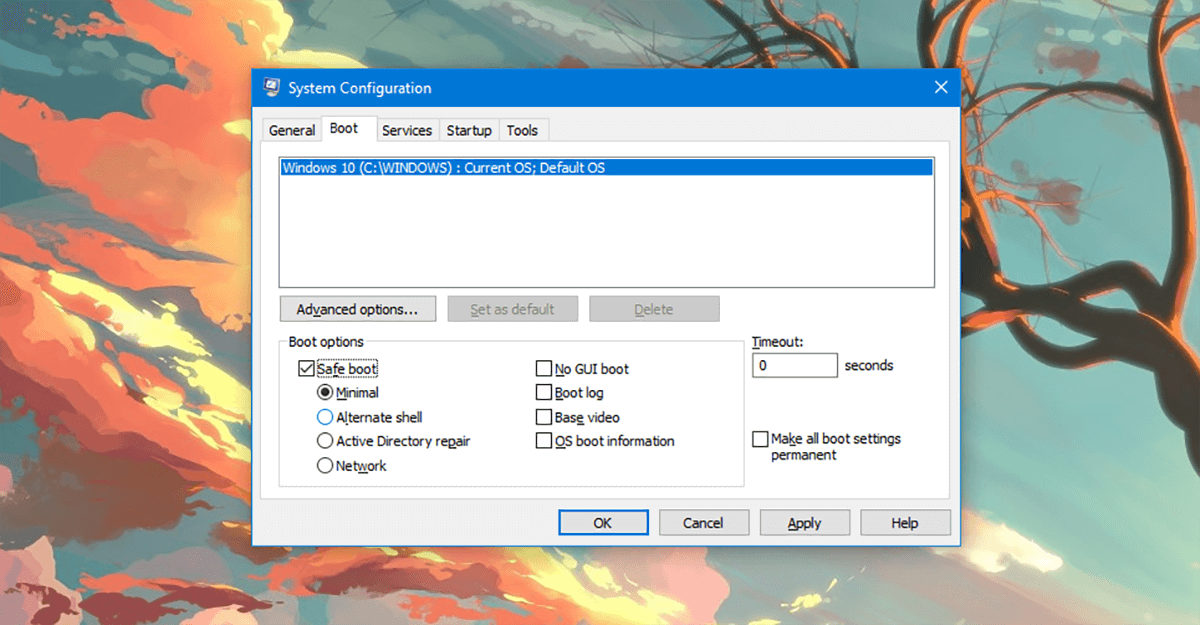
In Windows search, write: ‘msconfig’. You will see ‘System Configuration’, open it. In the available tabs, you will see five tabs. Click on the ‘Boot’ tab. In this tab, look to the bottom left and you will see ‘Safe Boot’. Click on it, and press Okay. Restart your computer when prompted.
You will reboot into Safe Mode (after a little waiting). Now you should be able to install your drivers and tools just fine.
4- Installing Windows
In case you want to use your new, super fast drive to run your Operating System and are starting from scratch (i.e. no previous installation of an Operating System). You will need the following.
1- USB Drive (16 GB minimum)
2- Genuine Microsoft Windows
It is assumed you have access to another computer on which you can create the above mentioned items. Genuine Microsoft Windows are easy to come by, just purchase a copy from the Microsoft Store and you’re good to go. If you are running this operation from a branded manufacturer (as opposed to assembling one yourself), then you can probably request the manufacturer for a copy of your Operating System (most manufacturers let you download a copy).
First we will create a bootable USB that facilitates UEFI (this is important for PCIe drives). So we will basically format your USB into a bootable one, with the FAT32 file system (NTFS will only enable BIOS, not UEFI).
Diskpart
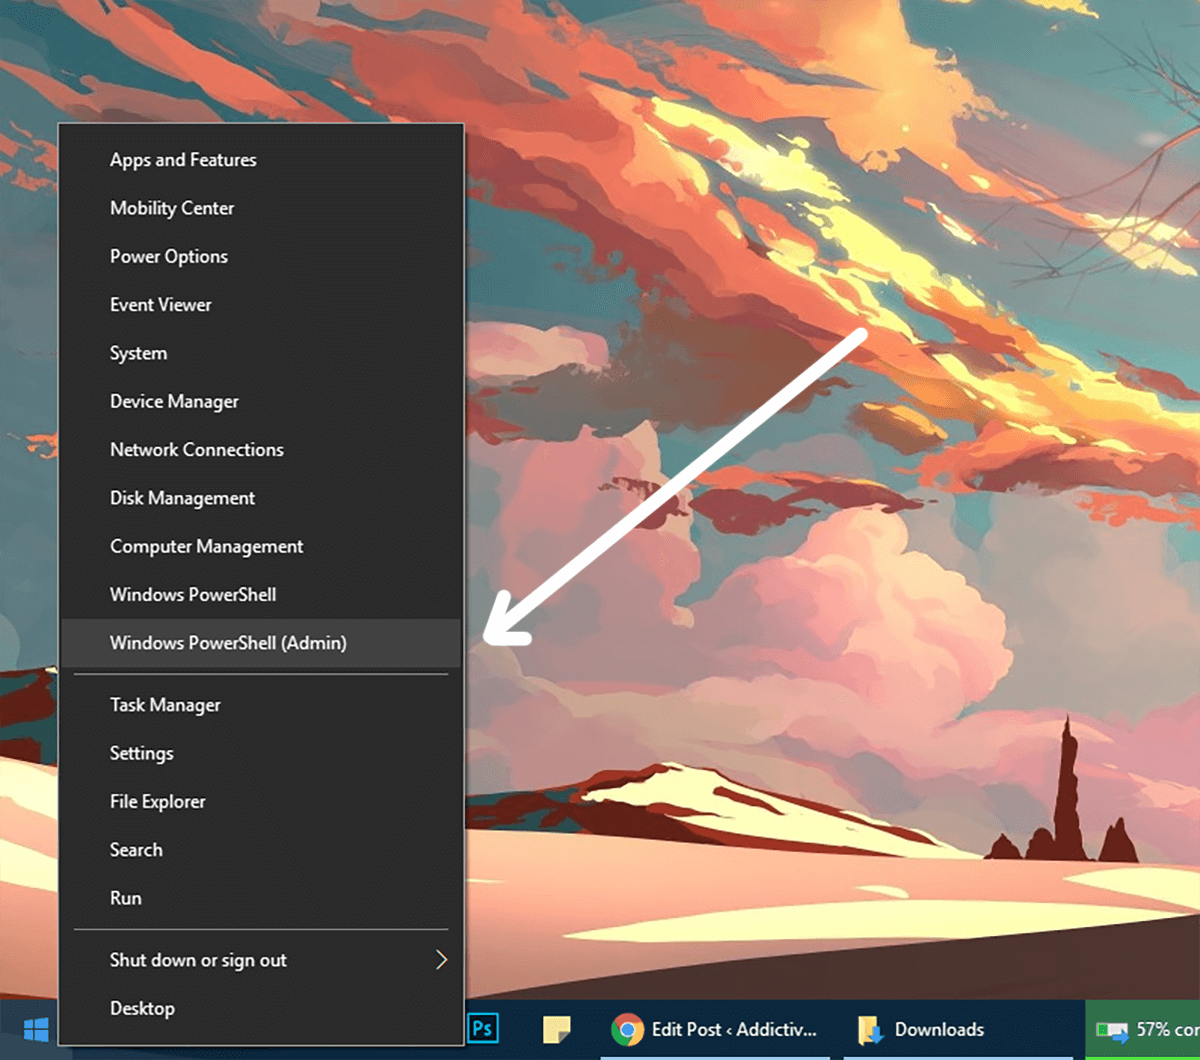
Open a command line in administrator mode by right-clicking on the ‘Start Menu’ and selecting Windows PowerShell (Admin), run DISKPART and then each subsequent line as directed below.
DISKPART
LIST DISK
You will see a list of all your drives. Look for the disk number that represents your USB drive
type SELECT DISK #
The # is the number of your USB, if you choose any other number, you will be wiping out the wrong drive.
CLEAN

CREATE PARTITION PRIMARY

SELECT PARTITION 1

ACTIVE

FORMAT fs=fat32

assign
The drive should now be formatted and marked as active and Fat32. Now you will need to copy the contents of the Microsoft Windows install dvd to the USB with a regular copy paste from windows explorer.
Once this is done you will need to get a copy of the EFI boot manager firmware file from a computer that has Windows 64 bit installed on a UEFI system. On your USB (assuming it’s drive E:) look in E:efimicrosoftboot and copy this boot folder up one level (to the main drive) so it sits in E:\efi\boot\
Now, go to the file C:\Windows\Boot\EFI\bootmgfw.efi and copy it to E:\efi\boot\ folder and rename the file to bootx64.efi. Insert the USB in the machine and turn it on and boot into the UEFI/BIOS loader and check for boot options. You can now install Windows on your PCIe SSD without suffering any performance losses.

Microsoft doesn’t provide the drivers its own installation routine asks for, when you start the install.
And Samsung does not provide drivers that could be used at the start of Windows 8.1 setup. Samsung’s drivers and that dismal excuse of a software called “Samsung Magician” require an already existing installation of Windows. you can’t integrate it into your windows install image.
So you have nowhere to get this driver. Windows install sees the drive but requests a driver, you can’t procure.
Certainly, I didn’t know where to find it under Microsoft’s countless .inf files. on the W10 image.
And in Windows, Samsung Magician is a real piece of work: Samsung SSD 970 NVME Evo 2TB – it does manage to detect it.
Then you go through the advertised functions:
Secure Erase: . . . . . . . . . . . . . . Not supported
Diagnostic Scan: . . . . . . . . . . . .Not supported
Performance Optimization: . . Not supported
PSID revert . . . . . . . . . . . . . . . . Not supported
Over Provisioning . . . . . . . . . . Not supported
So for this 300 Euro drive, Samsung doesn’t even deign enough money has been spent to permit secure erase??
Buy a pro model, if you ever want to secure-erase your drive, chum…
I think I’m cured of Samsung, what with all their phones splitting open from bulging batteries within the Year :p
I do not understand why all these manipulations to install Windows in UEFI Mode:
– Media Creation Tool allows to directly create an USB Drive in FAT32 (even if it was before in NTFS)…
Or
Simply format the key manually in FAT 32 through Explorer (right on the drive an select format in FAT32) and then copy the entire DVD (or an ISO).
These two methods allow to boot in UEFI mode and install Windows in UEFI.
Because the DISKPART method formats the drive with system files (that do not get copied from drive to drive) that instruct the BIOS on how to read a drive and boot from it.
Simply formatting in FAT32 and copying the files will not copy the necessary files and prevent the drive from becoming bootable.
Also, UEFI is new technology. It does not have widespread support, yet. So we have to make some modifications so that the system can communicate with the new hardware.
No, I’m sorry but no. I have always done as said above, and I have never had to use diskpart. The BIOS (UEFI) of my PC is from 2012 (MB Asus P8Z77-V). I think I know a little about the UEFI mode installations :
https://uploads.disquscdn.com/images/7b66206a5f91d9ad71c34ed9e55e8e3889f6f1457d3beeb8474444506c815d83.png