How To Edit System Environment Variables For A User In Windows 10
Windows 10 comes with a new Settings app and it’s kind of confusing for anyone switching to Windows 10 from Windows 7. Perhaps even Windows 8 users will struggle with it because Windows has always had the control panel. The control panel was one place where you could manage your computer’s settings but with the Settings app, there are now two places where you can do that. What makes it more difficult to adjust to is the fact that some things can only be changed from the Control Panel but have to be accessed from the Settings app. If you’re looking for a way to edit environment variables for a particular user, you might feel a little lost trying to find the setting. Here’s a brief look at how you can set edit environment variables in Windows 10.
The process is more or less the same as it was in older Windows versions. The trick is knowing how to open the right setting in Control Panel. There’s two ways of doing it; right-click on the Start Menu and select ‘System’ from the context menu. The other way to open the correct Control Panel settings is to go to the Settings app and in the ‘System’ group of settings, click on ‘About’. At the very bottom, you will see an option ‘System info’. Click it.
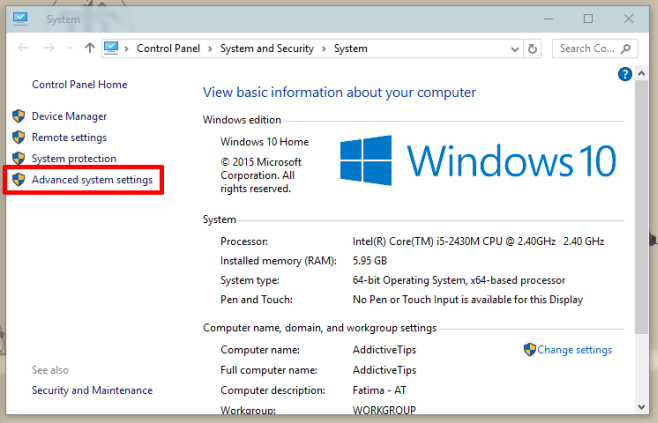
In both cases, the window shown below will open. Click on Advanced system settings.
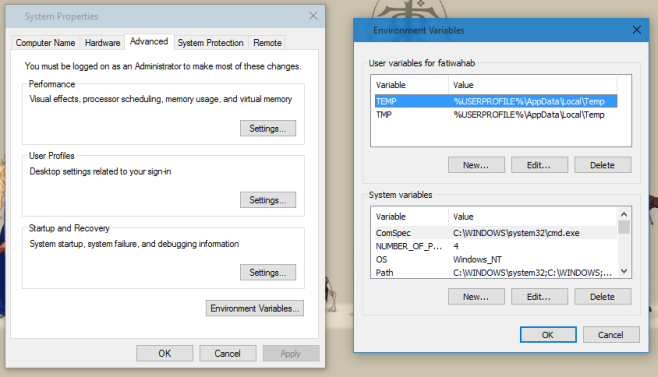
The System Properties window will open. Select the ‘Advanced’ tab and click the ‘Environment Variables…’ button at the very bottom. A new Environment Variables window will open. Select a variable to edit or delete it, or click the ‘New’ button to create a new variable.


