How to Customize Windows Server PowerShell Profiles
If you use PowerShell extensively on Windows Server, you may want to set up PowerShell Profiles. What are PowerShell Profiles? They are scripts that run each time a PowerShell session starts. By customizing your PowerShell profile, you can easily automate tasks on Windows Server and tailor your PowerShell environment to better suit your needs.

Before we begin
Before customizing your PowerShell profile on Windows Server, check if you already have a profile. To test for an existing PowerShell profile, launch PowerShell and execute the Test-Path $profile command. This command checks your system for existing profiles.
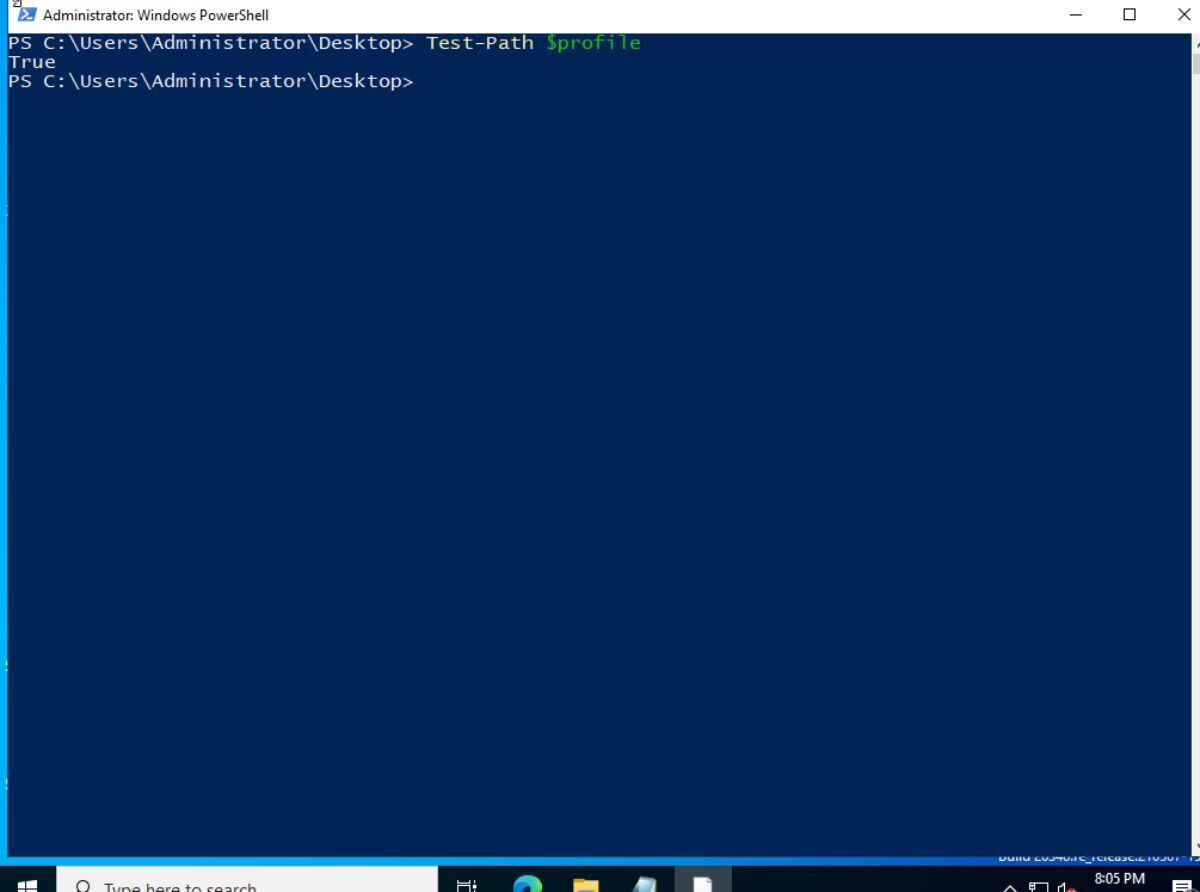
Test-Path $profile
If you run the above command in PowerShell on Windows Server and receive false, you do not have a PowerShell Profile. You must create a new profile. To create a new PowerShell Profile, execute the following New-Item command in a PowerShell window.
New-Item -path $profile -type file -force
After running the New-Item command, you will have created a new PowerShell profile. Now, verify that your profile is indeed on your Windows Server system by executing the Test-Path command. Instead of False, you will now see True, indicating that you have a PowerShell profile.
Test-Path $profile
How to edit your PowerShell profile
Now that you have created your PowerShell profile on Windows Server, it is time to edit it. To edit your PowerShell profile, open it in the Notepad text editor for editing. To open your profile in PowerShell, run the following notepad command.
notepad $profile
After running the above command, your PowerShell profile will open in Notepad for editing. Note that if you use a different text editor on Windows Server, you can replace notepad $profile with your-text-editor $profile.
Adding aliases
On Linux, you can add an “alias” to your Bash profile to make executing long or tedious commands easier. The same can be done in PowerShell. To add an alias to your profile, use Set-Alias. For example, to quickly open Notepad from PowerShell, add the following alias to your profile.
Set-Alias -Name np -Value 'C:\Windows\notepad.exe'
Once you have added the alias to your PowerShell profile, save it in Notepad. Then, execute the . $profile command to load your changes into PowerShell.
Adding functions
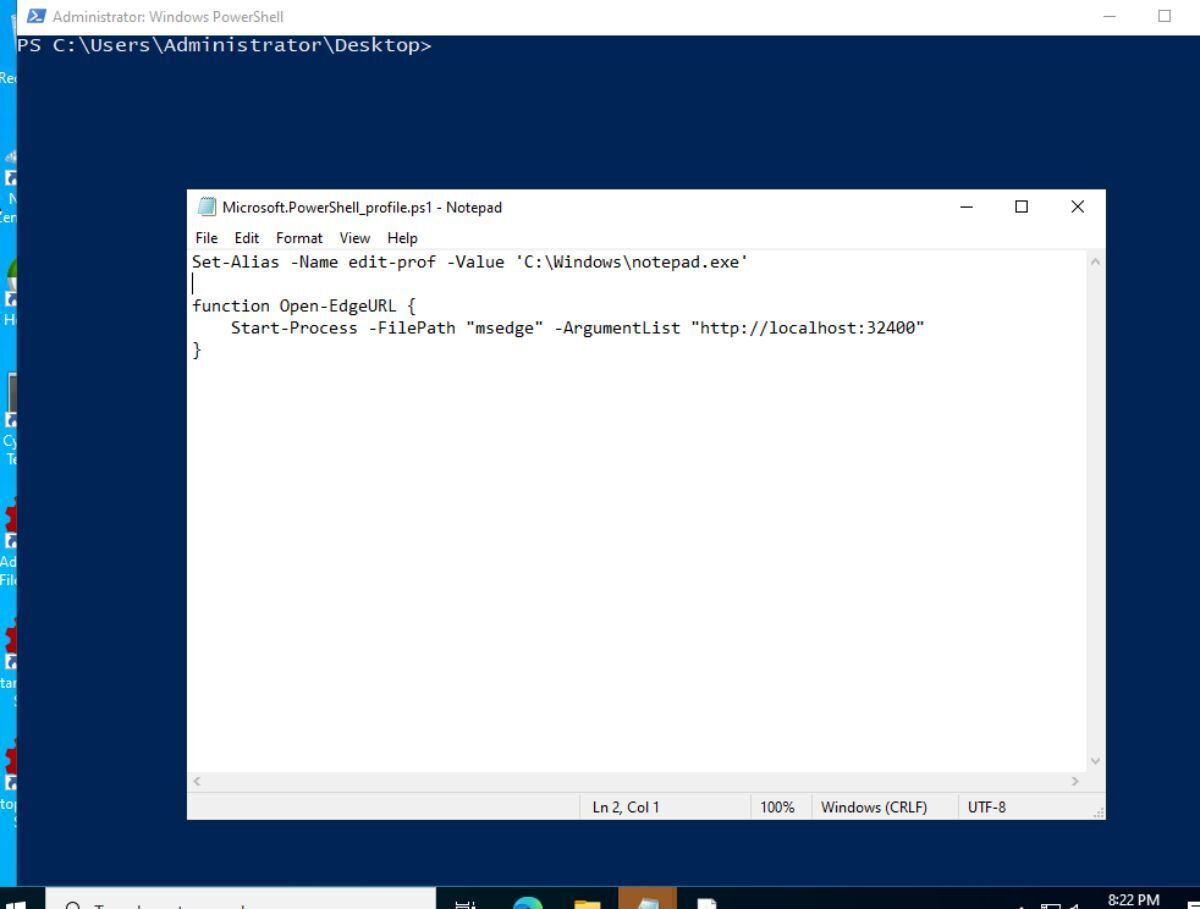
In addition to aliases, it is also possible to add functions to your PowerShell profile to perform specific tasks. For example, if you want to automatically launch a specific URL in Microsoft Edge (e.g., a web UI on your Windows Server). You can achieve that with a function. Make sure to modify the function below to suit your needs.
function Open-EdgeURL {
    Start-Process -FilePath "msedge" -ArgumentList "http://localhost:32400"
}
After adding your PowerShell functions to your profile, save it in Notepad. To apply the changes immediately, execute the following . $profile command.
. $profile
The possibilities are endless when it comes to PowerShell functions. These are just two basic examples, but if you want to incorporate more advanced functions into your PowerShell profile to enhance your Windows Server experience, check out Microsoft’s PowerShell documentation.
How to set custom working directories
Another useful addition to your PowerShell profile is the ability to set custom working directories. For example, if you have many PowerShell scripts (.
ps1 files) and want PowerShell to always load into that directory.
To always load PowerShell into a specific working directory, define it in your PowerShell profile using the Set-Location command. For instance, to always open PowerShell in C:\scripts, add the following code to your PowerShell profile.
Set-Location -Path "C:\scripts"
You can specify any location in PowerShell, and it is not restricted to the C: drive. It can be any volume and any folder. Simply follow the code pattern and modify it according to your needs.
Set-Location -Path "DRIVE_LETTER:\FOLDER\PATH\"
Once you’ve made your changes, run . $profile to use your newly edited profile.
How to check if you can execute scripts in PowerShell
It is great that Microsoft allows PowerShell users to add aliases to shorten commands, add functions for simplified operations, and more. However, it is essential to check if you can execute these edits to your profile using the Get-ExecutionPolicy command.
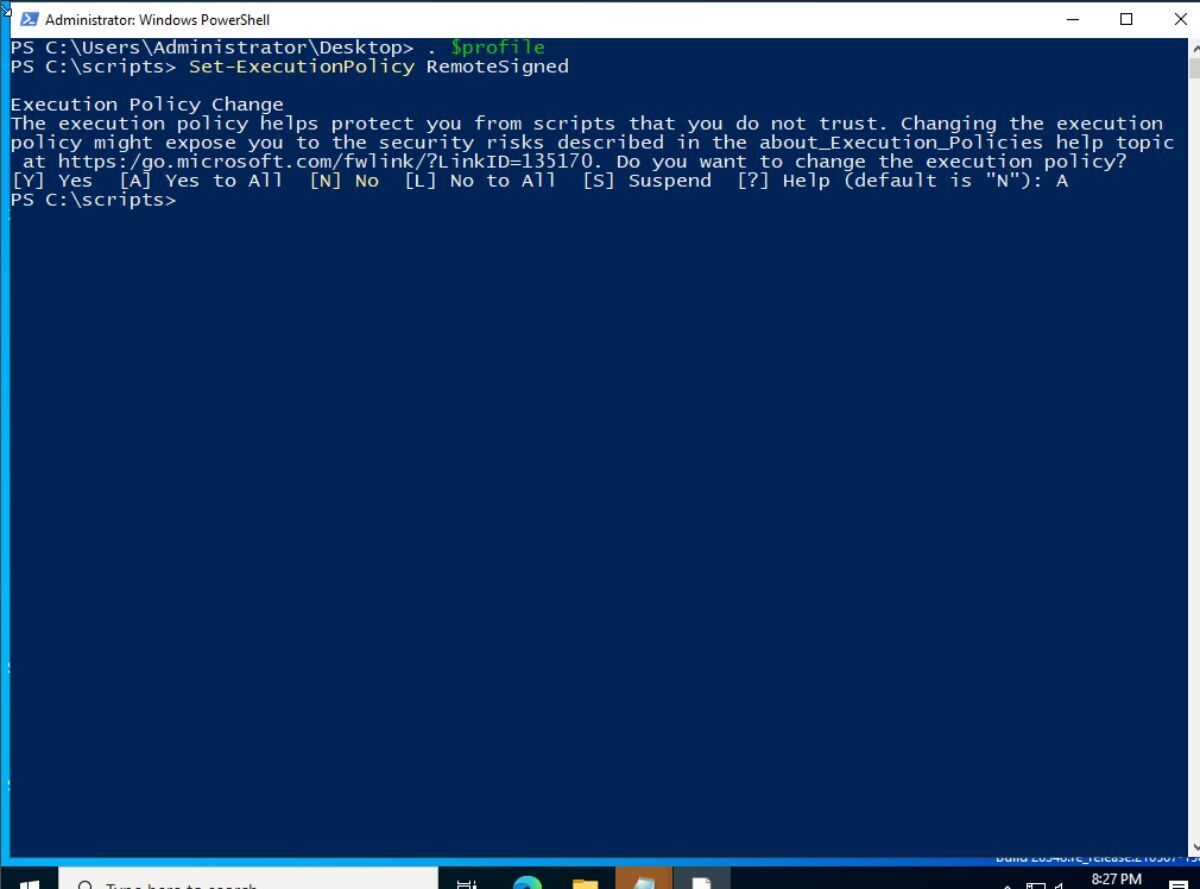
If your policy is set to “Restricted,” it may not be advisable to use any edits before contacting your system administrator. If you are the administrator, you can change it using:
Set-ExecutionPolicy OPTION
Restricted: No scripts can run on your system.AllSigned: Only scripts signed by a trusted publisher can run on your system.RemoteSigned: Scripts downloaded from the internet need to be signed, but local scripts do not need to be.Unrestricted: All scripts, remote or local, can run without restrictions. Use this option with caution.
