How to Customize Windows Server Active Directory
If you use Active Directory on Windows Server, this guide will help you customize it to better suit your needs. To get started, ensure you have the latest version of Windows Server and Administration privileges.
How to install the Active Directory Domain Services
You must install Active Directory Domain Services on your system. To do this, start by launching the “Server Manager” app. You can open “Server Manager” by searching for it in the Start menu.
Once you’ve loaded up the “Server Manager” app on your system, find the “Manage” button, and click on it with the mouse. After selecting this button, choose the “Add roles and features” option to open up the “roles and features” wizard
With the Roles and Features Wizard window open, click through and find the “Server Selection” option. You’ll then need to choose your server in the Roles and Features Wizard window. Click the “Next” button to move to the next page in the installer.
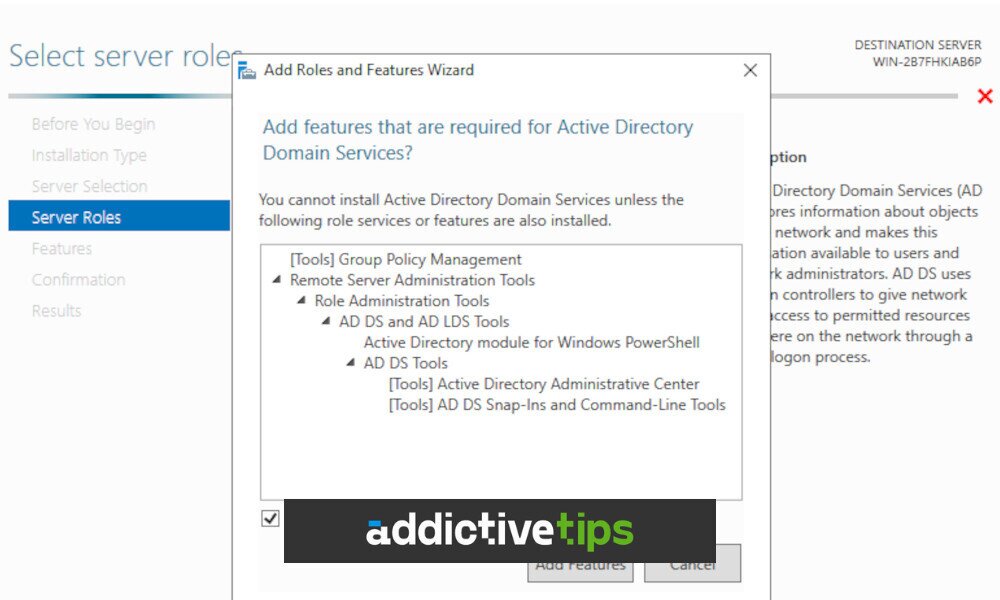
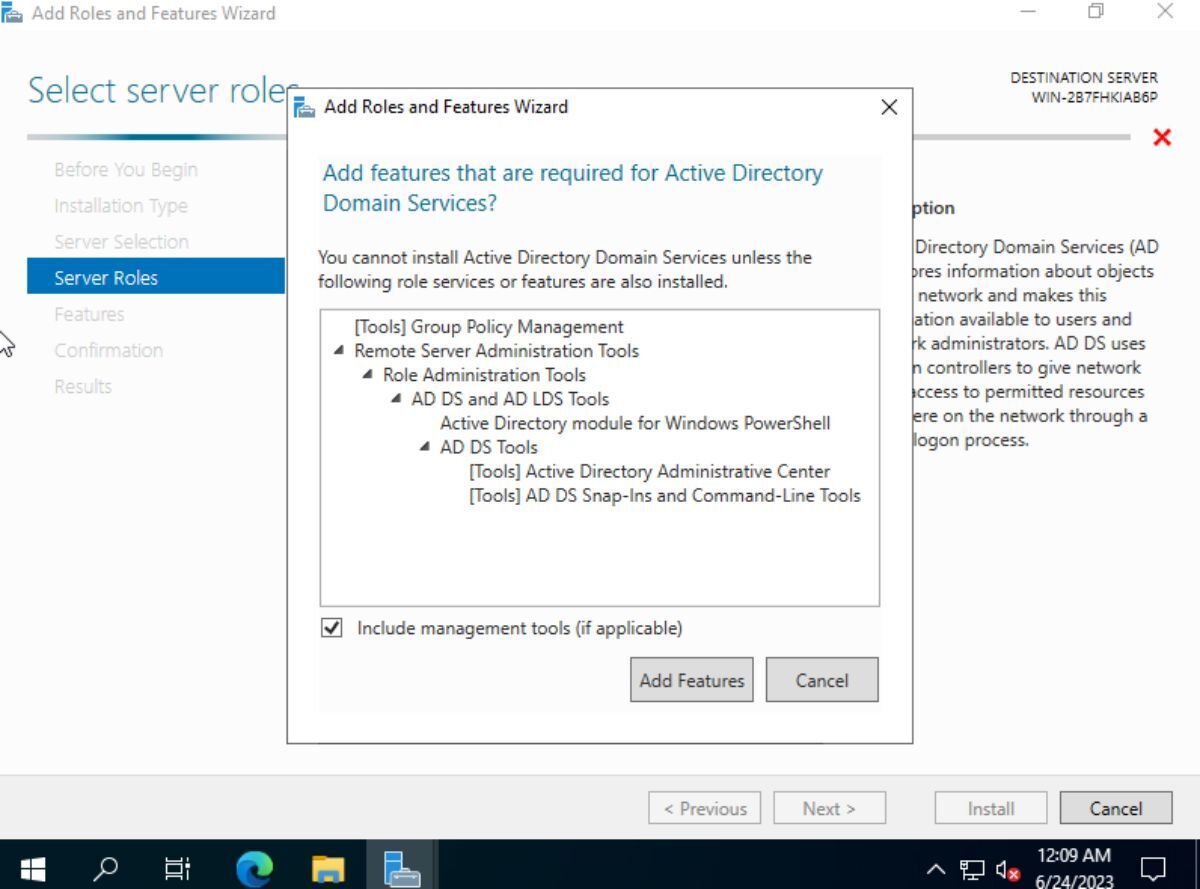
After selecting the “Next” button, you’ll be brought to the “Server Roles” page. On this page, locate “Active Directory Domain Services” and check the box next to it. When you select this box, you’ll see a pop-up.
In the pop-up, you’ll see a message. This message asks you if you’d like to “Add features that are required for Active Directory Domain Services?” Click the “Add Features” button. Doing this will install things like “Group Policy Management,” “Remote Server Administration Tools,” and much more.
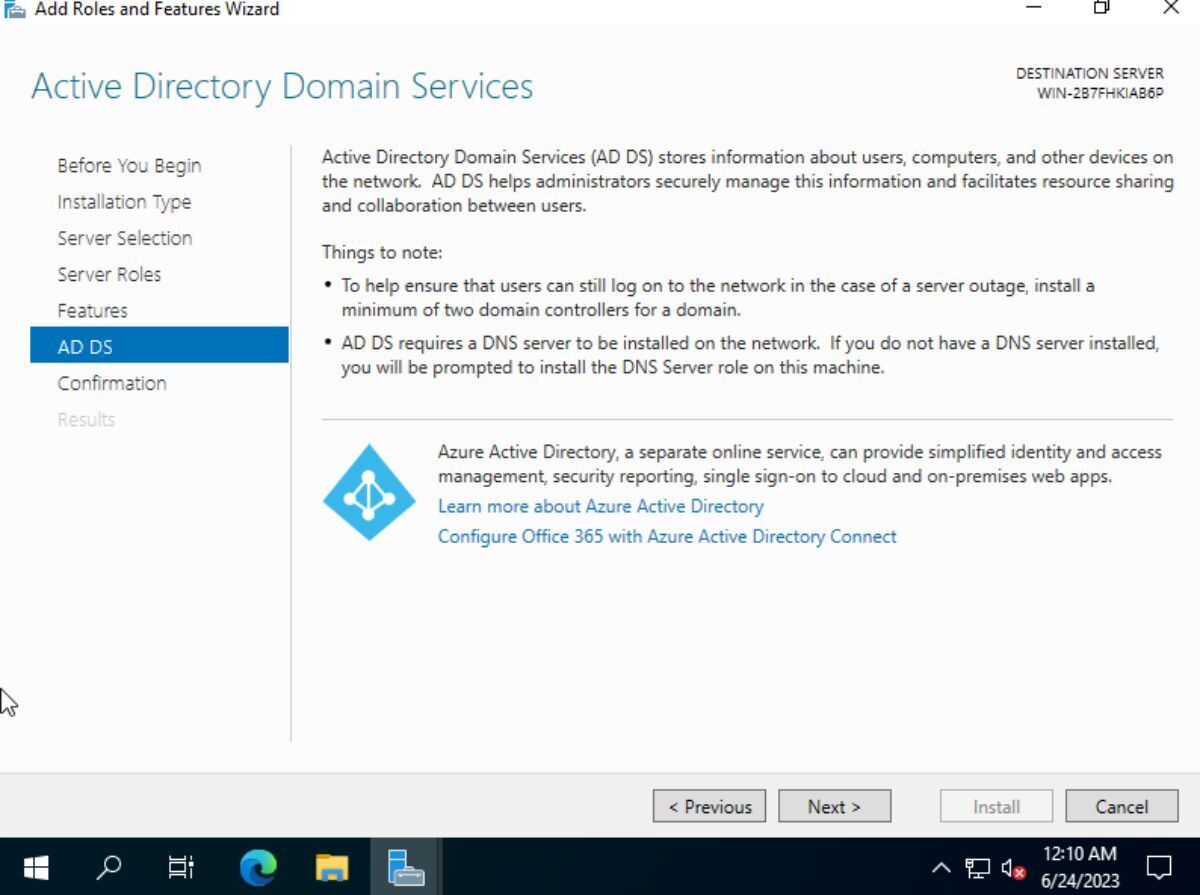
Select the “Next” button once you’ve selected the “Add Features” button. From here, go through the process of setting up and configuring Windows Server Active Directory Domain Services.
How to configure Active Directory
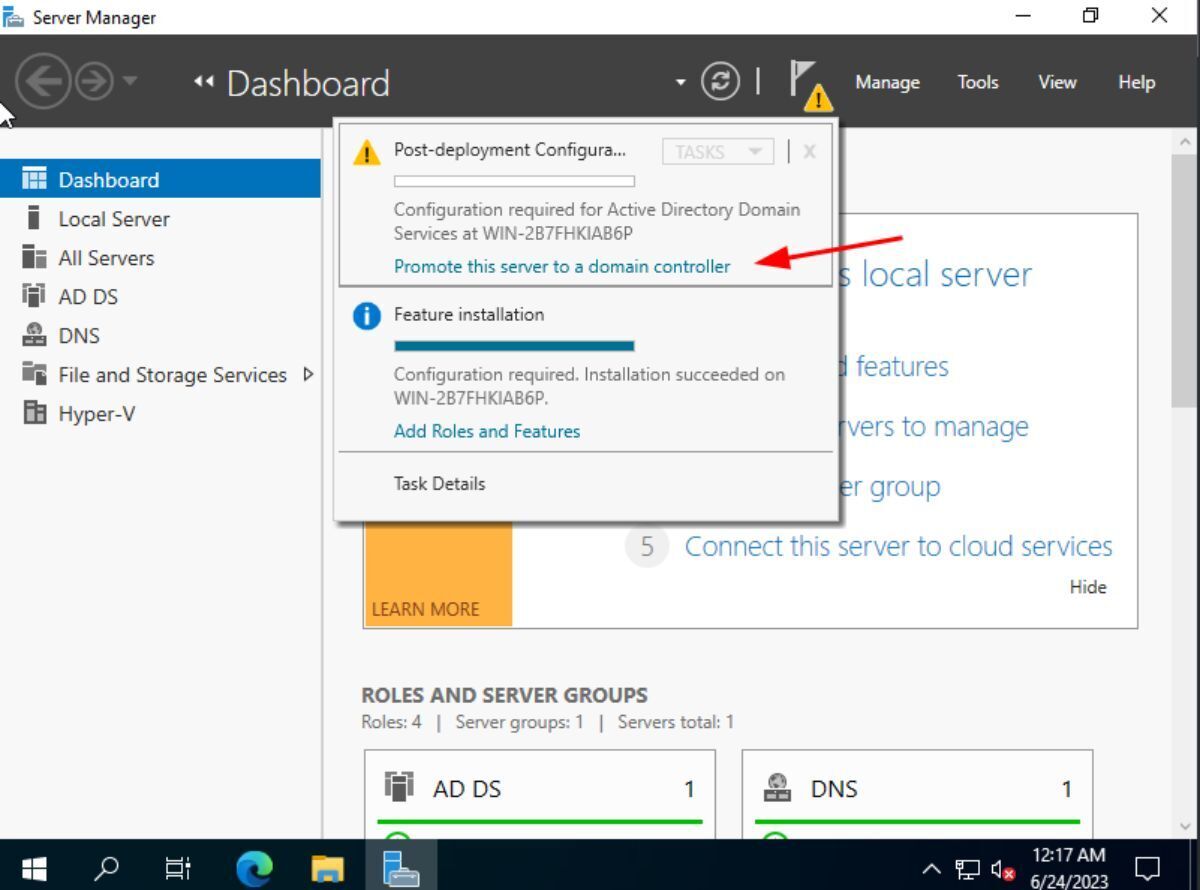
Once you’ve installed Active Directory Domain Services on your Windows Server system, you will have some post-configuration to do. Specifically, you have to set up your Windows Server as a “domain controller.”
To set up your Windows Server system as a “domain controller”, do the following. First, re-open the Windows Server Manager. Then, find the flag icon in the right-hand corner and click on it. Choose the option “Promote this server to a domain controller” with the mouse.
After clicking on the “Promote this server to a domain controller,” the “Active Directory Domain Services Configuration Wizard” window, you will have the option to do one of the following actions:
-
- “Add a new domain controller to an existing domain.”
- “Add a new domain to an existing forest.”
- “Add a new forest.”
If this is your first time configuring active directory, you must choose the option “Add a new forest.” In Active Directory, a “forest” is a collection of domain trees. If you’re not configuring Active Directory for the first time, choose one of the other options and enter your information.
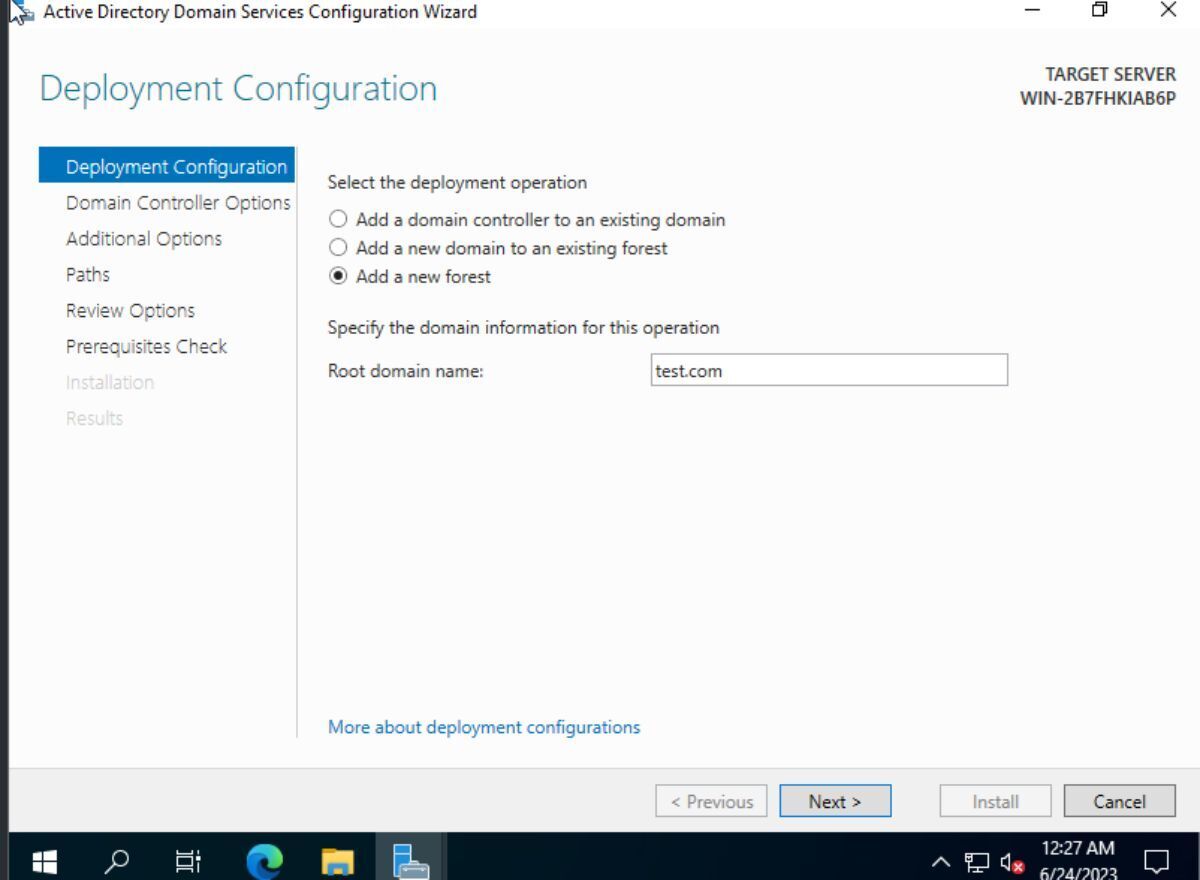
Once you’ve chosen one of the three options, you must provide a root domain name. Be sure to enter your primary network domain. When you’ve finished entering your domain, click the “Next” button to continue.
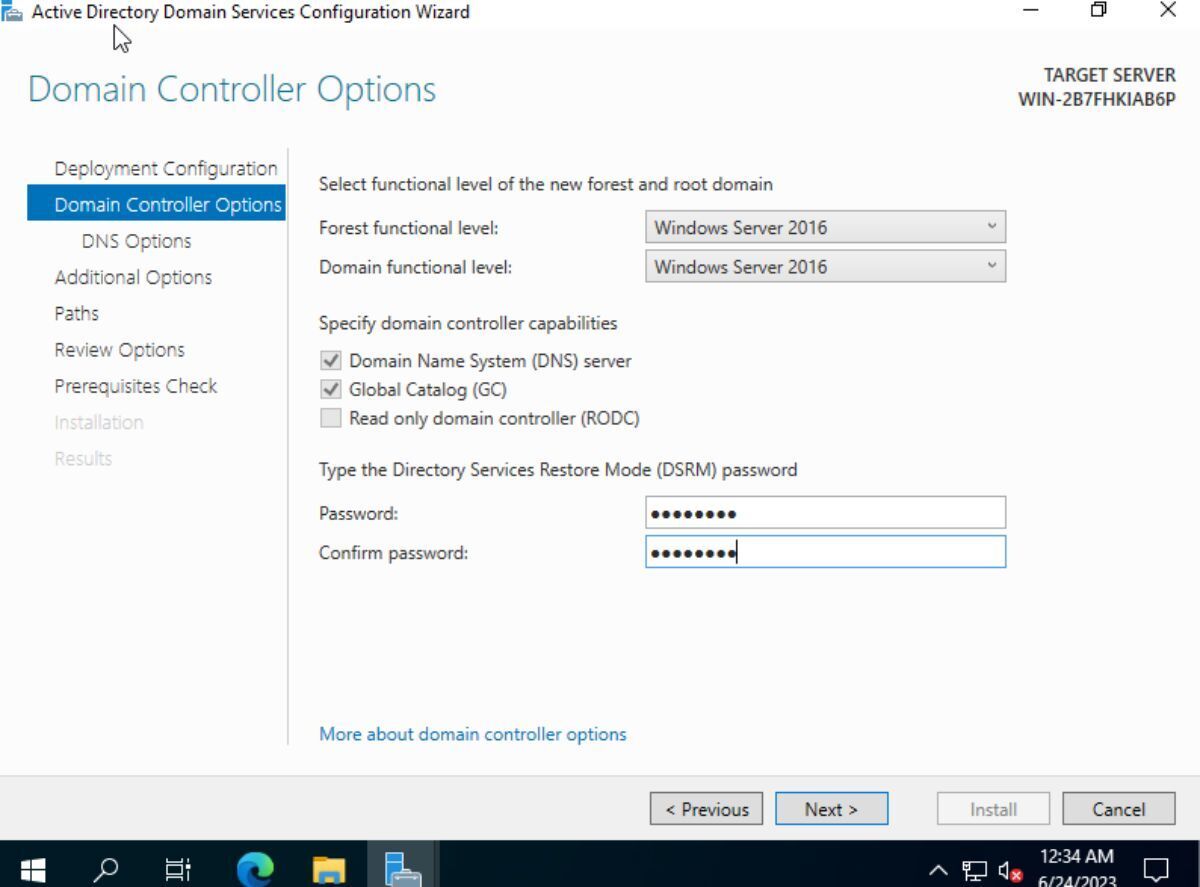
On the next page, you need to choose your “Forest functional level” and your “Domain functional level.” You must choose a level that matches the version of Windows Server domain controllers on your network use. For example: if you’re using Windows Server 2022, choose the highest available level. For Windows Server 2012, choose “Windows Server 2012,” etc. Keep in mind that enabling a higher level enables newer features, but restricts adding domain controllers with lower versions.
When you’ve selected your “forest functional level” and “domain functional level”, enter your DSRM password in the box, and press the “Next” button to move to the next page. Once this is configured, the “Active Directory Domain Services Configuration Wizard” will take you through additional options, and ask you to configure them.
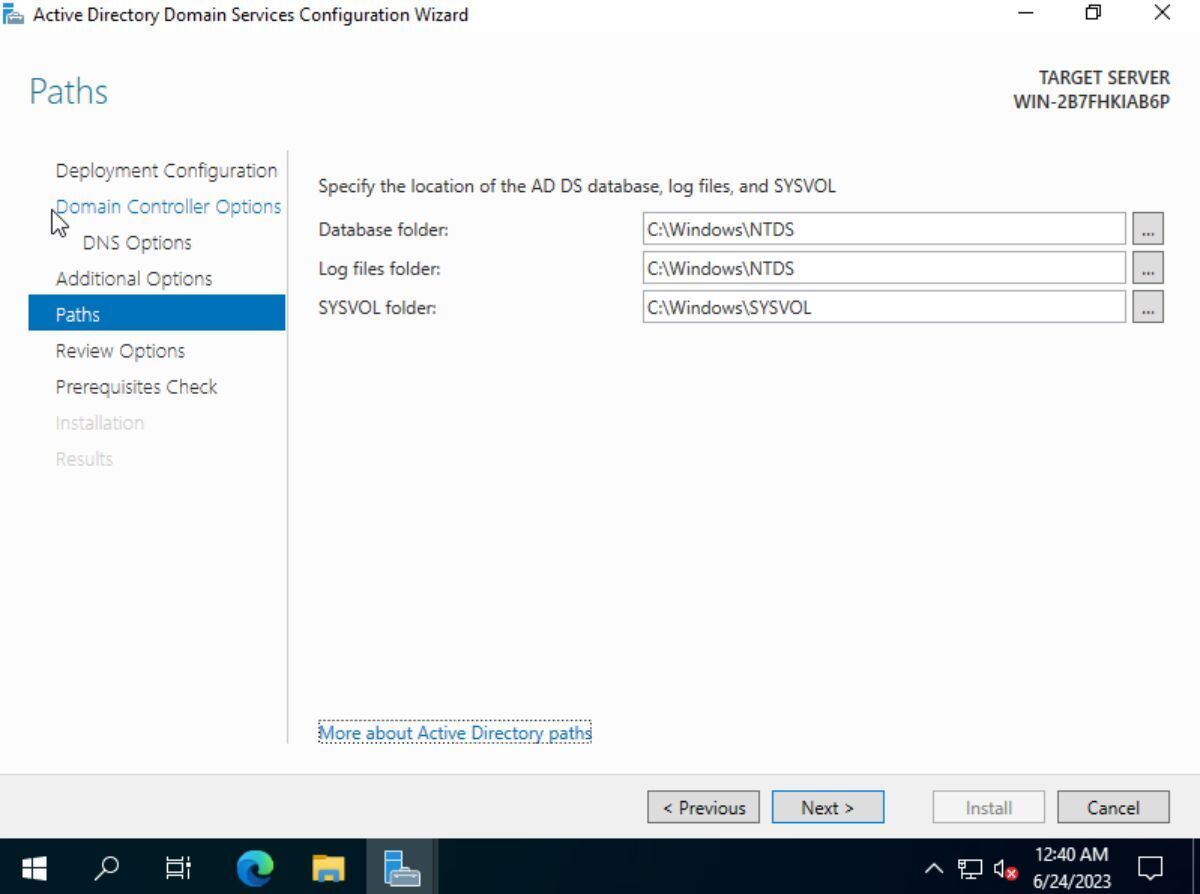
After “additional options,” you’ll need to specify your AD DS database folder, log files folder, and SYSVOL folder. By default, Windows will assign these folders. However, if you wish to change these paths, you can, using the UI. When done, click the “Next” button to continue.
On the next page, Windows will show you an overview of what it will do. Read this overview, and click the “Next” button to go to the “Prerequisites Check” page. Then, allow Windows to install any prerequisites it requires. Finally, click the “Install” button to install and promote your server to a domain controller.
How to customize Active Directory
To customize Active Directory, do the following:
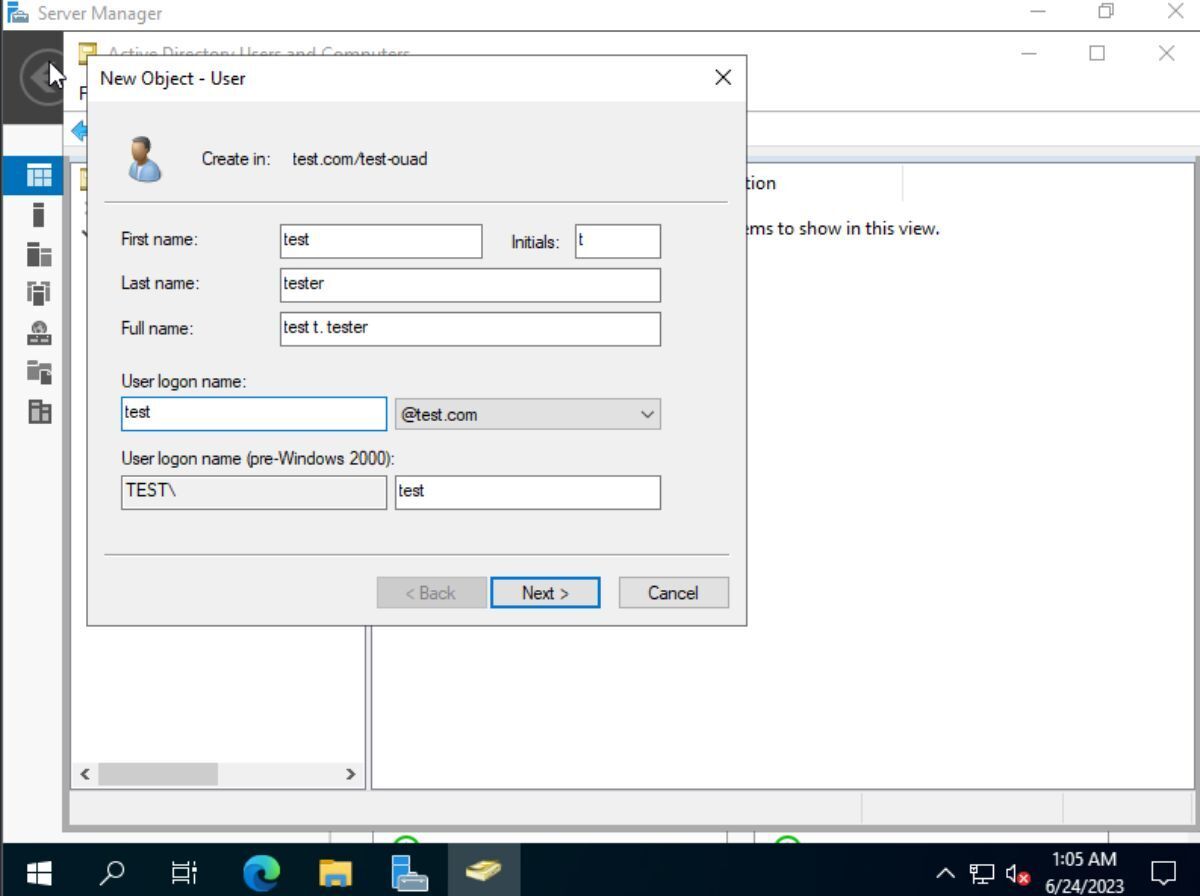
- Open up the “Windows Server Manager,” and access the “Tools” area. Then, select “Active Directory Users and Computers” in the available drop-down menu. Inside the window that appears, you will see a navigation panel. This panel will display your domain and “organizational units.”


- After selecting either “User” or “Groups,” enter the user or group information into the “New Object” window. Once you’ve added your user(s) or group(s) to your OU, you can right-click on it and select “Properties” to further customize them.

Repeat this process to customize your Active Directory on Windows Server with as many “organizational units” as you wish. Additionally, if you’re looking for even more information on customizing Active Directory, you should read Microsoft’s official documentation.
