How to check for open ports on your Windows Server
Regularly checking your server for open ports is critical when you’re a Windows Server administrator. This helps in assuring that your server is secure against attacks and intrusions while allowing data to move through the server safely. Thankfully, there are a few ways to check for open ports on Windows Server, and the procedure is simple. Here’s how to do it on your system.

How to check for open ports using Portqry
An easy way you can check for open ports on your Windows server is with the Portqry app. This app is from Microsoft, but it must be downloaded. It is a command-line utility.
To start, head to the official download page for Portqry. Once there, select the orange “Download” button. When you choose the “Download” button, the EXE file will download to your Windows Server.
When the download is complete, open Windows Explorer, and select the “Downloads” folder. Inside the folder, double-click on “PortQryV2.exe”. By selecting this folder, you’ll bring up the installer.
In the installer, you must agree to the license agreement. Select “Yes.” When you do, the installer will ask if you wish to install Portqry to C:\PortQryV2. Select the “Unzip” button to install the program to your Windows Server system.
Once the program is installed, launch Windows Powershell. After opening up the Powershell app, use the CD command to access the “C :\PortQryV2” directory. This folder is where your program was installed previously.
cd C :\PortQryV2
You can now run the PortQry help command to view what this program has to offer. Use the command below.
./PortQry.exe
Read over the help information that the command prints in Powershell. When done, follow the instructions below to learn how to use PortQry.exe to check for open ports on your Windows Server.
Checking ports
You can easily check ports using the ./PortQry.exe -local command. Running this command will show a list of all active ports. Ones that are reported as “LISTENING” are open.
How to check for open ports using Zenmap
Another way to check for open ports on Windows Server is with the Zenmap application. This is a graphical frontend for the nmap command line application.
If using the PortQry.exe application isn’t enough for you, this app is just what you need. However, you’ll need to install it first. To install Zenmap on your Windows Server, start by downloading the official EXE.
Head over to the official Nmap website, on the Zenmap page. Then, click on the “Nmap download page” link. On the download page, scroll down and locate the “Microsoft Windows binaries” area.
In the Microsoft Windows binaries area, download the latest stable release. You can download it by simply selecting the EXE link. When the download is complete, open Microsoft Windows Explorer, and select the “Downloads” folder.
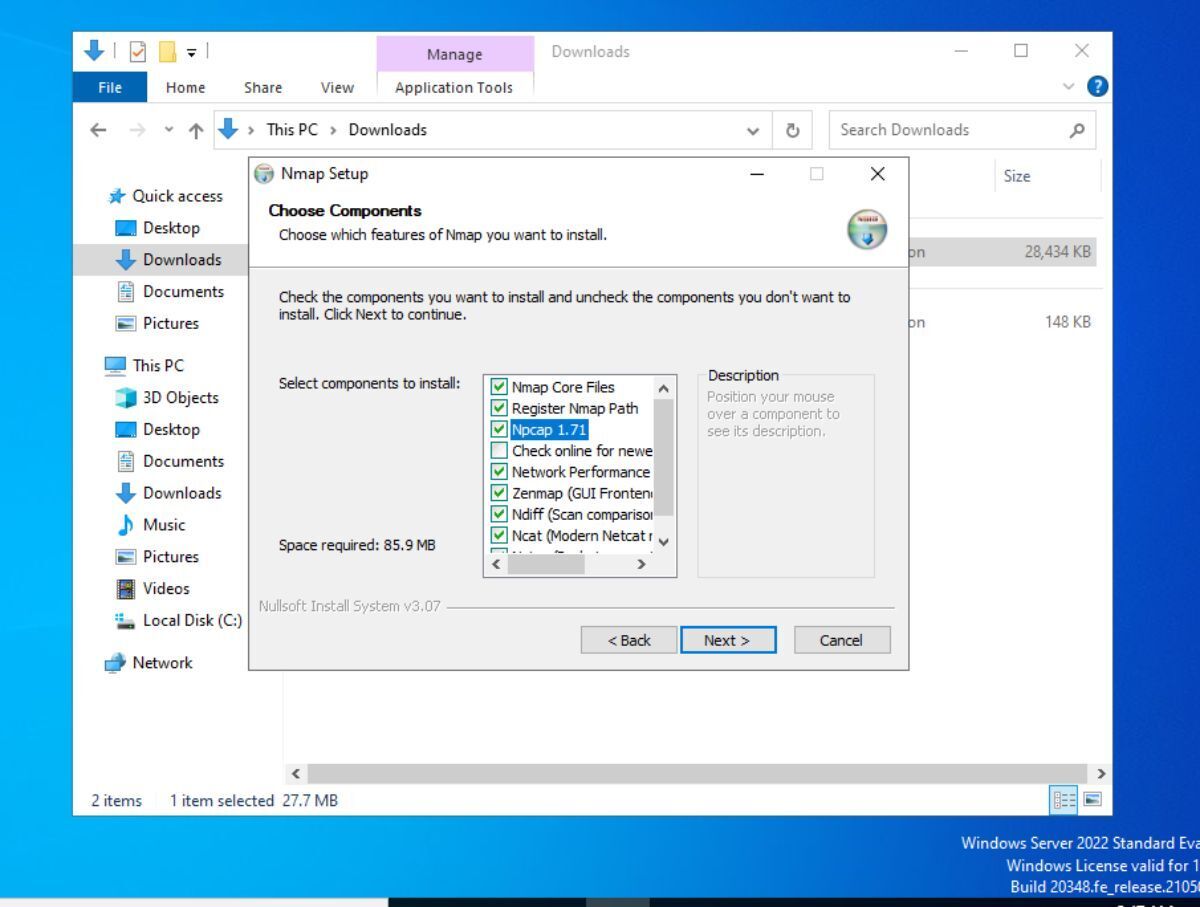
Inside the “Downloads” folder, double-click on the EXE file to launch the Zenmap installer. When you launch it, you will see “License Agreement”. You must read and agree to this to continue on with the installation process. Click the “I Agree” button.
After selecting “I Agree,” you must choose what components to install to your Windows Server via the installation tool. All boxes should be checked, including “Npcap.” If it is not, select it. Then, click the “Next” button to move to the next page in the installer.
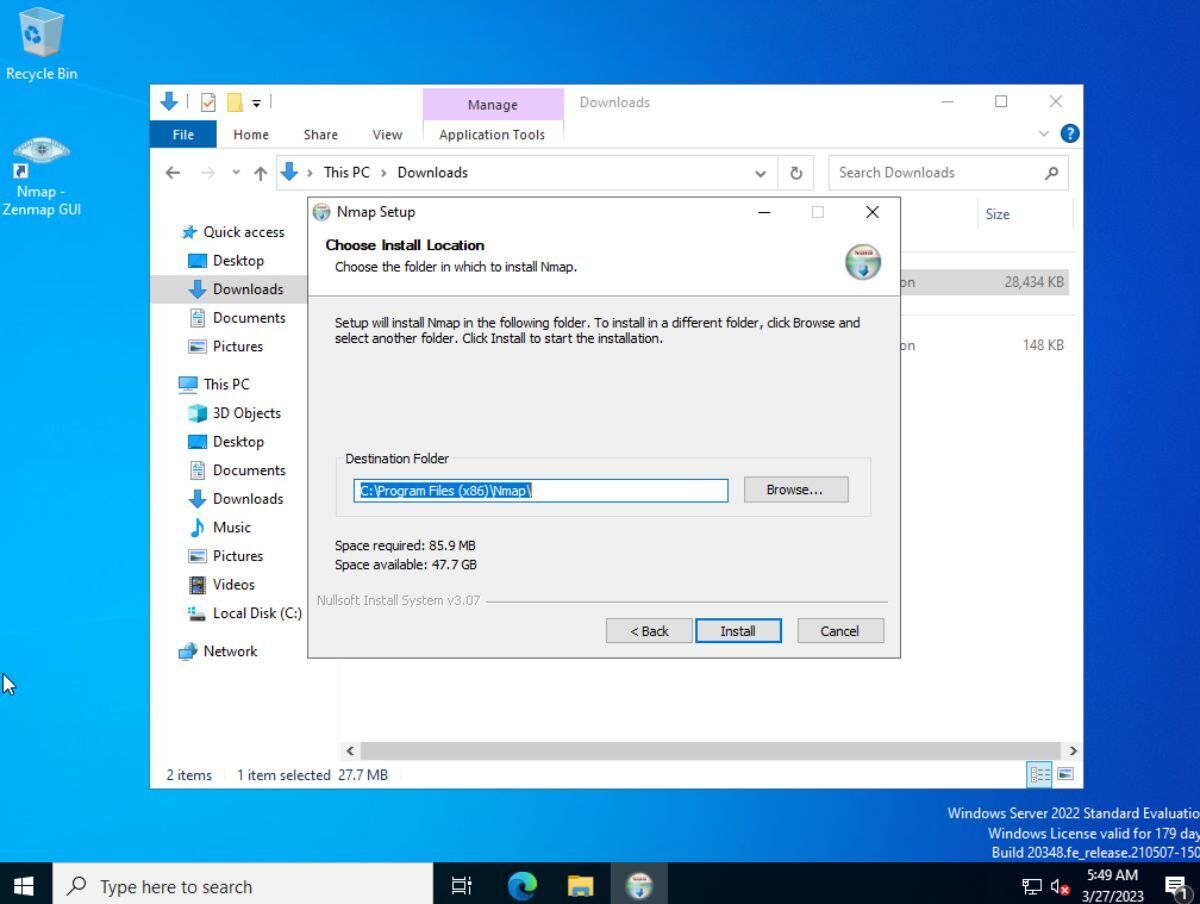
You’ll now need to choose where to install Zenmap on the Windows Server. By default, it goes to “Program Files (x86).” If you wish to change it, click the “Browse” button and choose a new location. When done, click “Install” to install the app.
How to use Zenmap to scan for open ports
If you wish to scan for open ports on your Windows Server with Zenmap, do the following. First, launch the app. Once open, find the “Target” text box, and select it with the mouse.
After selecting the “Target” text box, type in your Windows Server’s local IP or hostname, and set “Profile” to “Quick scan plus.” Or, for a more intense scan, select “Intense.” When the Zenmap app finishes doing a scan, click on the “Ports / Hosts” tab.
Inside of the “Ports / Hosts” tab, you’ll see a list of open ports that Zenmap was able to find. It’ll also show you the services associated with the ports, and the versions (if possible).
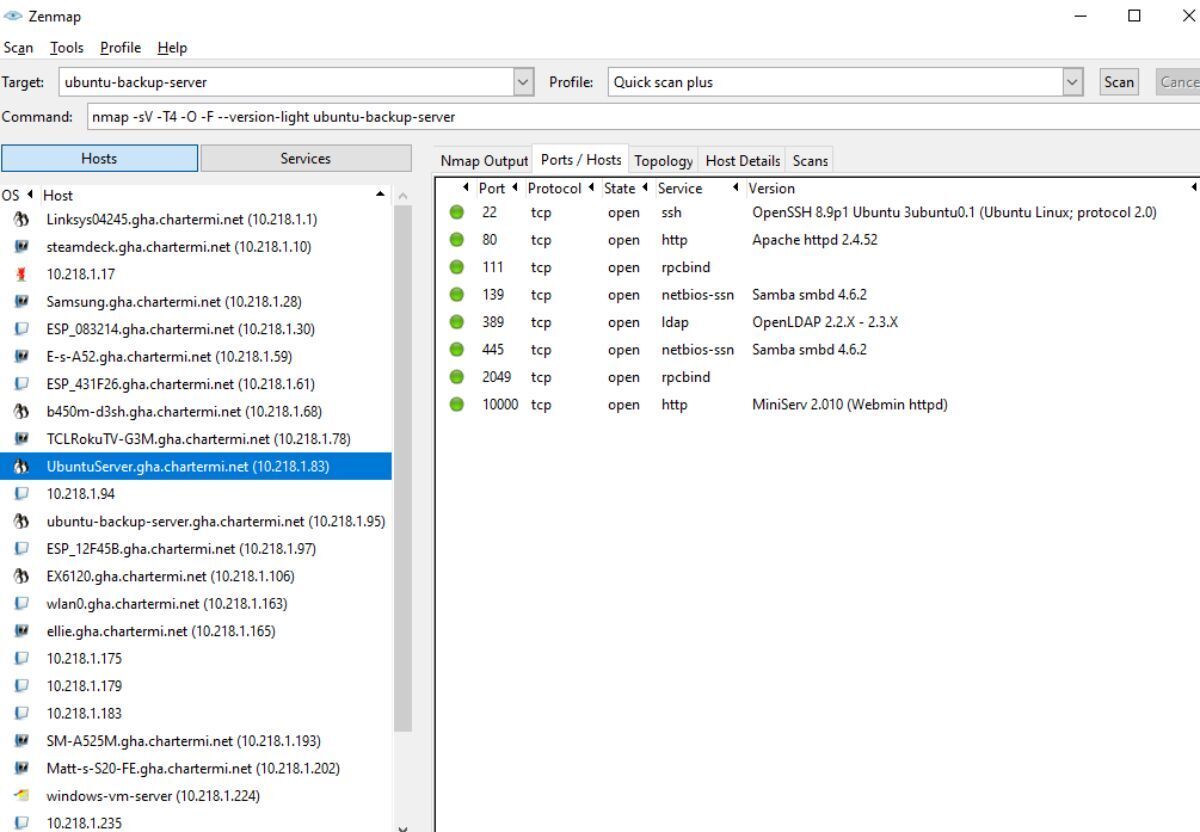
From here you can take this information and close the ports in your Windows Firewall. Or, alternatively, use these open ports to set up services that are accessible through it.
