How To Check Camera Make & Settings Used To Take A Photo
Learn by doing is possibly the best way to learn to do anything. It’s also not the smoothest way to learn a new skill unless you find a really great starting guide. Photography is one skill that you can easily develop just by taking more photos (selfies not included) and once you’ve got some basic things like the rule of thirds figured out you want to go deeper. You want to see what cameras are out there and what they can do. You want to see what settings, the level of exposure, focal length, exposure time, etc are used to capture a particular setting and what works best for landscapes. For photos you might find online on sites like Flikr, the information might be made available by the owner themselves but if not, and if it hasn’t been wiped, here’s how you can check it yourself without needing any extra apps. This works on both Windows and OS X.
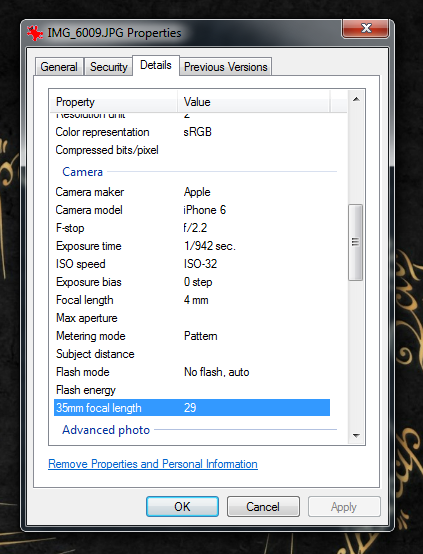
Find a photo that you like and would like to know more about from a photographer’s point of view. You can find great photos on Flickr, or Instagram. Download it to your desktop. Right click the image and on Windows select ‘Properties’ from the right-click context menu. In the properties window, go to the Details tab and scroll down to the ‘Camera’ section where you can see which camera was used to take the photo and other camera settings. These include ISO speed, exposure time, F-stop, and more.
For photos taken with a camera and later edited or manipulated with apps like Instgram, the information is retained by default unless you explicitly exclude them when you save it.
On OS X, follow suit only instead of clicking Properties in the right-click context menu, you will click ‘Get Info’. In the window that opens, expand the More Info section to view camera details and settings. Try replicating those settings on your camera when you take photos next time and see how well they work on your subject and with your camera.


How do you connect this camera to your phone