How To Change Where OneDrive Saves Files In Windows 10
OneDrive comes pre-installed on Windows 10. It won’t sign you in even if your PC is linked to your Microsoft account but once you do sign in, it by default puts your OneDrive folder at the root of your User folder. OneDrive will then sync files to that folder and depending on how big and how many files you’ve synced, it might take up substantial space on your hard drive. If you prefer to move the files to a different drive and change where OneDrive saves files, here’s how you can do just that.
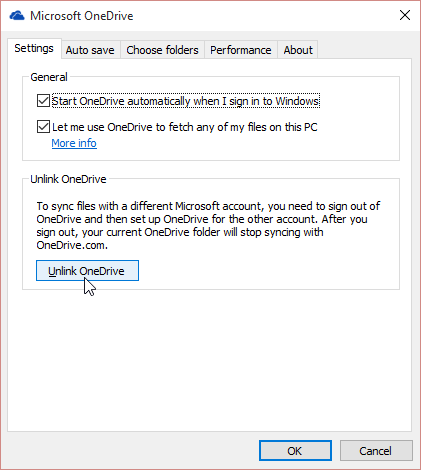
Right-click the OneDrive icon in the System Tray and select Settings.
Unlink OneDrive from the PC.
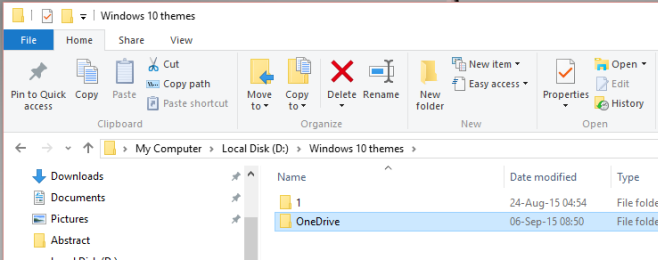
Open your OneDrive folder at its location. Select it and move it to a new place using the ‘Move to’ button at the very top of the Home tab in the explorer ribbon.
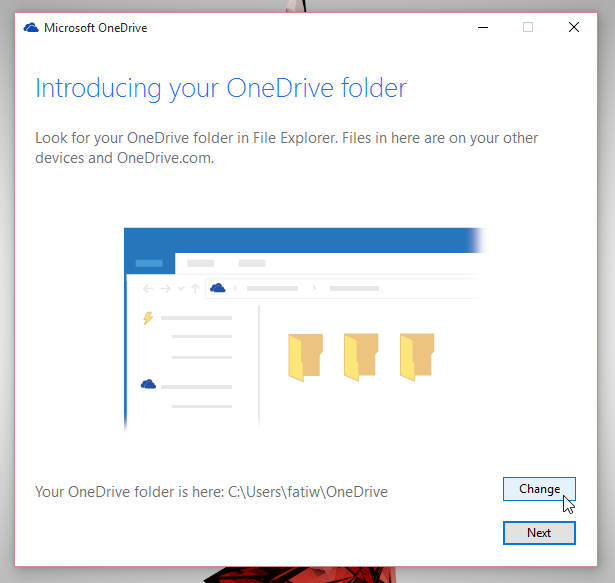
Next, sign in to OneDrive again. When you sign in, OneDrive will ask you where you want to save folders to with a suggested location (your User folder) already selected. Instead of accepting this suggested location, click ‘Change’ and then navigate to the where you moved the OneDrive folder to in the previous step.
The process isn’t exactly the easiest and Microsoft should have included an easy way to change the location of the OneDrive folder. That said, if you’re setting up OneDrive for the very first time, you have complete freedom to select any drive or folder as the destination for the OneDrive folder. It’s only the change that’s complicated and needs fixing on Microsoft’s part.


Yeah, you obviusly have not tried this on Windows Home. You get this Your OneDrive Folder can’t be created in the location you selected. Please choose a different location.”
I have this same problem. After 6 months maybe you know the solution?
Yes, it has sorted itself out through updates. If you still can’t do it. Reload Windows with the latest version. It works now.