How To Change The Power Plan From The System Tray In Windows 10
Windows has different power profiles that users can set up. A power profile lets you quickly change your system’s settings between low and high power usage. Some of the variables in a power plan include screen brightness, display timeout, system sleep, and more. Users can customize a power plan to suit their needs.
There are three power plans in Windows 10; high performance, balanced, and power saver. In order to switch to a different power plan, a user has to open the Control Panel app by right-clicking the battery icon in the system tray. In the Creator’s Update, Microsoft is going to add a slider to the battery icon’s menu to make this easier. PowerPlanSwitcher is a Windows UWP app that gives you this feature right now. It lets you change the power plan from the system tray to any one of the three default plans. Here’s how it works.
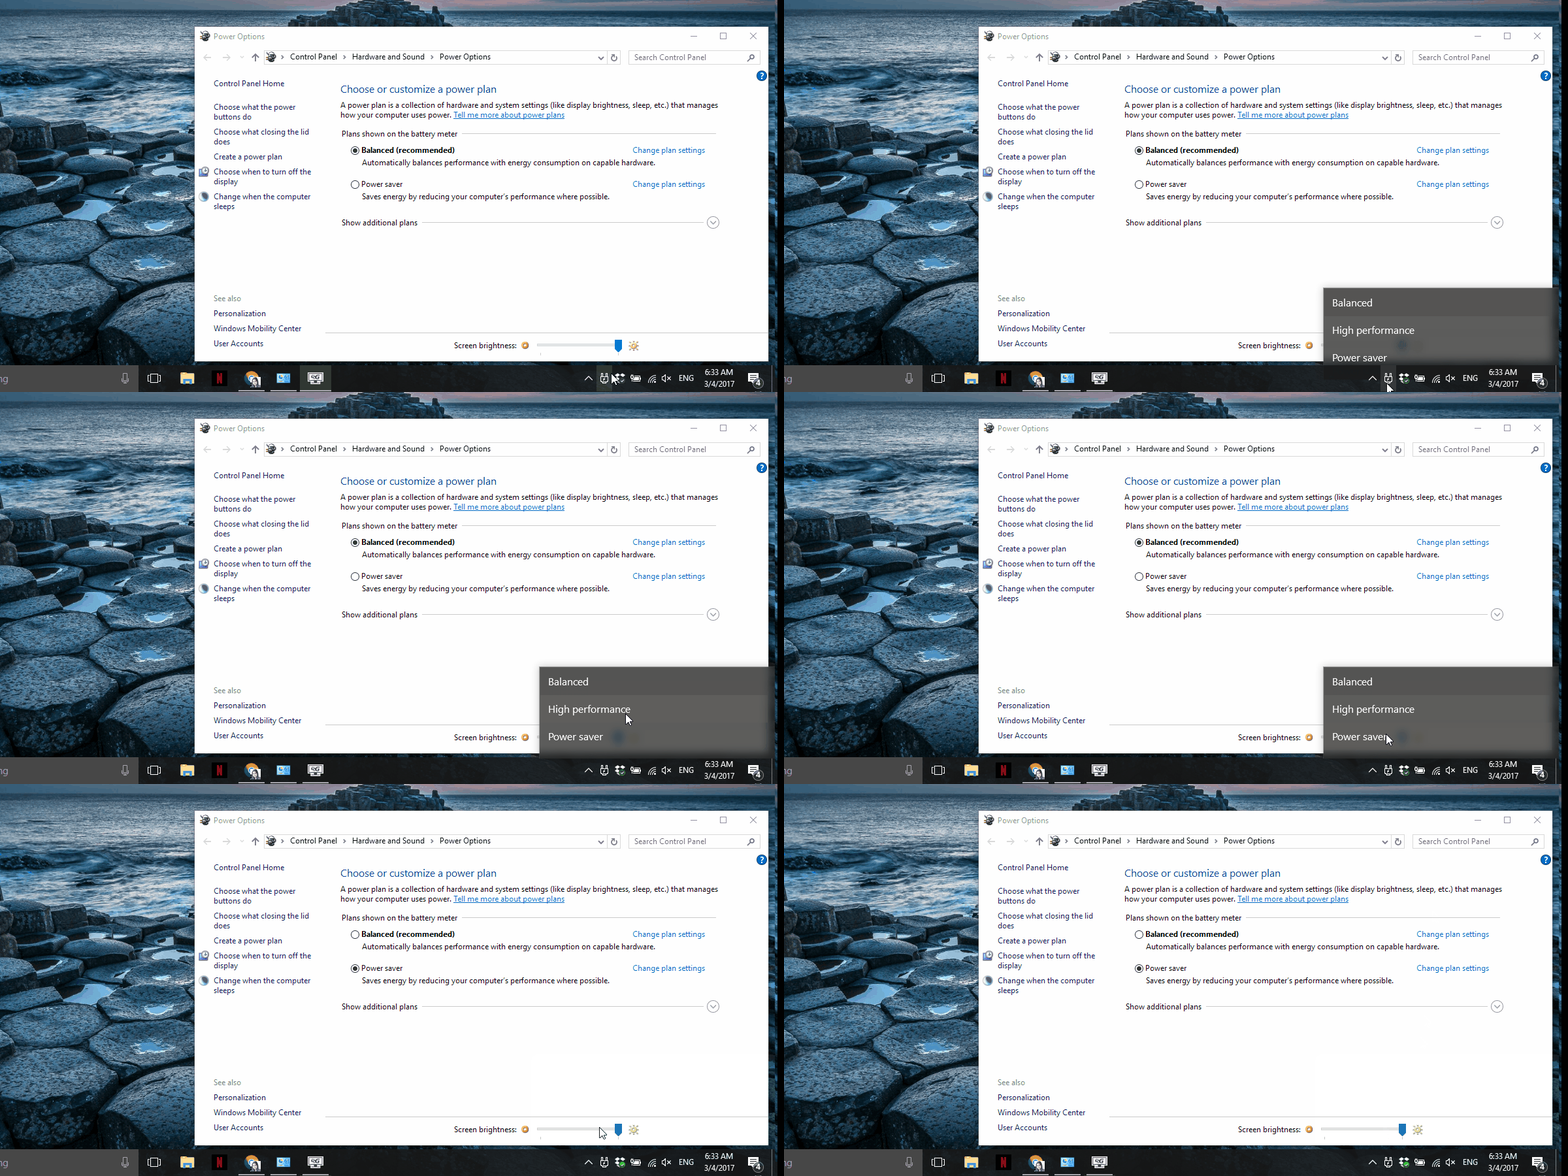
Download and run PowerPlanSwitcher. It will add a power plug icon to the system tray. Click it, and a menu with the three basic power plans will appear. Select the plan you want to switch to.

We should mention that you do not have to open the Control Panel app at all when you switch plans. The above GIF is simply meant to show the power plan switching.
On the surface of it, this app is very simple, but it’s got a few more tricks up its sleeve. Right-click the power plug icon to access additional features.
PowerPlanSwitcher can automatically change your power plan when you plug or unplug your laptop. You can select which power plan your laptop should run on when connected to a power source or a battery.

The power slider that Microsoft will add with the Creator’s Update doesn’t let you select one of the three power plans built into Windows. Instead, it lets you change the overall power settings on a scale that ranges from best battery life to best performance. The slider will make it easier to change the power plan from the system tray, but it won’t give you these three options to choose from. You might find, even after the Creator’s Update has been released, that PowerPlanSwitcher is the superior option.
The app’s UI ties in nicely with Windows 10. The color of the menu will change to match the accent color you have set. Performance-wise, the app is fast. There is little to no delay between the plans switching. You cannot turn on Battery Saver using PowerPlanSwitcher. To do that, you will have to use the dedicated quick setting button in the Action Center.
Install PowerPlanSwitcher From The Windows Store
