How to Change Mouse Cursor Color on Windows
As you use your PC over time, you may realize that you need to change your cursor’s color — not merely for aesthetics, but to enable your mouse cursor to match with your new desktop theming or the window of specific programs.
You’d agree that the mouse cursor is sometimes difficult to see against specific backgrounds due to its size or color. And if that’s anything to go by, you need to dive into settings to customize it into something more suitable.
Here, we discuss the available options to change cursor size and color. Read on below to find out how.
How to Change Cursor Color and Size
You can change your mouse color in different ways in Windows Settings App. There’s also the option to change the appearance of an individual cursor, which you can access via the Mouse Properties dialog box in additional settings.
To change the mouse cursor color,
- Press Windows key + I to launch the Settings app
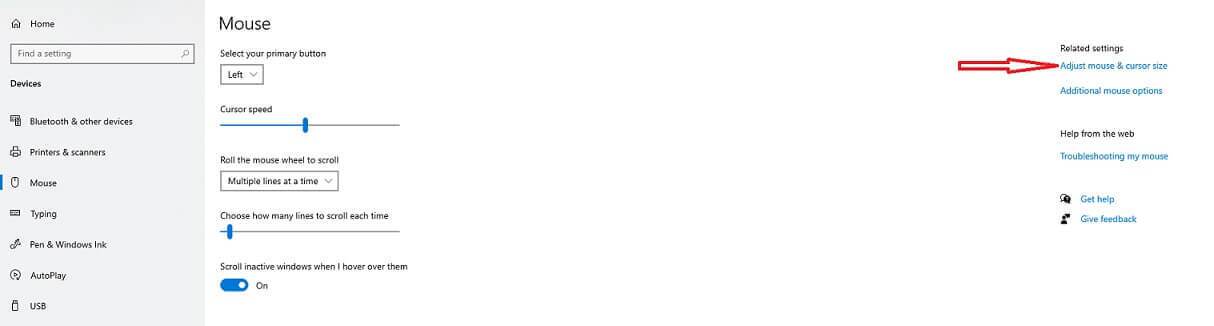
- In the Settings window, navigate to and click Mouse on the right pane
- Next, on the right pane, select the Adjust Mouse & Cursor Size option under Related Settings
- Use the Change Pointer Size to adjust cursor size to your taste
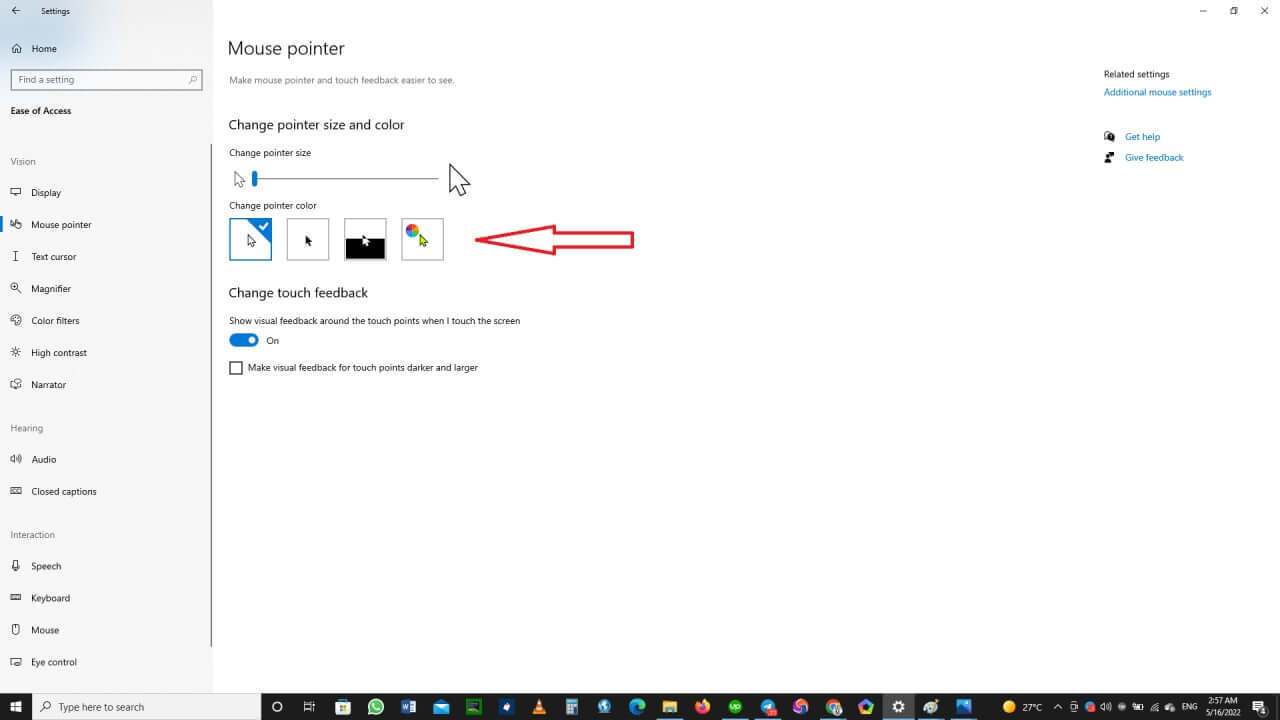
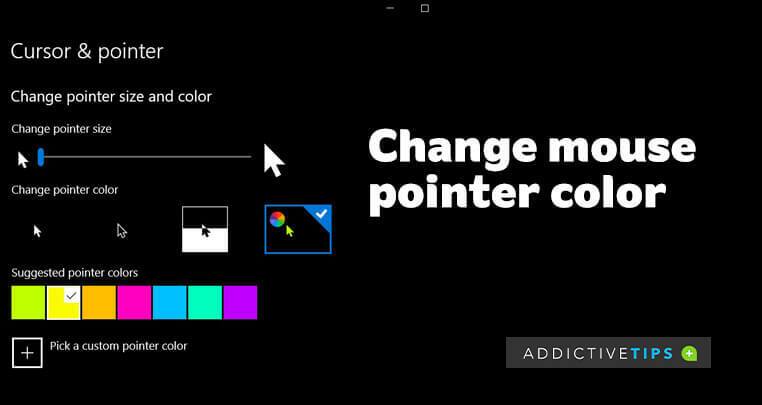
- Secondly, click on any of the tiles right under Change Pointer Color
You’ll find four tiles in total here, but we’re interested in the fourth one as it enables you to customize the cursor and pointer to any color of your choice. The first and second tiles are your typical white or black pointers. The third tile is an inverted one, and it changes to black or white with an inverted background based on your current window.
If you selected the fourth tile,
- Pick any color of your choice under the Suggested Pointer Colors
- Alternatively, you can click the + icon to Pick a Custom Pointer Color and then select a color of your choice from the provided palette
- Click Done once you’ve customized your pointer color
If you’d like to change the look of your cursor even further, use the following method in this article.
How to Change Your Cursor Look with Additional Mouse Options
Under the Related Settings on the Mouse window, you’ll find additional settings for your mouse cursor. One of these is changing the schemes and how the colors you choose for your cursor appear. To use this option,
- Press Windows key + I to launch the Settings app again
- Go to Devices > Mouse > Additional Mouse Options, then a Mouse Properties mini window will open
- In the Mouse Properties window, navigate to the Pointers tab
- Use the drop-down under Scheme to select any scheme of your choice. You can use the Customize box to see a preview of each of the schemes
- Lastly, click Apply and then OK to save all changes
Final Notes
That’s all about changing your mouse cursor color on Windows. If you’d like to go back to your default mouse color and scheme, follow the above steps and reverse all changes made. I do hope you find this tutorial helpful. And if you need any further assistance, use the comments section below.
