How to backup your Windows Server to the cloud
Need to create a cloud backup of your Windows Server? It’s easier than you think. In this guide, we’ll show you how to create a cloud backup on Windows Server using Duplicati.
How to install Duplicati on Windows Server
The best way (and free way) to do easy backups on Windows Server is Duplicati. It’s an open-source tool and lets users upload their backups to various cloud providers like Dropbox, Box.com, Backblaze, Google Cloud Services, Google Drive, etc.
To install the Duplicati app on your Windows Server, head over to the official website. Once on the website, find the “Download Duplicati 2.0” button, and click on it with the mouse.
After selecting the “Download” button, you’ll start the Duplicati download process. When the download is complete, open up the Windows Explorer app, and double-click on the EXE file to open up the installation tool.
Once the installation tool is open, use it to install Duplicati on your Windows Server. This installation process should be quick. When it is complete, the default browser on your Windows Server will open up to the following URL.
localhost:8200
How to backup your Windows Server to the cloud
To create a backup of your Windows Server to upload to the cloud, access Duplicati via the following URL. This URL will give you access to the Duplicati web front end.
localhost:8200
Once you’ve accessed the Duplicati web interface, click on the “Menu” button in the top-right corner. When you select this button, options will appear. In this menu, select the “Add backup” button. Selecting this button will allow you to create a new backup.
After selecting the “Add backup” button, select the “Configure a new backup” button. Then, click on the “Next” button to move to the next page in the configuration wizard.
On the following page, you’ll see “General backup settings.” Locate the “Name” text box, and click on it with the mouse. Then, enter the name of the backup in the “Name” box.
After entering the name of the backup, find the “Description (optional)” text box, and enter a descriptive summary of your backup. This step is optional, but filling it out is helpful, especially if you need to know details about your backups when using Duplicati.
When you’ve entered your description, move on to the “Encryption” text box. This section will allow you to choose what type of encryption you’ll use when backing up with Duplicati. Choices are “No encryption,” “AES-256 encryption, built-in,” and “GNU Privacy Guard, external.”
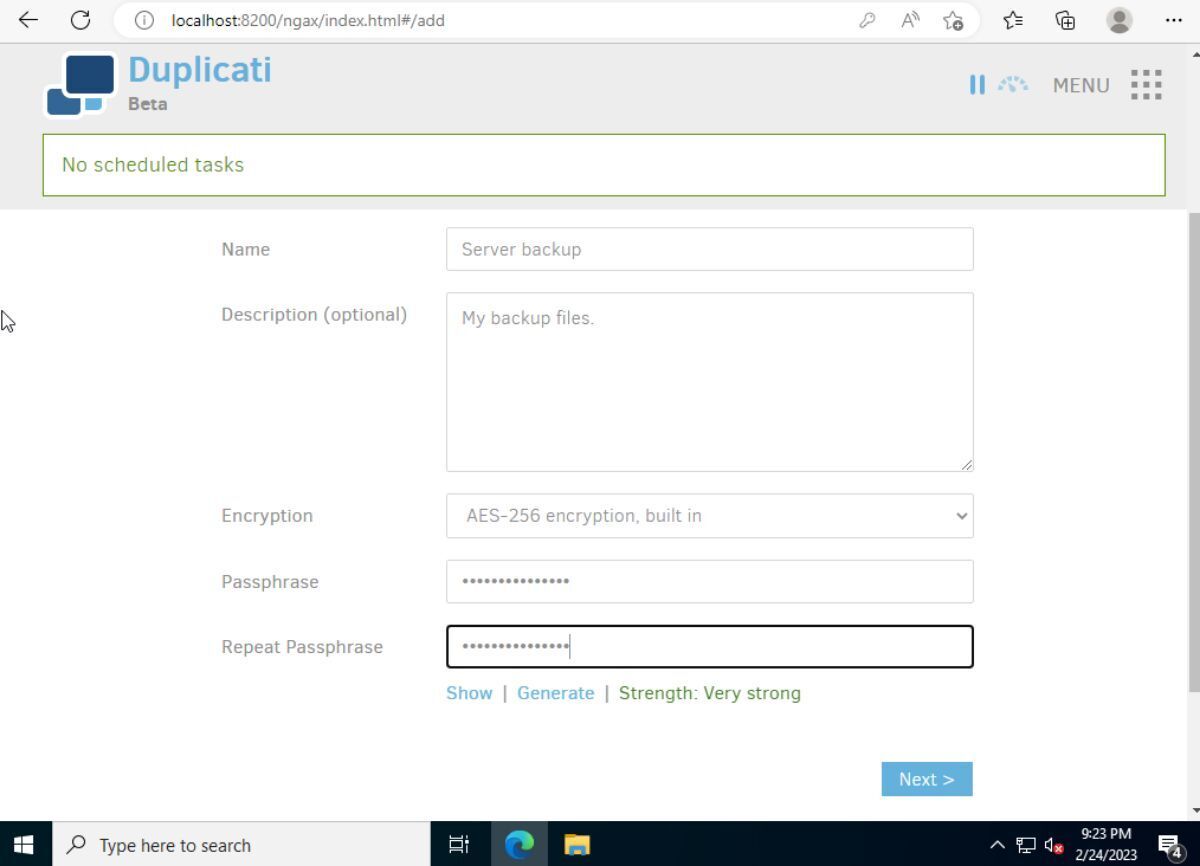
When you’ve chosen your encryption type, find the “Passphrase” box, and enter a secure password. Then, find the “Repeat Passphrase” box, and re-enter the password. When you’ve finished entering your password, click the “Next” button.
After selecting the “Next” button, you’ll be taken to the next page in the backup process. On this page, you’ll need to choose where to store your backup. To back up your server to the cloud, find the “Storage Type” section, and click on it with the mouse.
When you’ve selected the “Storage Type” drop-down menu, locate your preferred cloud provider. Your cloud provider choices include “Azure, B2 Cloud Storage, Box.com, Dropbox, Google Cloud Storage, Google Drive, HubiC, Jottacloud, Mega.nz, various Microsoft services, OpenStack, Rackspace, Rclone, S3 Compatible, Sia Decentralized Cloud, and much more.
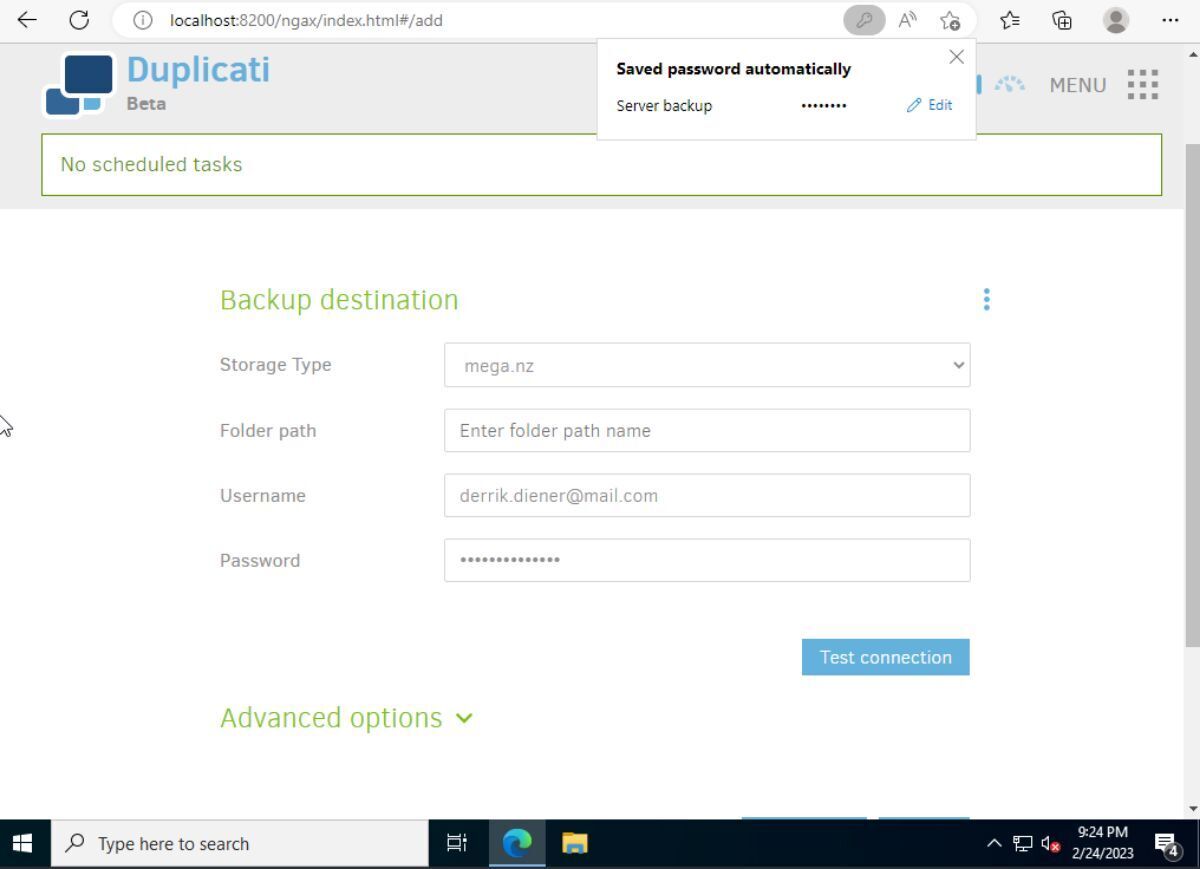
Once you’ve chosen your preferred cloud provider, enter the details, such as “Folder path, username, password, keys, etc. When you’ve filled out all of your information, click the “Test connection” button. Assuming your connection works, click the “Next” button to move to the next page.
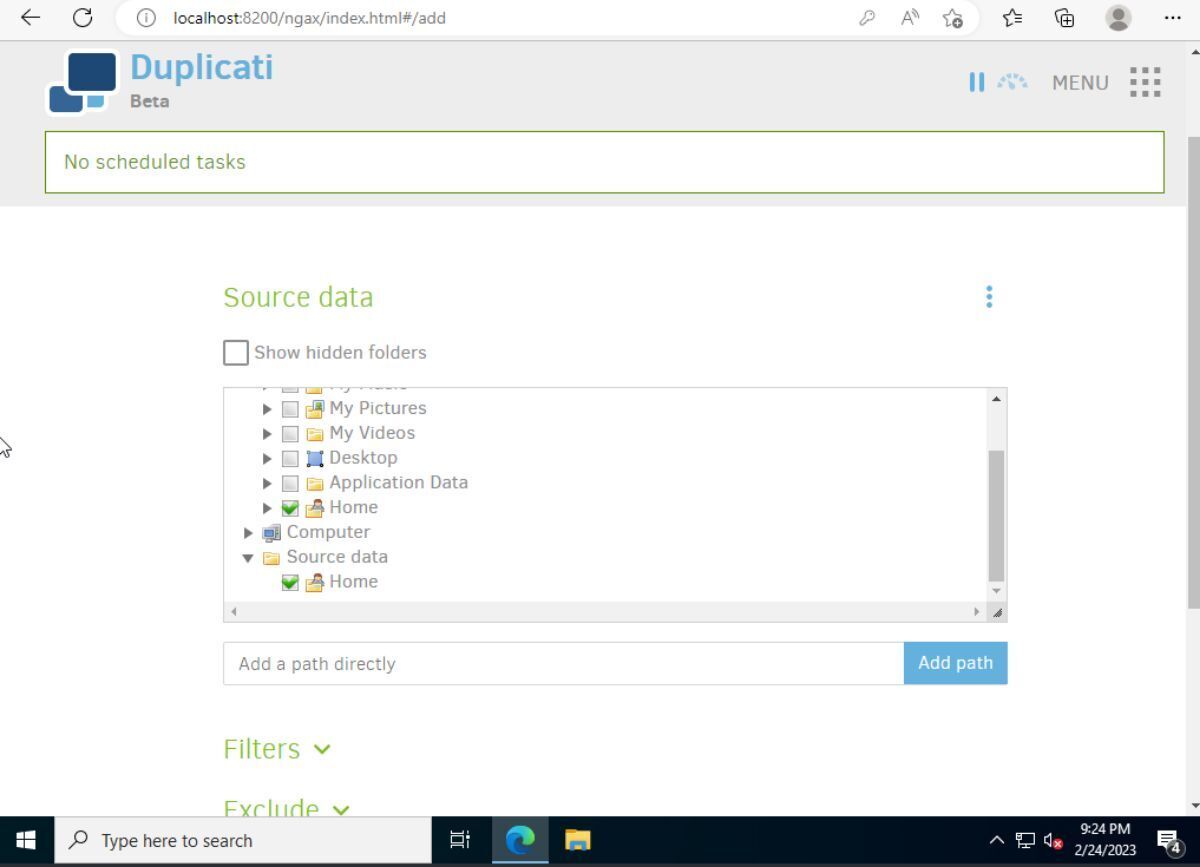
On the next page, you’ll need to choose your source data. Source data is what will be uploaded from your Windows Server through Duplicati to your chosen cloud service provider. Using the built-in file browser, check the boxes next to the folders you wish to backup with Duplicati. When done, click “Next.”
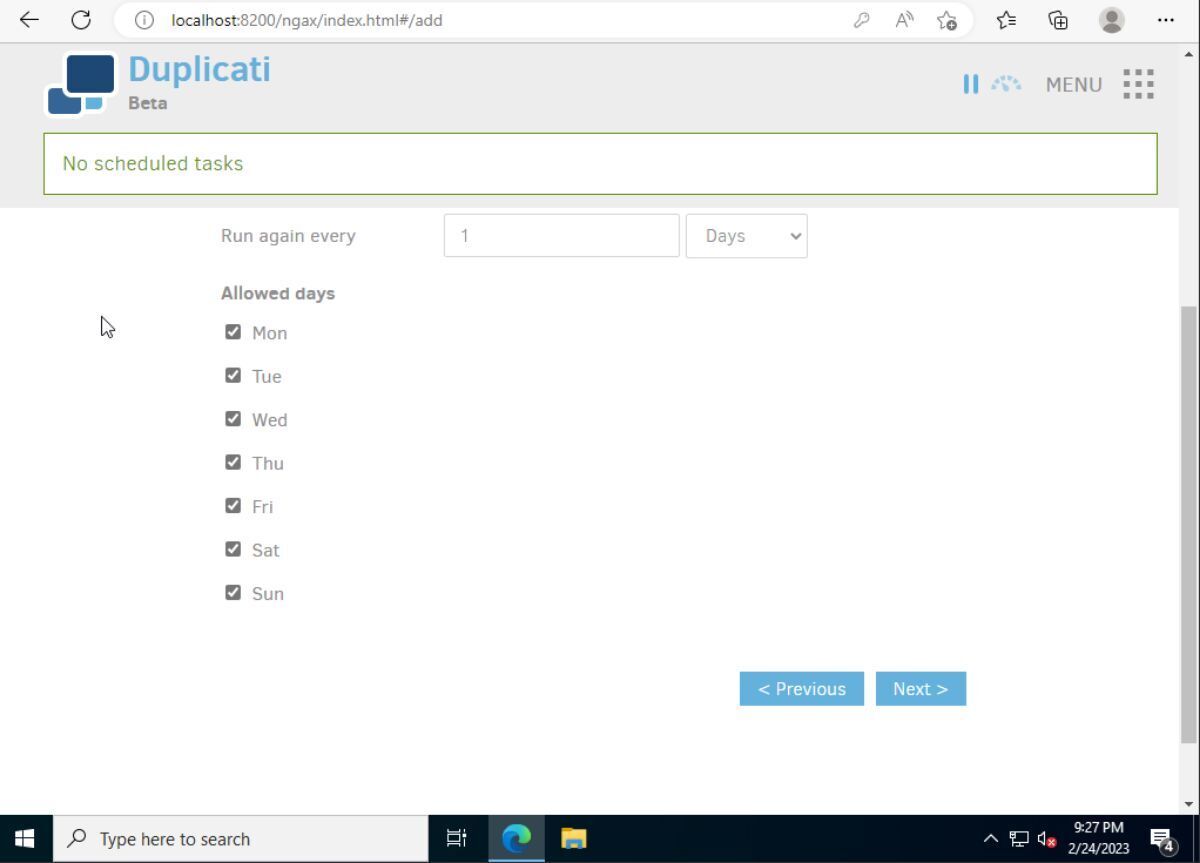
When you’ve configured what to back up, Duplicati will ask you to create a backup schedule. Use the UI to create a schedule for your backups. When you’ve configured your schedule, click on the “Next” button to move to the next page.
You’ll now need to configure how large your backup files will be, as well as backup retention settings. When you’ve configured these settings, click the “Save” button to save your backup settings.
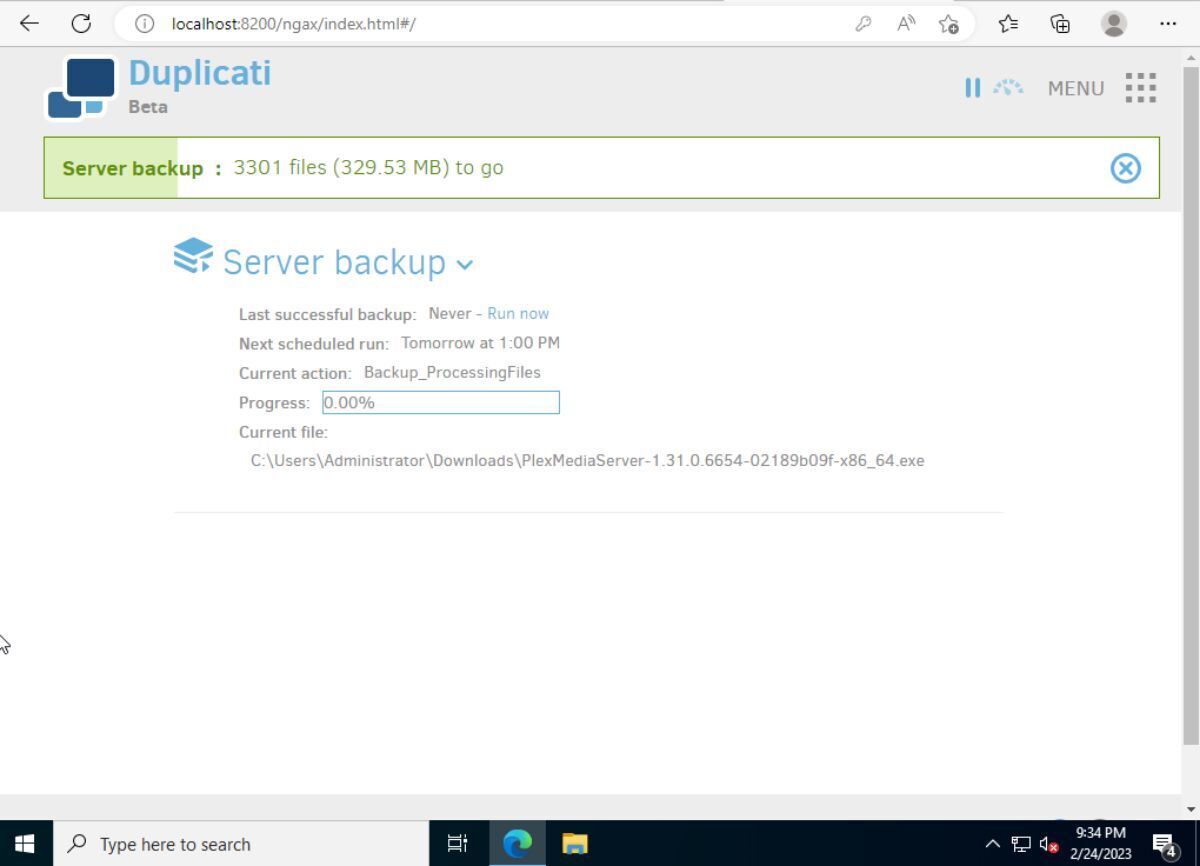
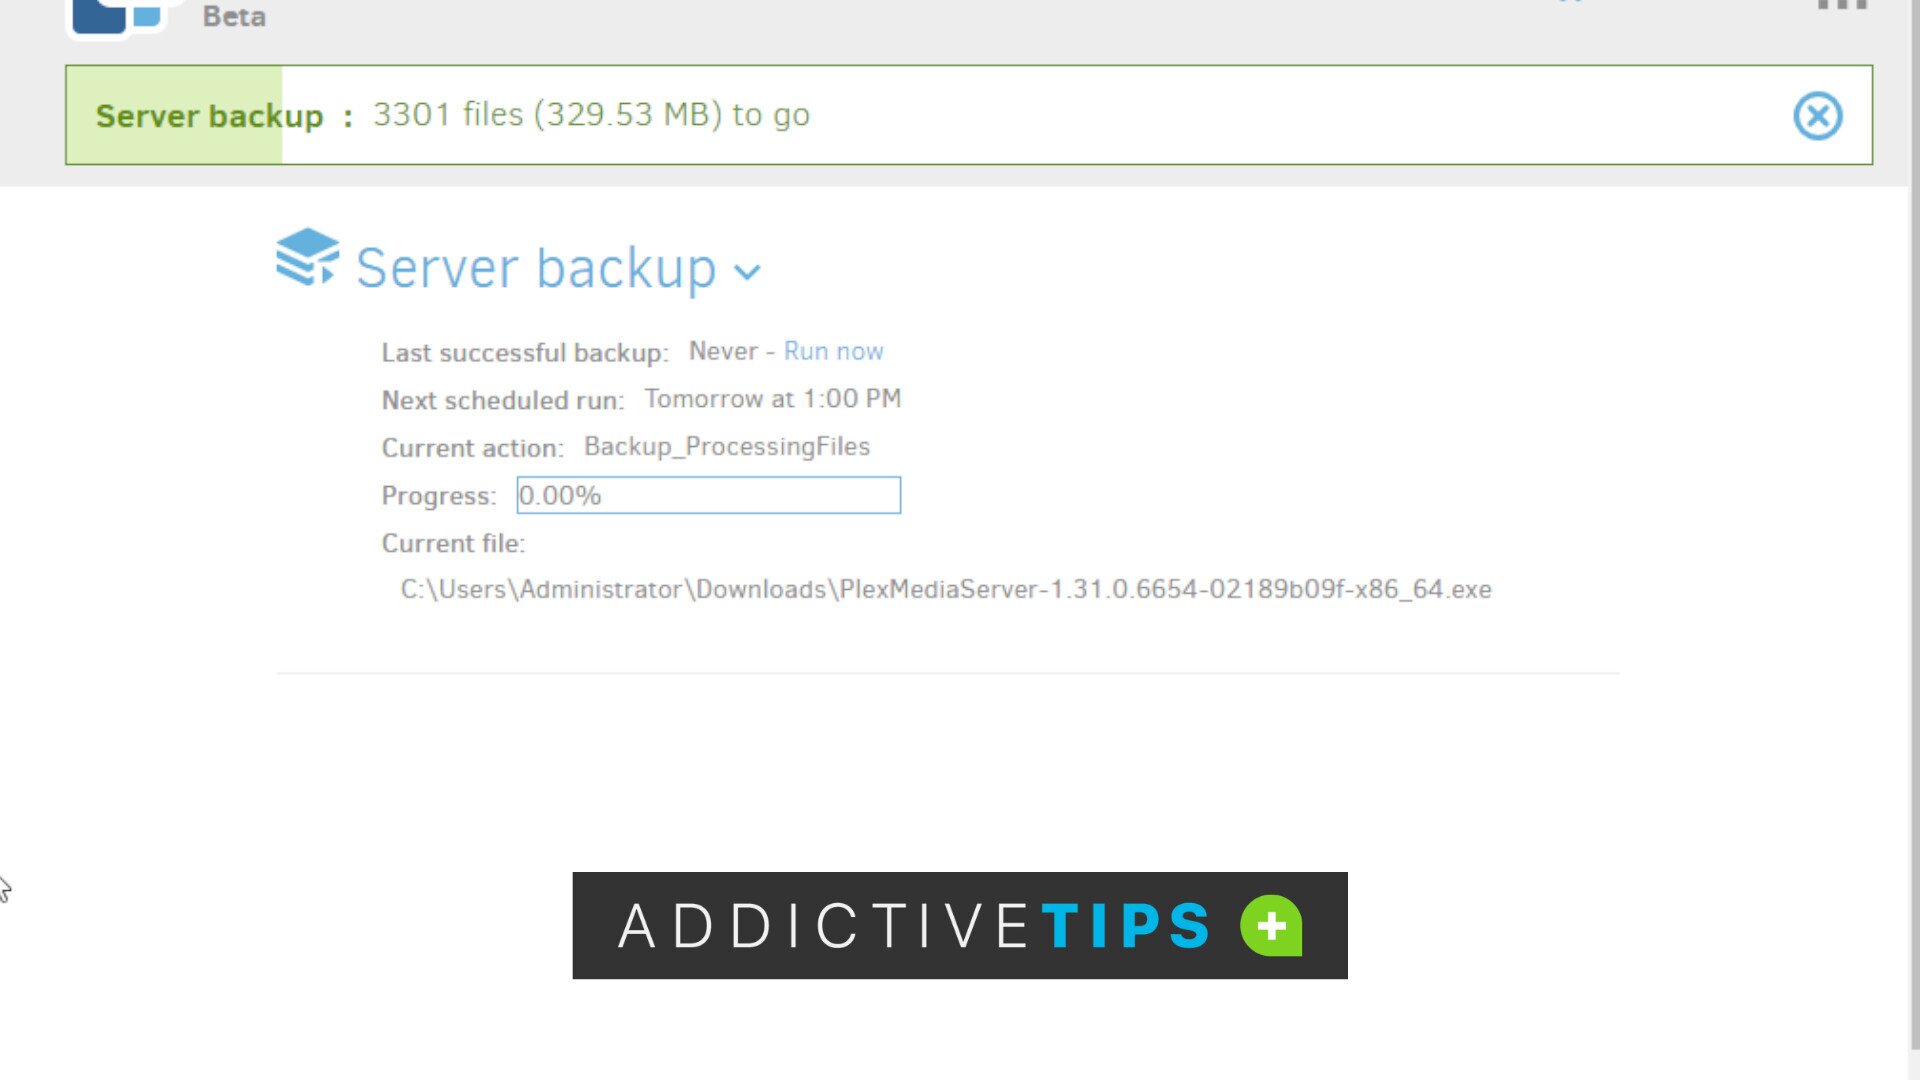
When everything in Duplicati is configured, you’ll be taken to the dashboard. Find your backup, and click the “Run now” button to upload your Windows Server files to the cloud.
