How To Always Run PowerShell As Administrator In Windows 10
PowerShell is a default component in Windows 10. Not only does it come packaged with the operating system but you can also replace Command Prompt on the Power User menu with PowerShell. Like it is with Command Prompt, you can run PowerShell as an ordinary user or as a user with administrator rights though there are few occasions when you need to use either of these tools without admin privileges. If you prefer PowerShell over Command Prompt and want a quicker way to open it with admin rights, you can modify its taskbar shortcut to always run as an Administrator.
Pin PowerShell to the taskbar. Search for it via Windows search, find it in the All Apps list on the Start Menu, or ask Cortana to find it for you. Right-click it and select ‘Pin to taskbar’ from the context menu.
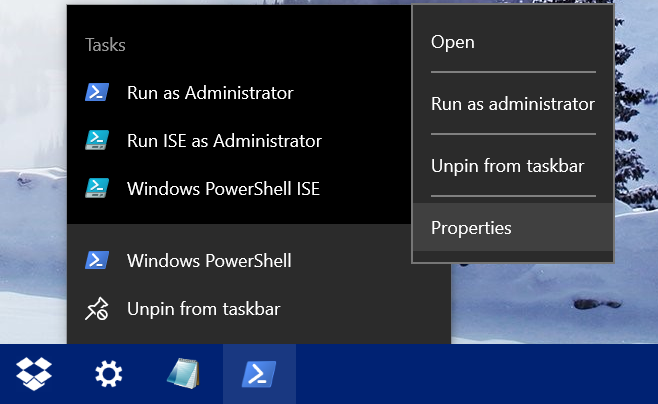
Once PowerShell has been pinned to the taskbar, right-click the icon to bring up the jump list for the program. On the jump list, right-click ‘Windows PowerShell’ again and select Properties.

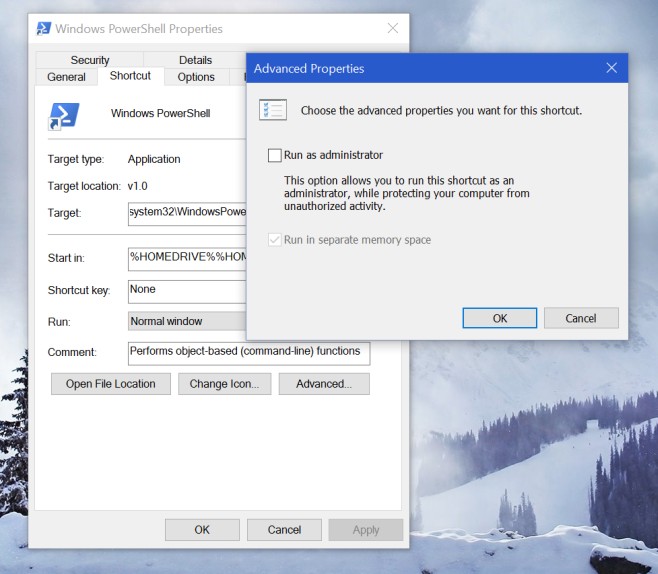
The properties window will open to the Shortcut tab by default. Click the ‘Advanced’ button at the bottom of this tab to open the Advanced Properties window. Enable the ‘Run as administrator’ option here and click ‘Ok’.

Make sure you click ‘Apply’ on the Properties screen. From this point forward, whenever you use the taskbar shortcut to launch PowerShell, it will always run with administrator privileges. Running PowerShell as administrator and then pinning the program to the taskbar will not do the trick.

What if I DO NOT want the Power Shell icon on my Task bar. Is there a way to do the same thing to Power Shell pinned to Start? Tried, but the same drop down menus do not appear to be there.