How To Add Separators In Windows 7 Explorer Jumplist [Tip]
When Microsoft released Windows 7, it met with an instant acclaim, and many thought that this is how Windows Vista should have been done in the first place. Albeit, Windows Vista gave an interface overhaul, it was not easy on the system resources and Windows 7 tweaked all that. Not only Windows 7 tweaked all the voids left by Vista, but also introduced with itself many new features. Amongst all the useful features that Windows 7 brought to its users, Jumplist probably tops the list of most used ones. This feature made the OS a lot more ergonomically friendly by letting you quickly access most frequently used functions and tasks of an application without cluttering your desktop with shortcuts. Jump lists provide right click menu options on Taskbar icons, which makes it easy to jump to recently accessed files or favorite files by pinning them. If you frequently use Jump list, then you might have noticed that some applications have separate sections in their jumplists. For instance, if you access the Jumplist of Google Chrome, you have Most Visited, Recently Closed and Tasks sections divided by separators. However, you don’t see any explicit option to insert these separators yourself while pinning files, folders or applications to Windows 7 superbar. As dividers or separators could have made the task easier, by easily identifying the pinned files, in this article, we will guide you through the process of adding custom separators in a Jump list.
To insert a separate in a Jump list, first create a new folder and rename it to 36 underscores “____________________________________”.

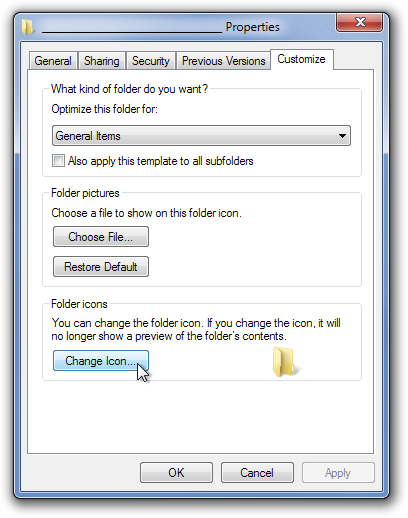
Once you have created the folder and successfully renamed it, right-click this folder, and from the context-menu, open Properties window. Now go to Customize tab and select Change icon at the bottom.

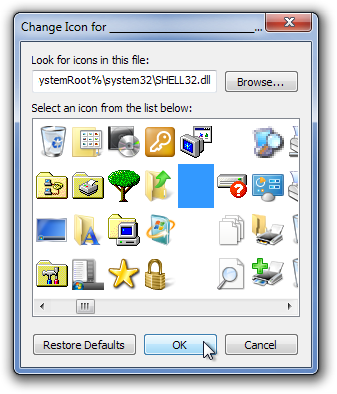
A separate console windows will pop-up, all you have to do is select the blank icon and click OK. And then select OK in the Properties dialog box to save your changes.

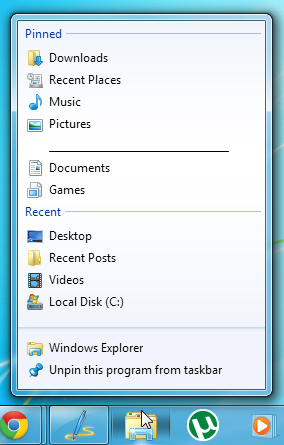
Now, just drag the folder to the Windows Explorer icon in taskbar to Pin it. You can drag it to any position of your choice (only under Pinned section) to use it as a separator. This way you can create as many folders and separators as you want. Isn’t that easy!

We hope this tweak would help making your job easier, especially if you were already looking for something like this. Please feel free to leave your comments in the comment section.

Very nice way to group like-programs. Thanks!
that’s useless