How To Add & Remove Shortcuts From Windows 8 Win + X Menu [Tip]
Compared to Windows 8 Developer Build, there are a lot of things that have been added to the Consumer Preview. In the past, we have extensively reviewed all the changes that have been made to the upcoming version of Windows. For instance, the removal of the Start Menu button has conjured up quite a debate on whether this radical change was for the good or the bad. Some people cite it as a step towards the future, while others claim this move to be a poor judgment on Microsoft’s part. Apart from some critical subtractions, there are some worthwhile improvements and additions in Windows 8. For example, the new Win + X menu of Windows 8 provides an easy way to access numerous System Utilities such as Programs and Features, Network Connections, Power Options, Task Manager, Control Panel, Run dialog box etc. However, there is no default option to easily edit this menu according to your own requirements. In this post, we will guide you through the process of adding and removing items from Windows 8 Win + X menu.
There are two methods to edit Win+X menu; a manual method, which requires you to manually copy shortcuts to a WinX folder, while the other method includes using a Win+X menu editing tool.
Using Manual Method
Step 1
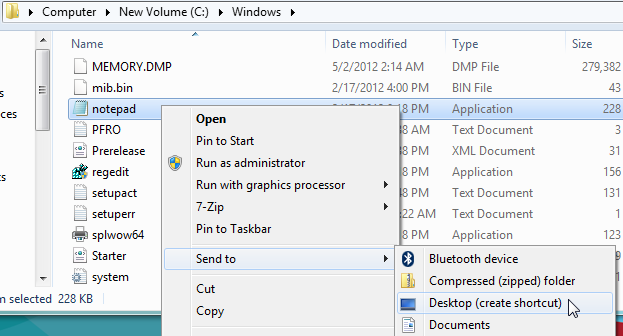
First, locate the required program that you want to access through Win + X menu, right-click it and choose Desktop (create shortcut) from Send to menu.
Step 2
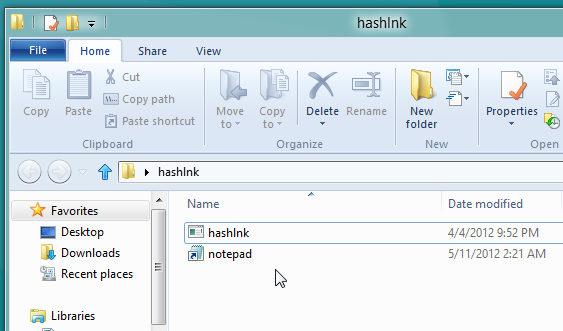
Now, download the hashlnk tool zip file (link given at the bottom of the post) and then extract the zip file. Now, copy the application shortcut to hashlnk tool folder.
Step 3
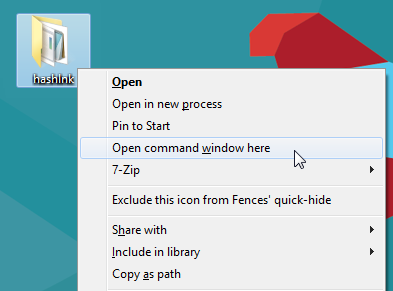
Once the shortcut is copied, right-click the hashlnk folder while holding Shift key, and then select Open command window here.
Step 4
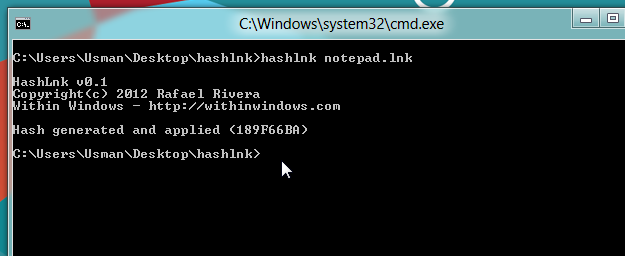
This will open Windows command line interpreter. In the command prompt, you need to generate and apply hash on the shortcut of the app. For instance, if you are trying to add the shortcut of notepad.exe in Win + X menu, just run the following command.
hashlnk notepad.lnk
The hash will be generated and applied on the shortcut. Now, it is ready to be added to Win + X menu.
Step 5
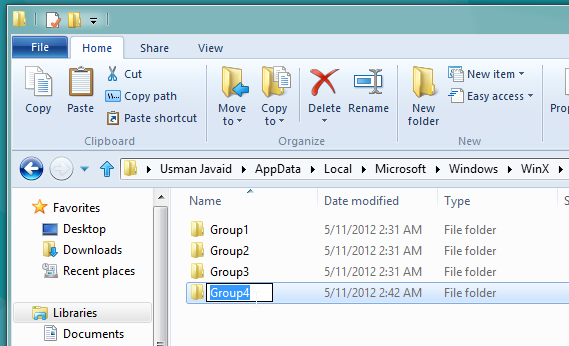
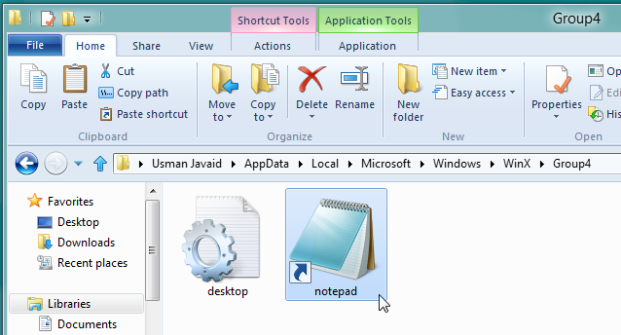
Now, navigate to the following location “C:\Users\<username>\AppData\Local\Microsoft\Windows\WinX” and, either create a new group for the shortcut, or add the shortcut to an existing group. By default, Winx folder has 3 group folders namely Group1, Group2 and Group3. You can create a new Group by the name of Group4 (to add separator in Win+X menu), and then add shortcuts to that group folder.
Step 6
If you create a new group, copy the shortcut from Hashlnk folder to your group folder.
Step 7
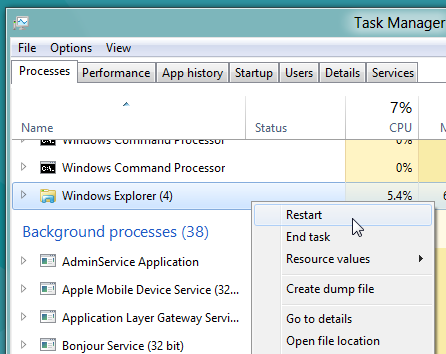
The shortcut will not appear in the Win + X menu right away. You will have to restart the Explorer in order to access the shortcut. Just open Task Manager, head over to Processes tab, right-click Windows Explorer and select Restart.
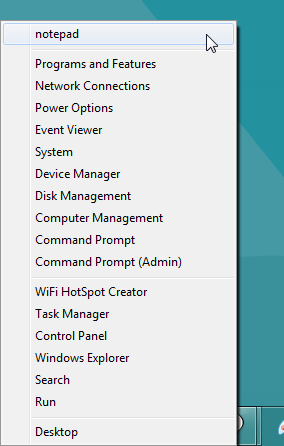
Once Windows Explorer is restarted, you can access the newly created shortcut in Win + X menu.
Using Win + X Menu Editor
The Win + X Menu Editor for Windows 8 is an application that provides you with a user-friendly GUI to add new shortcuts to Win + X menu. The application actually uses hashlnk tool to generate and apply hash on the selected shortcuts in order to add them to Win+X menu. Using Win+X Menu Editor is easy. To begin, click Add Group and then give it an appropriate name. Now, just select Add Shortcut and select the app shortcut you wish to add to Win+X menu.
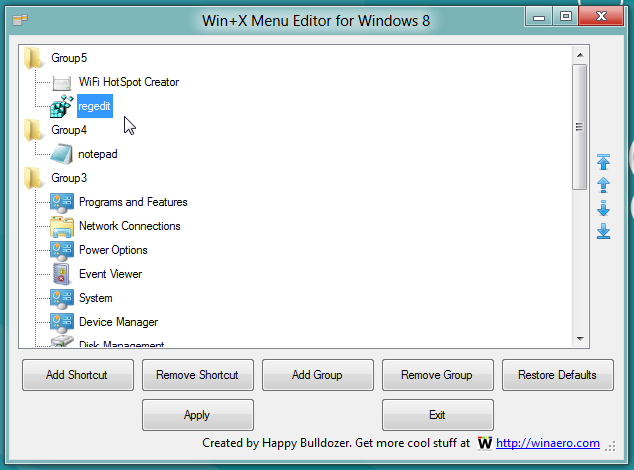
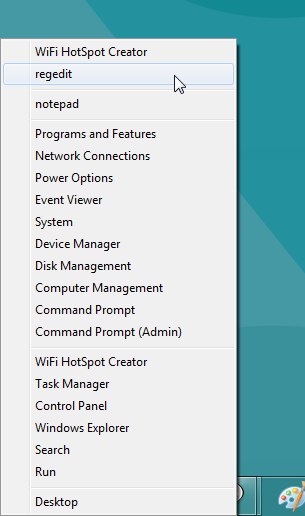
Once added, click Apply to add shortcut to Win+X menu.
Download Win + X Menu Editor for Windows 8

forget to mention,
OS: Windows 8 Pro 64-bit
App: SnippingTool
tried with both methods, both not working because of missing .dll (msvcr100.dll & msvcp100), found them in C:WindowsSystem32. so i have no clue why hashlnk says otherwise…