How To Add Rays Of Light Effect In Photoshop [Tutorial]
You can always make your photos look astonishing by doing little adjustments. In this tutorial we will show you how to add a ray of light to a photo using different tools like brightness / contrast and hue / saturation.
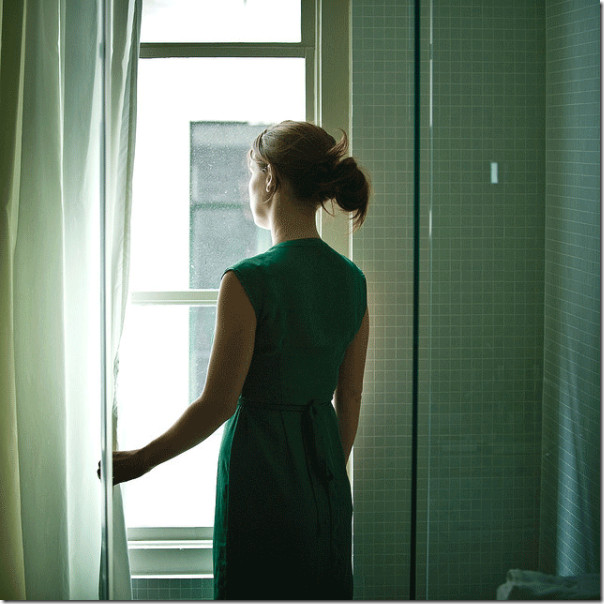
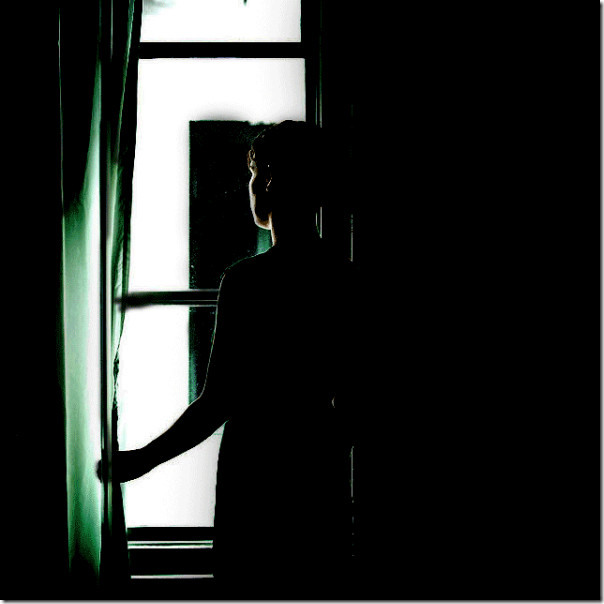
Take this picture for example, by using some of the above mentioned tools we will put some light rays coming in from the window.
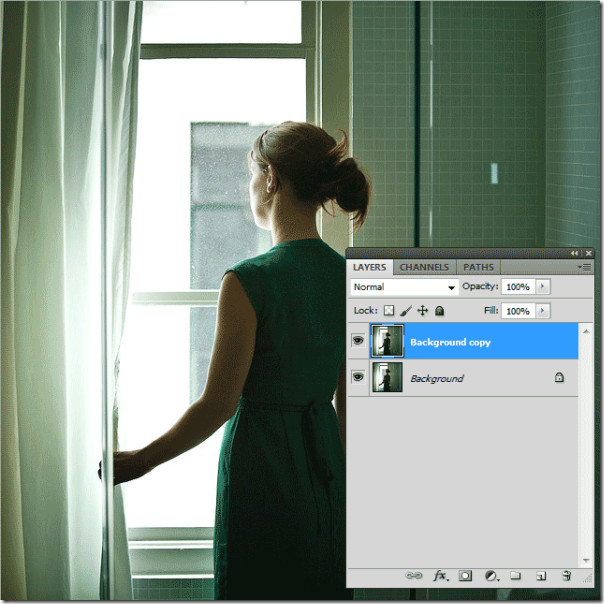
After opening it in Photoshop, duplicate the layer by simply pressing Ctrl + J or right-click on the background layer and duplicate it.
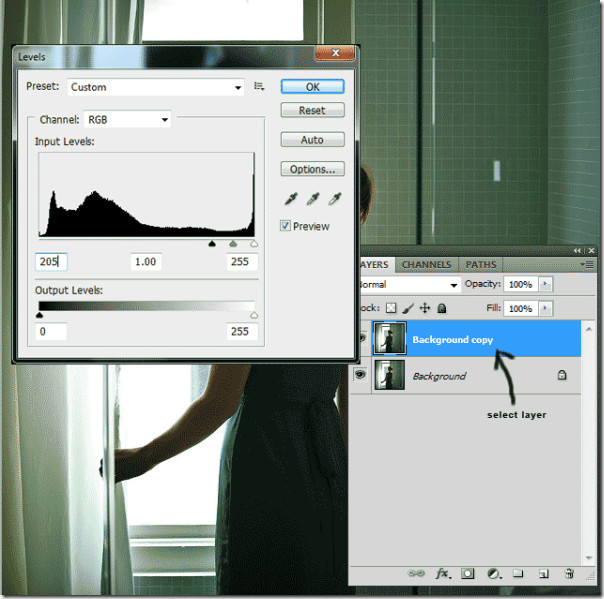
Secondly, with the top layer selected press Ctrl + L to get the levels and make some adjustments to the RGB levels (205, 1, 255).
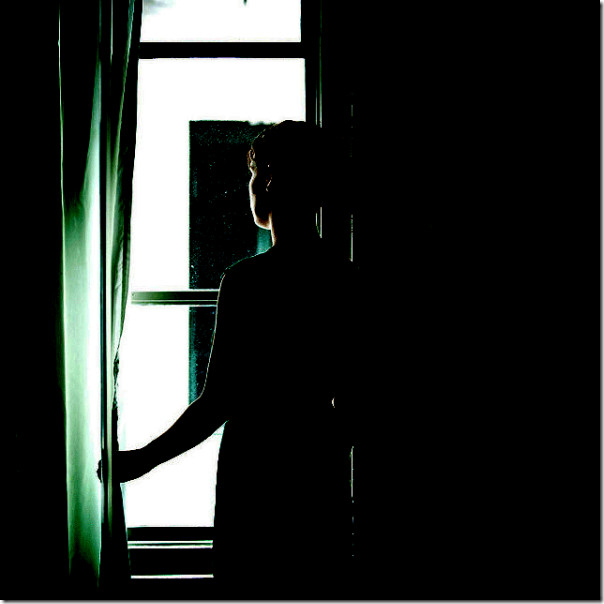
After the level adjustments your duplicated layer should look like this.
Now we will paint out the areas that are not bright by using the brush tool and setting the foreground color to black.
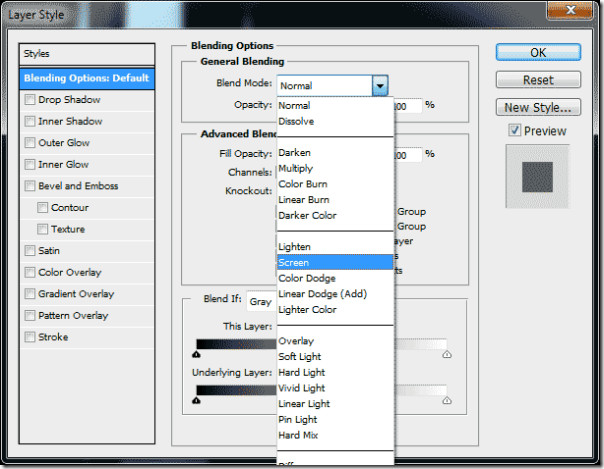
Change the blend mode of the selected (duplicated) background to screen by double clicking on the layer or right-clicking on it and then clicking blending options. This will make the highlighted areas visible in the layer.
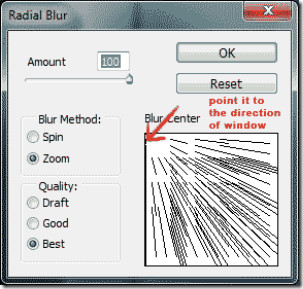
After doing the blend mode changes, navigate to Filter –> Blur –> Radial Blur. Adjust the amount to 100 and point the cursor to the direction of the window or the place from where you want the light rays to fall in from.
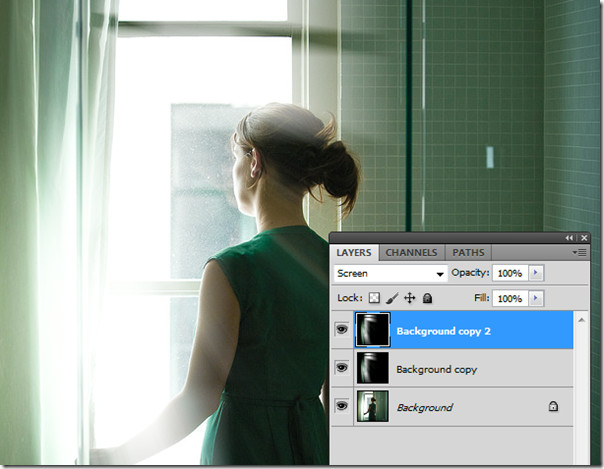
Now you will see a rays of light coming in. Duplicate the background copy layer again and repeat the radial blur effect.
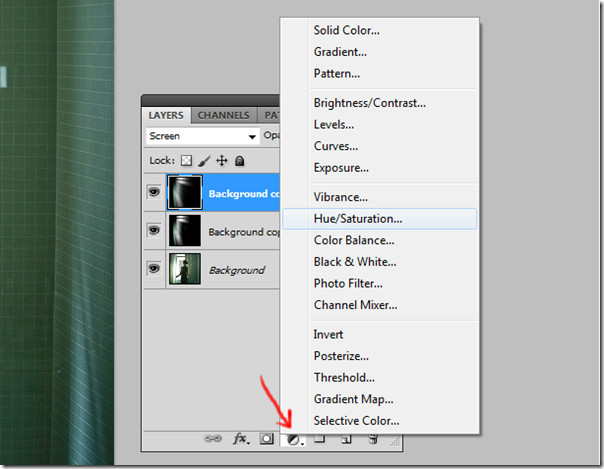
Add a Hue/Saturation layer by clicking the ‘add fill/adjustment layer’ button.
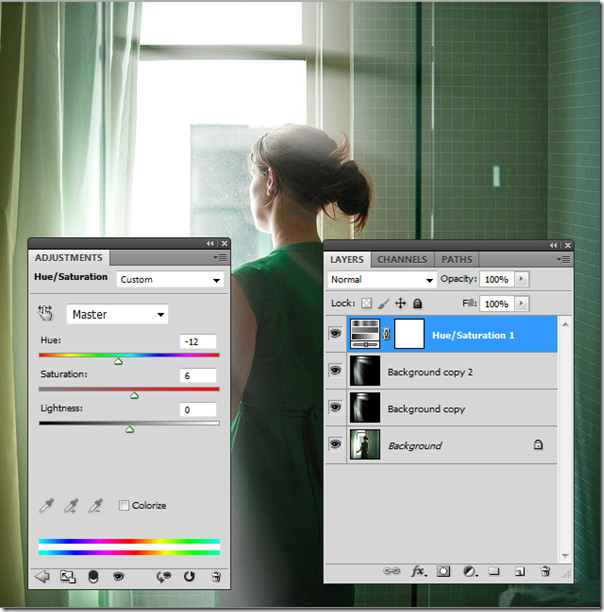
Double click on the selected Hue/Saturation layer and do the following adjustments. Put hue to –12, saturation to 6 and lightness to 0. These settings completely depend on what kind of feel you are looking for the picture.
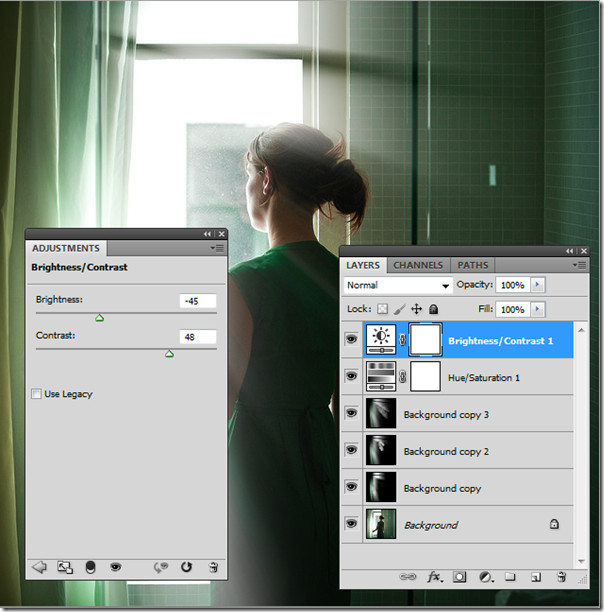
Now we will duplicate the background copy layer again and repeat the motion blur effect on it, do some brightness and contrast adjustments adding another add/fill layer. Set the brightness to –45 and contrast to 48.
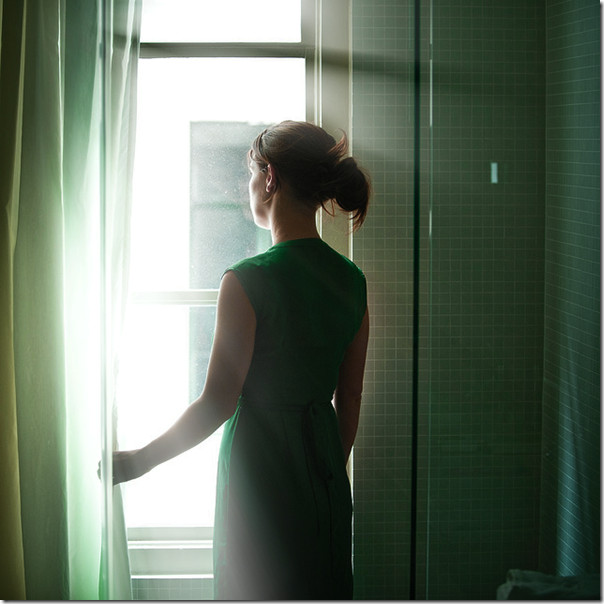
Lastly, the final photo should look like this.
Adding light rays to this picture was fun, wasn’t it? Let us know what other Photoshop Tutorials you would like to see!

thanks
good..thanks
I’m confused about the “Now we will paint out the areas that are not bright by using the brush tool and setting the foreground color to black” step.
gud 1…gud job