Give Your Windows RT Desktop A Facelift With Rainmeter
Windows RT has been around for a few months now, with Microsoft’s own Windows Surface being the primary device this tablet-friendly OS has been running on so far. Recently, when XDA member clrokr successfully jailbroke Windows RT, it resulted in opening up doors of possibilities for the homebrew community to run ported x86 desktop apps on ARM architecture. By now, a multitude of app have already been ported to the platform by various users, and one of the awesome additions to the ported apps library is Rainmeter. For those who don’t know about it yet, it’s a fascinating desktop customization utility that allows you to give your desktop a complete makeover. In what follows, we will guide you through the process of changing that boring desktop look and spicing it up with Rainmeter’s plethora of gorgeous skin packs.
Before reading any further, make sure you’ve already jailbroken your device by following our step-by-step guide here. Once done with that, download Rainmeter from the link provided at the end of the post and use a ZIP file extraction utility like Unpacker to extract the contents of the archive to an easily accessible location on your disk. Afterwards, you have to simply run the Rainmeter executable file from the extracted folder. The application itself looks really simple. To get acquainted with its features, you might want to check our full review here and also our post on customizing Windows 8 desktop with the Rainmeter and RocketDock apps.
The beauty of Rainmeter lies in the endless customization options it puts at your disposal. The tool lets you adds different types of widgets to the desktop ranging from weather, clock & date to RSS feeds & calendar widgets. Although you can grab a huge number of such widgets from DeviantART, you might want to take a look at the following options for a head start.
MidnightBiro | MacBar 3.0 | Rota H.U.D | Wallpaper
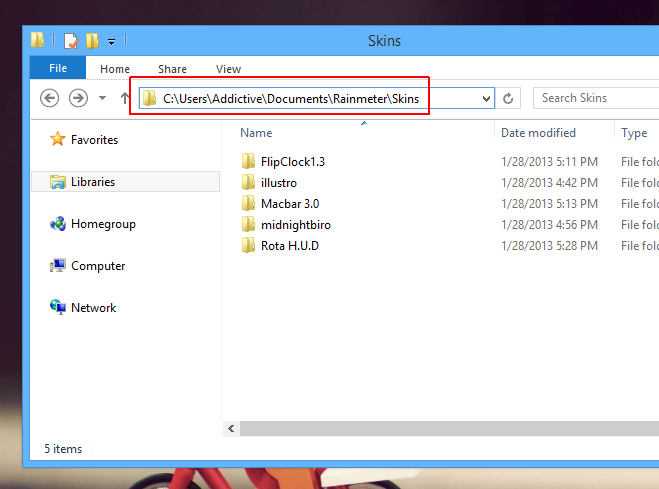
The application automatically creates a Skins folder ‘C:\Users\username\Documents\Rainmeter\Skins’. So after downloading any skin pack, you just to need to move the extracted contents of its ZIP archive to the aforementioned directory in order to add it to Rainmeter.
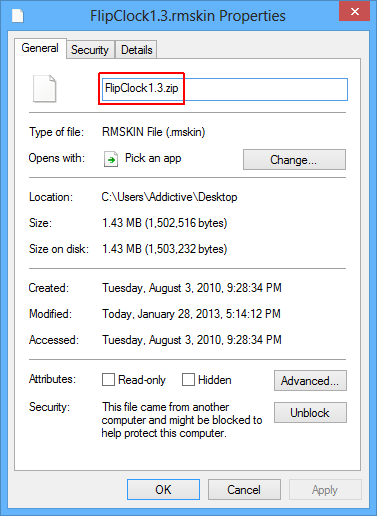
Some of the files however, come with an RMSKIN extension, which can be a bit tricky to install, since the ARM version of Rainmeter doesn’t include the skin installer that usually comes with the desktop app. But fret not – there’s a very simple method to extract those RMSKIN files.

All you have to do is rename the .rmskin extension to .zip. This in turn allows you to easily extract the files using the Unpacker app.
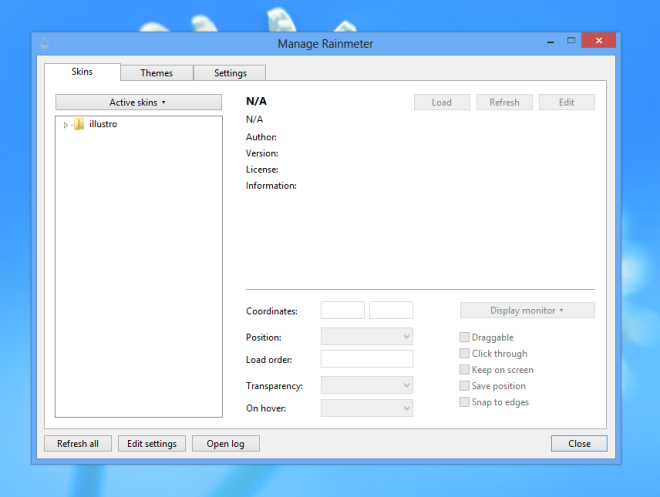
After installing your desired skin packs, launch the Rainmeter utility again (or hit Refresh all at the bottom of the application window) and you will see the skins added to the left pane. Skin packs usually come with multiple widgets but you can choose to add only the ones you want. To load a widget, select it from the list and tap the Load button. You can place the widgets anywhere on the screen, as well as lock them at one position via disabling the Draggable checkmark.

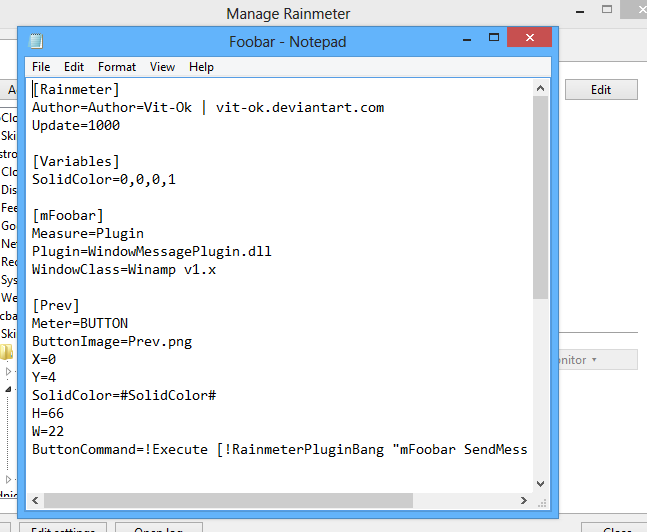
Skins can also be customized via a text editor, such as the native Notepad utility. This makes it possible to modify the scripts of the widgets according to your preferences. To modify a skin using a text editor, select your desired widget from the list and hit the Edit button on the program.
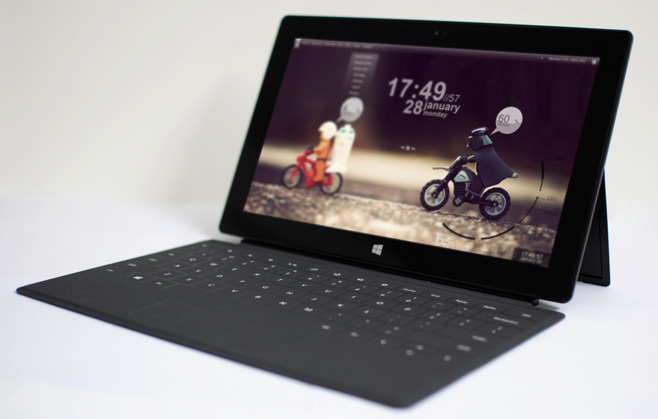
The screenshot below demonstrates how a simple-looking Windows RT desktop was turned into a StarWars-inspired Rainmeter theme. Quite alluring, isn’t it?

Rainmeter is a free application and this ARM version works on Windows RT only. You can download it from the original XDA-Developers thread via the link provided below.
Download Rainmeter for Windows RT

Hi, great post. Can you post wallpaper link?
Wallpaper link is provided in the post