Fix The Disk Structure Is Corrupted And Unreadable In Windows
There are times when we want to access parts of our disk and Windows simply refuses to comply. Sometimes it just freezes until explorer crashes, or the disk isn’t physically removed. Sometimes, you get the message ‘The disk structure is corrupted and unreadable’. That is a sign that your device has incurred some physical problems that might need addressing. This is a common occurrence with removable media such as USB Drives, Memory Cards, or older mechanical hard drives. This can be brought on by simple corrupt data, or it can be as bad as a damaged Master File Table (MFT). Whatever the cause, the result is the same. Here are all the ways you can overcome this problem.
With any kind of storage related issue, there needs to be a preliminary test. That test is to see if there is any visible physical damage to the device in question. If either of those two things are true, then it is very unlikely that a software solution can cure what ails you. However, there are numerous steps to take before we come to that abysmal conclusion.
Unplug/Replug Device
If you are using an external device, then this process is as simple as it is preliminary. If you plug in your USB, SD Card, Removable storage, etc. and get the error “The Disk Structure is Corrupted and Unreadable”, remove it from your system. Wait a few seconds to make sure no programs are freezing, and plug it back in.
It is very easy to access the internal storage drive on most desktops. Power down the system and unplug everything. Then just remove the case’s screws and expose the side panel. Once in, track down your hard drive. It is normally traditionally located in the hard disk housing of your chassis (unless you have a custom chassis, in which case you can check your instruction manual) and unscrew the hard drive.
On a laptop, a hard drive is easier to location. Flip your laptop over and look at the bottom. It will have helpful little symbols on it. The stacked disks represent the location of the hard drive.
Then, remove all cables, but make a note of which ones you unplugged. Then put everything back the way you found it, ensuring that the wires are inserted completely (no wiggle room) and the screws tightened securely and boot up to see if that has solved your problem.
If this doesn’t fix the problem, try the next solution.
Reinstall The Device
This solution does not work for the drive that has your current operating system installed on it.
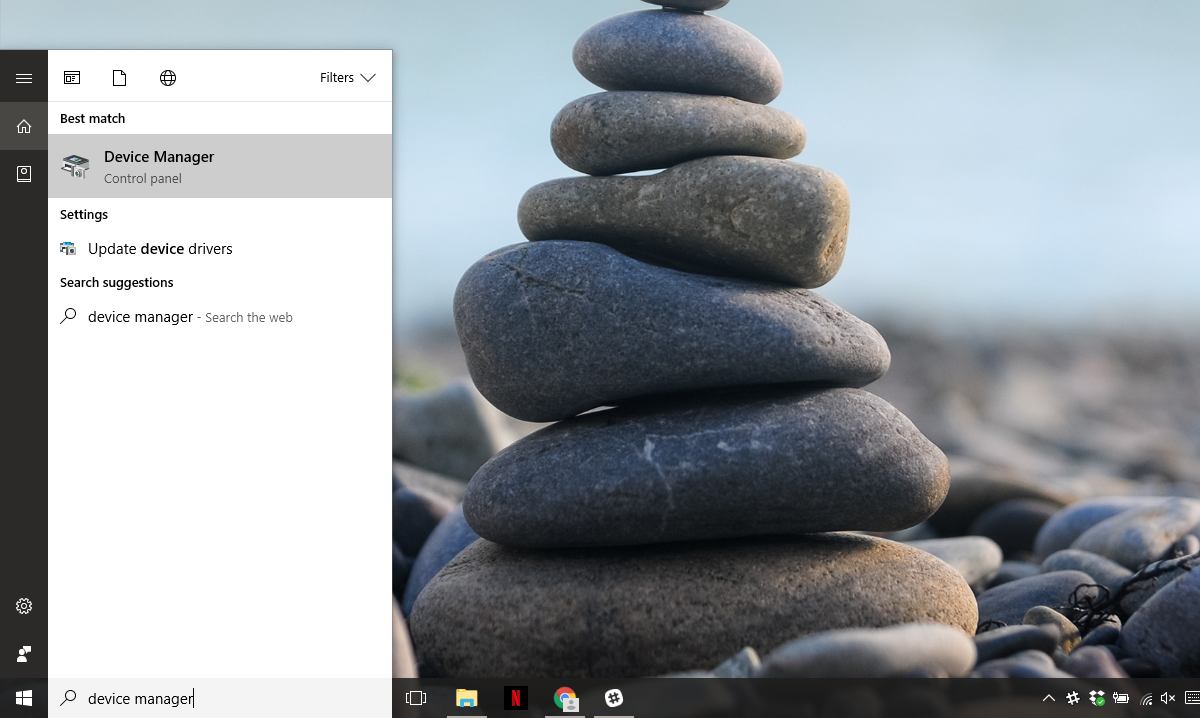
This is another variant of the above solution with the caveat that you are removing the device through your software. In order to do this, type ‘Device Manager’ in Windows search and open the Device Manager app.

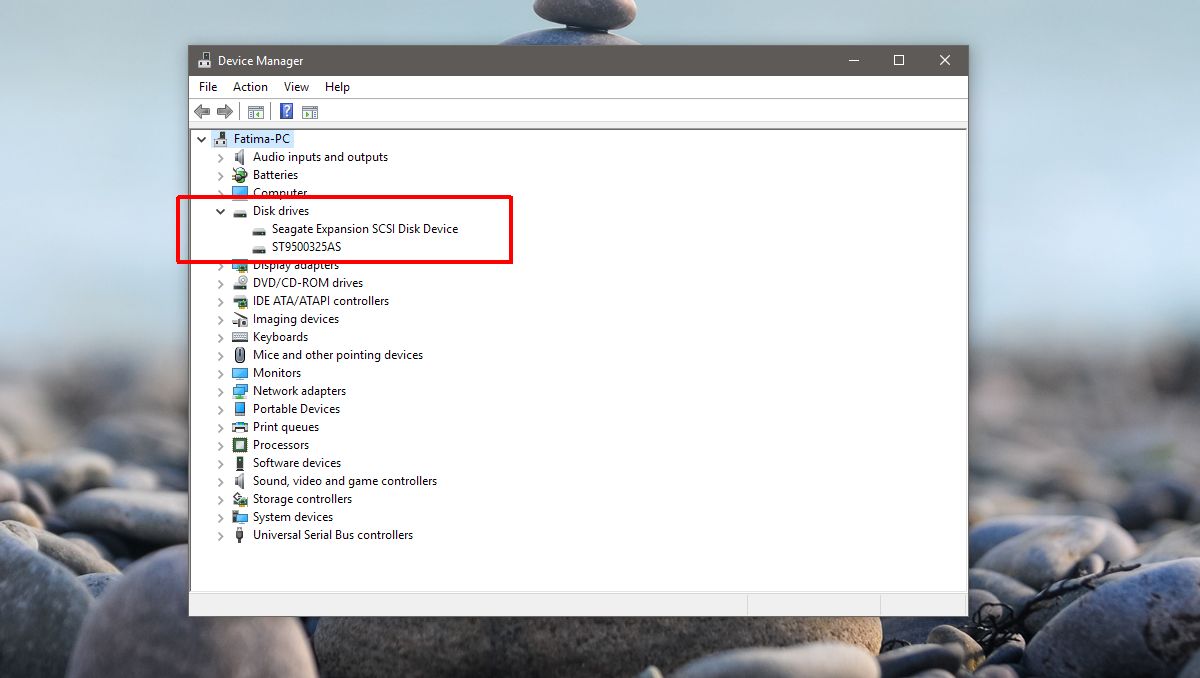
Expand the disk drives section. Right click the problematic disk and click ‘Uninstall’.

Once the drive is uninstalled. Click on ‘Scan Hardware Changes’, the last icon under the menu bar.

Run CHKDSK (Check Disk)
In case you are running into issues with non-removable storage (non-removable in the sense that we can’t just plug and unplug it within seconds), we will need to run a basic test of all connected storage, called CHKDSK. This is ideal for internal storage, but it is also just as feasible for any connected storage device.
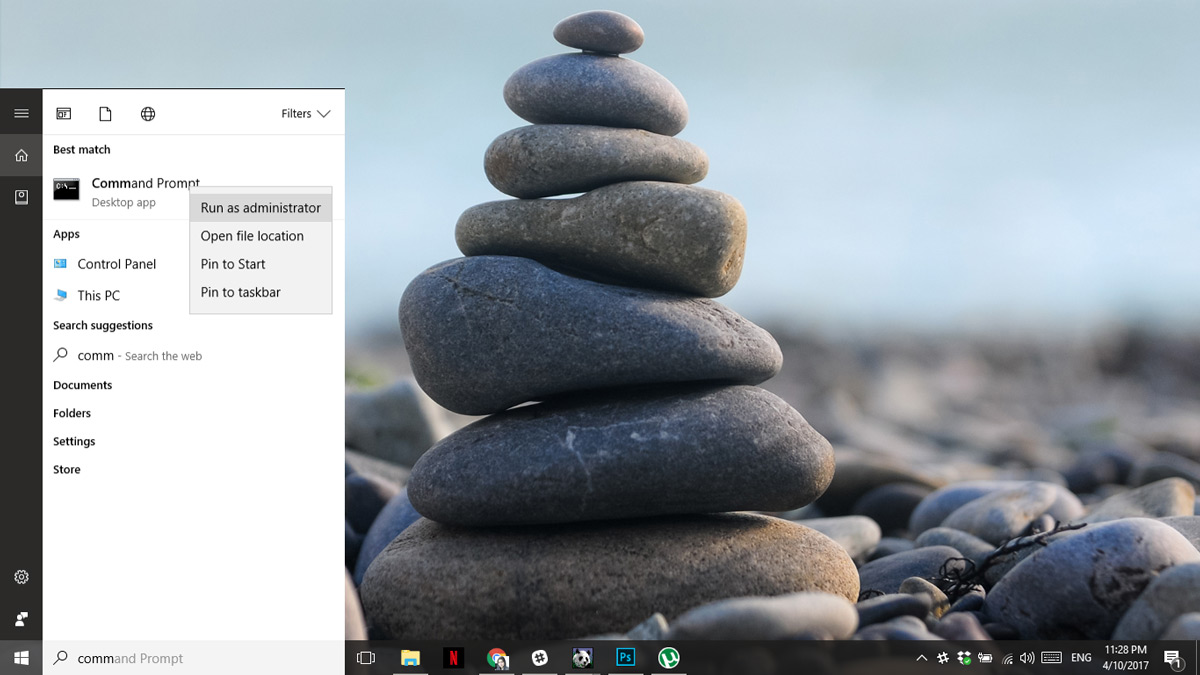
CHKDSK is a DOS command (Disk Operating System, a command-line interface). Open the Command Prompt with administrative privileges.

Here, type in CHKDSK and press enter and go about your business while it analyzes your drive. Depending on size and type of drive, this could take a few hours.
Check Disk When Windows Is Inaccessible
In case you are suffering from a disk corruption that does not allow you access to Windows altogether, we must boot the system and access Advanced Boot Options . Some laptops require pressing F12, some desktops require F8 to boot into Advanced Boot Options. You can look up your key on the manufacturer’s website.
Click on Repair your computer in the Advanced Boot Options. Click on Command Prompt in the System Recovery Options. Once you are in the Command Prompt, write;
CHKDSK /r X:
Replace X with the drive letter of your faulty drive. That should resolve it.
If your Advanced Recovery Options do not give you access to command prompt, you are going to have to get your hands on a recovery disk (contact your manufacturer for one).

Verify Using Disk Manager
If your Windows is booting, but everything else has failed and you are still having problems, you can temporarily alleviate your worries by making the drive disappear. We accomplish this by removing the drive letter. Your data will be safe but you will not be able to access it from a hidden partition. Be careful here, or you risk deleting the entire contents of the disk.
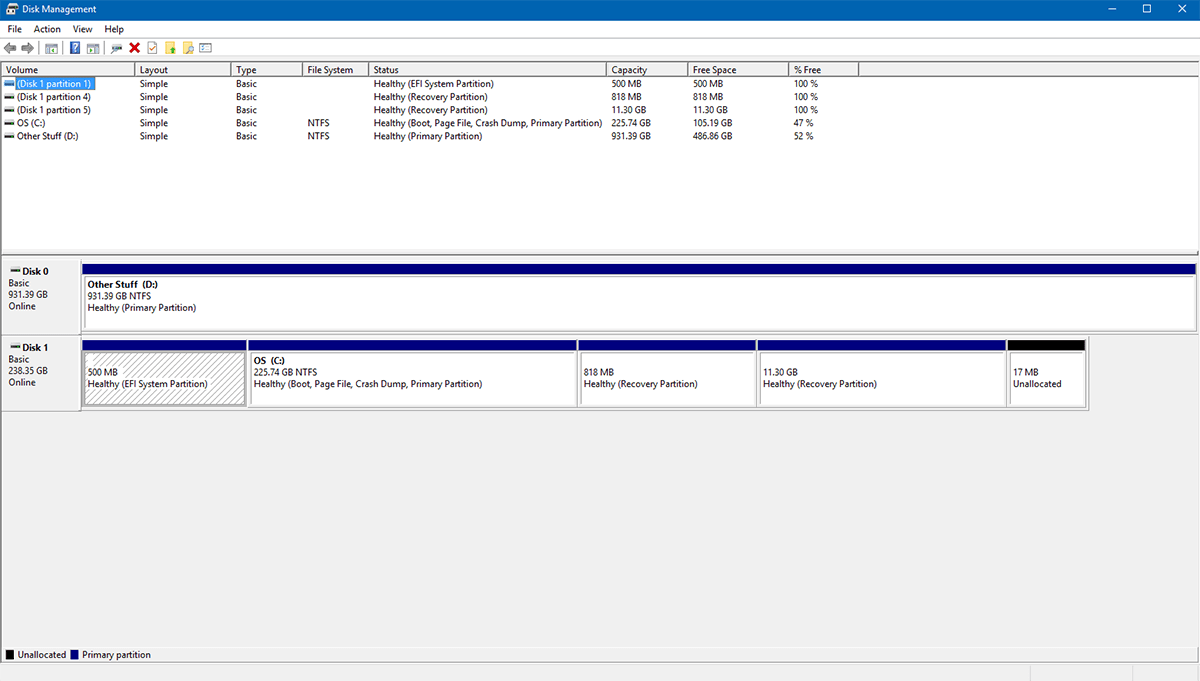
Access your ‘Start Menu’, write ‘Computer Management’ and press enter. In the menu on the left, see the words ‘Disk Management’. Click it.
Alternatively, you can access this menu directly by accessing ‘Start Menu’ and writing ‘DiskMgmt.msc’ and pressing enter. You will get the same window.
If you know which partition is giving you problems, then right-click it and select ‘Change Drive Letters and Paths…’, click on ‘Remove’, and then ‘Yes’. That should remove the disk from booting up, allowing you to access your system normally while you figure the problem out.
Again, this solution does not work with the partition that has the Operating System on it (usually C: Drive).

