How To Fix Red Screen Of Death In Windows
Windows has garnered a bit of reputation of being such an unstable platform since Windows 10 was released. While not true for all versions of Windows, the OS has its problems at times. Windows errors usually bring us to the much dreaded Blue Screen of Death (BSoD). However, there is a phenomenon known as Red Screen of Death (RSoD) and we all know that red is considerably more maniacal than blue. A red screen fatality does not occur as frequently as a blue one but it signifies more trouble than the blue screen of death. On the off-chance you were unfortunate enough to have received the Read Screen of Death, here are a few things you can try to fix it.
All system errors are caused by a computer’s inability to process certain information at a certain time. Some errors arise in critical locations and that’s what we need to address when trying to fix the Red Screen fo Death
Solution 1 – Update your BIOS / UEFI
Unified Extensible Firmware Interface (UEFI) is what the BIOS has evolved in to. Some hardware like the GPU, require constant updates to function well. Those updates occasionally require some modifications to the BIOS/UEFI. What this leaves you with is a driver upgraded beyond your BIOS/UEFI’s capability and it can potentially cause problems.
Alternatively, there could be a pre-existing condition with the hardware that needs to be rooted out. In either scenario, an upgrade for the BIOS/UEFI is a good place to start if you frequently see the RSoD.
Upgrading BIOS/UEFI means completely wiping the BIOS/UEFI clean and installing a fresh copy. So if something goes wrong, you can risk losing your entire system in one fell swoop. Keep the following in mind when upgrading BIOS/UEFI:
- If you are on a laptop, make sure it is fully charged or has at least 80% charge
- If you are on a Desktop, make sure you can’t lose power during the upgrade
- Download the latest BIOS/UEFI update from the hardware manufacturer’s website (make sure you download the ‘.exe’ file). We can’t pin-pount you to a specific link for this because updates differ for each manufacturer
- Save every running program and run the downloaded BIOS/UEFI upgrade .EXE file you downloaded from the manufacturer’s website.
- Do not power the system off during upgrade.
- If in doubt, contact an expert to do this for you
Solution 2 – Remove Overclocking
Overclocking is not as simple as flipping a switch and getting an instant speed boost. You have to do it gradually while tinkering with numerous things simultaneously and taking all necessary precautions in-between. Sometimes, people tend to overlook certain things (like safety settings) or overdo it. This kind of activity usually puts the hardware at risk of overheating and causing a thermal shutdown (when computers get too hot to function, they shut down).
Allow your system to cool down. Launch whatever tool you used to overclock and then remove the overclock settings. Otherwise, you can go to your BIOS/UEFI and reset all settings to default (most BIOS/UEFI tell you how to access them every time Windows boots) and you should be fine.
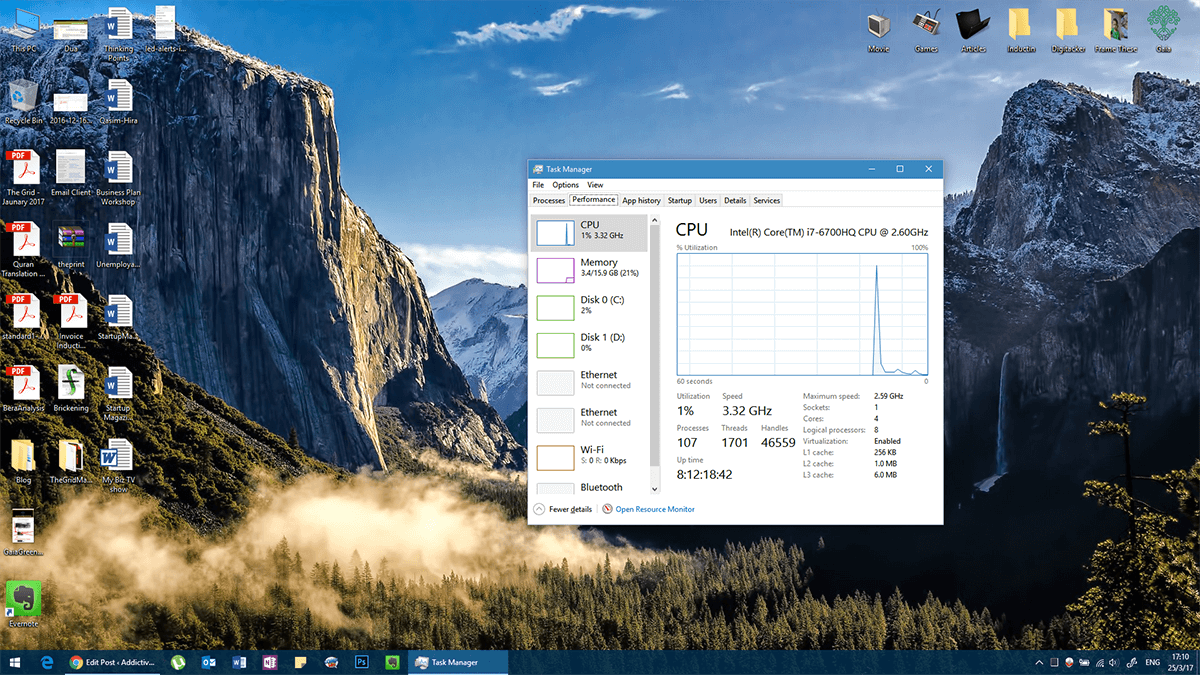
If you don’t know that your system is overclocked, then it probably isn’t. However, if you really want to be sure, press Ctrl + Shift + Esc to launch Task Manager. Go to Performance and check your CPU speed. If it is much more than your processor’s speed range as stated on the box (or website for your processor model), then you are overclocked and need to reset your BIOS/UEFI to default.

Solution 3 – Check for hardware malfunctions
Hardware malfunctions happen as systems age. However, in rare situations, some hardware does malfunction even if a system is new. Hardware malfunction is very specific, i.e. a faulty display will give you a hard time displaying items. Similarly, a faulty sound device will give you problems with sound.
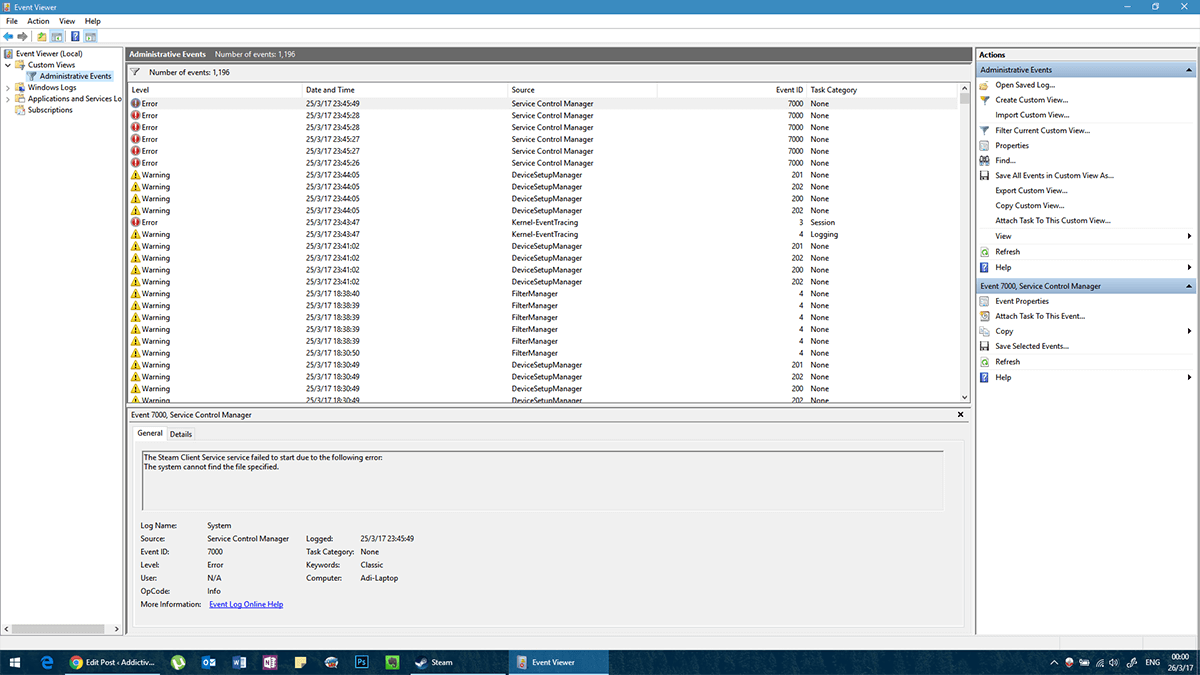
Hardware failure can cause the Red Screen of Death. These failures are rather difficult to diagnose. The easiest solution would be to check a crash report from the Event Viewer.
In the Windows search bar, type ‘Event Viewer’ and select the Event Viewer app from the results.
Select Custom Views in the left column. Click Administrative Events under it. Here, you will see a list of every crash that has taken place on your PC past, present and future. This report can help you diagnose which hardware is malfunctioning. If you click on the individual error, in the ‘General’ tab, it will have a copy of the error message and if you click on ‘Details’, and look at ‘PackageFullName’ you will be given the name of the device that malfunctioned along with its driver version.
So, now you can either download a different driver or an older version of that driver and your problem will be gone.

Solution 4 – Have you installed anything new lately?
This statement might sound vague, but it is tethered to practicality. If you have installed some new piece of software, or added or updated hardware just before the problem started then it might be the cause. Try running your system without said program or try disabling the new hardware (if possible) and running your system.
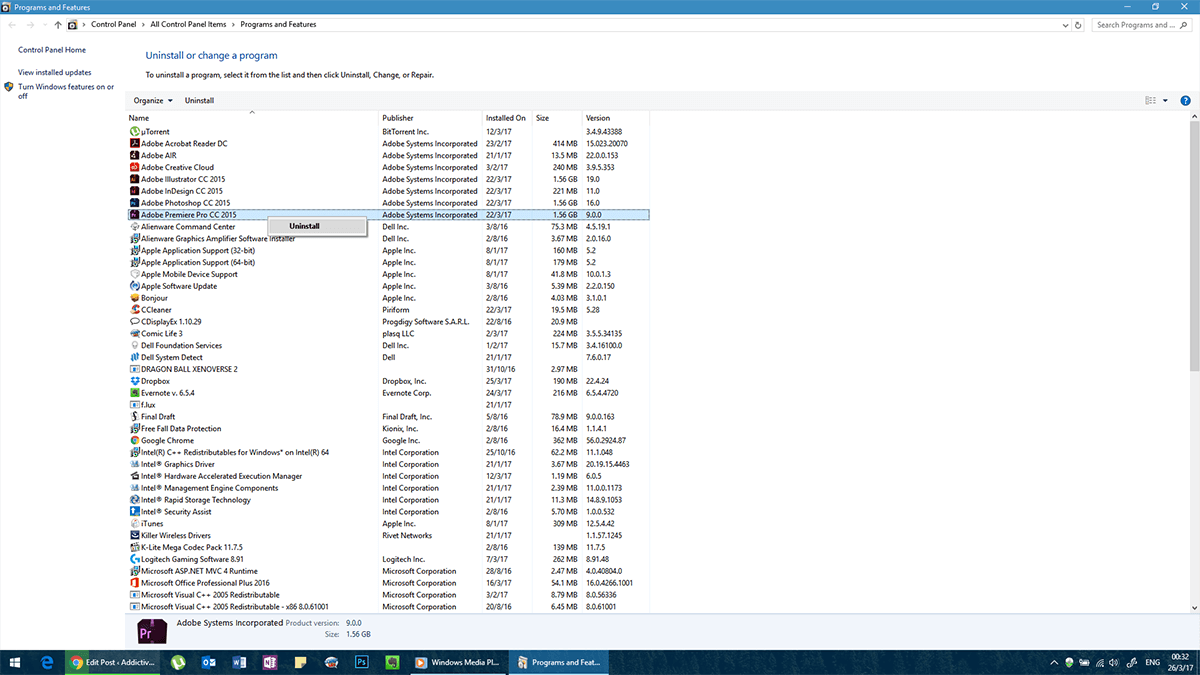
For hardware, simply remove it the way you installed it. If someone else installed it for you, ask them to uninstall it. For software, the process is simple.

If your computer is consistently giving you problems and you are not able to access your Control Panel normally, then you can restart it in safe mode.
Go to your Shutdown menu, hold down the Shift key and click Restart. It will take you to a Troubleshoot menu. Here, you can choose to restart in Safe Mode. You can uninstall problematic software now.
These simple tricks should help prevent your screen from turning Red with error ever again. However, if you continue to experience errors, consider going over this list to see if you’ve overlooked something.
