How To Fix Distorted Display In Windows 10 After Fall Creators Update
Windows 10 users who have upgraded to the Fall Creators Update are experiencing problems with their monitors. The colors look off or are distorted to the point where it feels like no graphics drivers have been installed. There’s no known cause but it seems to be effecting quite a few users. What’s happening is either the color profile for your monitor is being reset, has been corrupted, or you need to update your drivers. Some users with a multi-display set-up are seeing the problem on just one display. Here’s how to fix a distorted display in Windows 10.
The distorted display in Windows 10 is caused by one of several problems so some of these solutions can be tried on any system, while others are limited to which GPU you have.
Uninstall Apps That Modify The UI
If you have apps like Rainmeter, or TranslucentTB installed that modify the UI, try uninstalling them. Ideally, you should have disabled/uninstalled them before you upgraded to the Fall Creators Update. The updates often break something in the registry if UI modifying apps are installed. The same holds true for any app that modifies the Start Menu. Try removing them to see if the problem goes away.
Update Intel Graphics Driver
Most systems have an Intel graphics chipset so that’s the first place to troubleshoot this problem. This is a general fix that anyone who is experiencing a distorted display in Windows 10 should try.
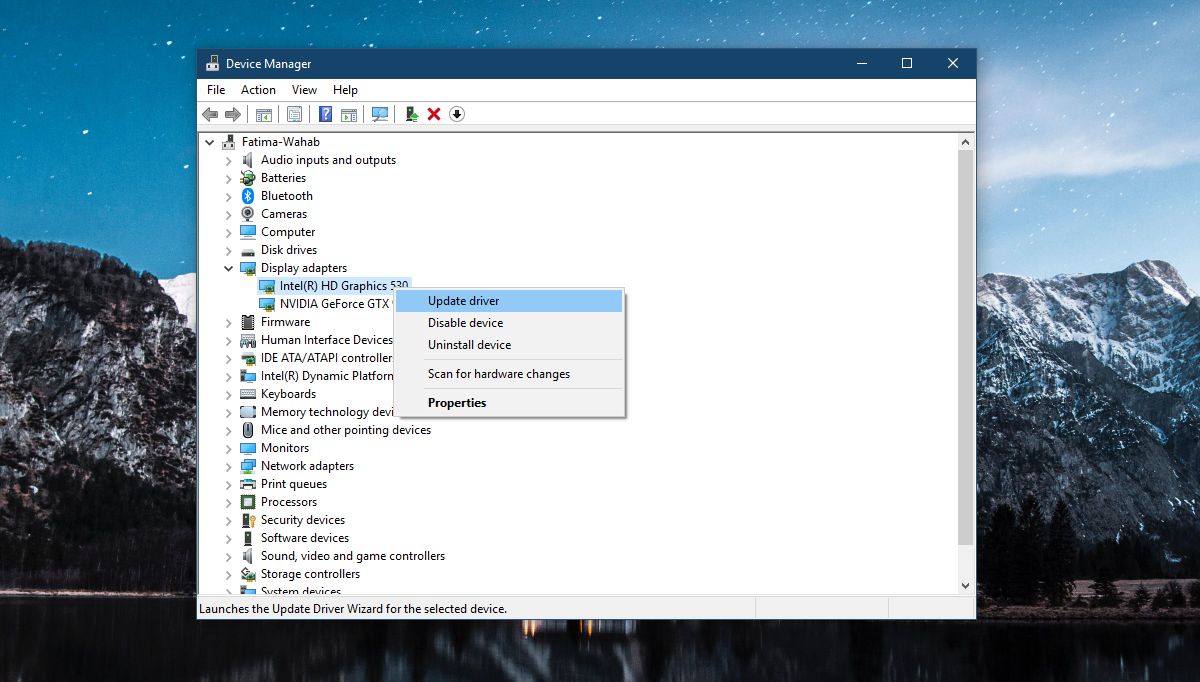
Open the Device Manager and expand the Display devices. Look for the Intel chipset and right-click it. Select Update driver from the context menu and allow the driver to update. Restart your system and the problem ought to be resolved. If there is no update available, then it’s possible the driver has already updated and the new version of the driver is causing problems. In this case, roll back the update.

NVIDIA GPU
If you have an NVIDIA GPU, you might need to disable a task in the task scheduler. This fix applies exclusively to systems that have an NVIDIA graphics card. You check under Device Manager>Display to see if you have one or not.
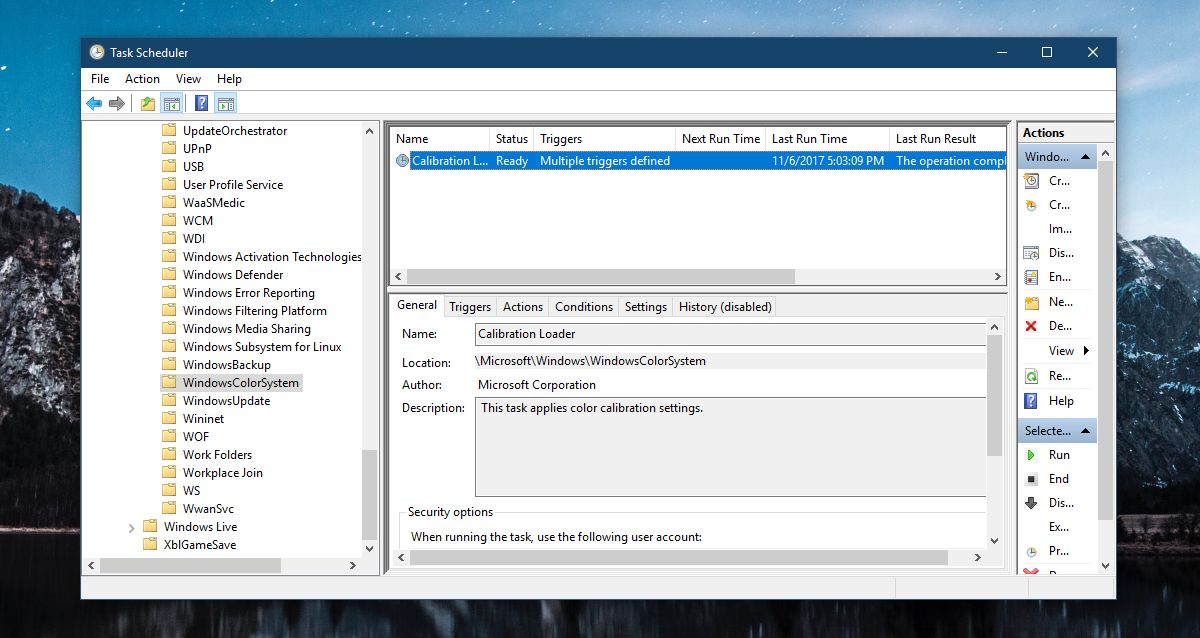
Open The Task Scheduler and expand the library. Go to;
Microsoft\Windows\WindowsColorSystem

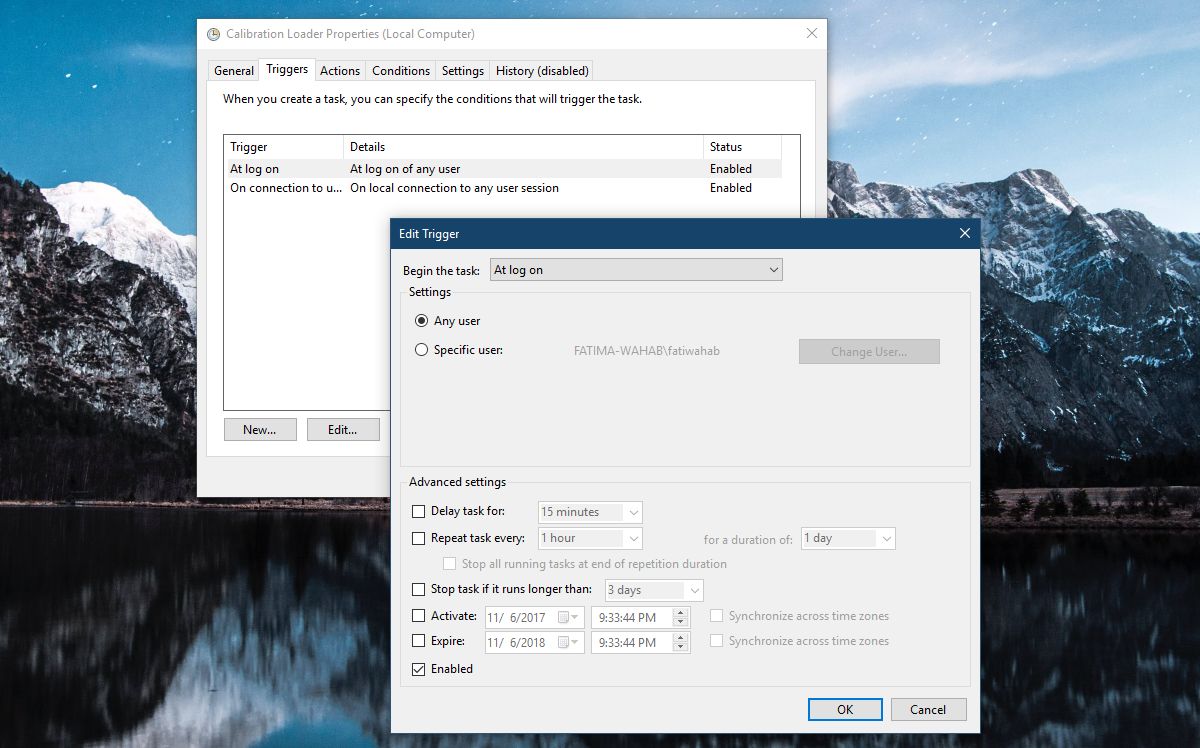
Look for a task called Calibration Loader, and double-click it to open its properties. In the properties window, go to the Triggers tab and disable both the triggers.

Reset Color Profile
The problem might have a simple solution in some cases such as resetting the color profile. Either the color profile has been reset or, it’s been corrupted. In either case, you should download the color profile for your monitor and install it again. This is again, a solution that can work on any system that’s experiencing this problem.
Install System Specific Display Drivers
This fix works if you have a manufacturer assembled laptop or system. Manufacturers like Dell, HP, Asus, etc, give you a library of drivers that are specific to the laptop or desktop model that you have. Check the official manufacturer’s website to see if any new display drivers are available for your system and install them.
It’s also a good idea to check if your manufacturer is aware of the issue and has issued any fix for it.

I have tried all the about methods and still have distorted windows when I’m trying to use Cubase 10.5
How are to do this when you can’t read anything on the screen?
If you guys have an Nvidia graphics card install Geforce experience then go to drivers and update!
A little effort and you could have incorporated these protocols into your installer. How about you lazy-ass developers stop forcing the public to be your beta testers. THIS kinda of crap is why Microsoft is so universally ridiculed.
Ok guys i faced the same issue, and it took me quite a while to find the solution.
Well, if you have an Nvidia Graphics Card, then most probably what happened is:
After the Windows Creator Update , the Colour Depth Setting on the Nvidia Control Panel would have got reset.
To fix this:
right click anywhere on Desktop > Nvidia Control Panel > Change Resolution
scroll down > Output Colour Depth
Choose a lower bpc. ( I chose 8 bpc )
Basically the issue was related to Output Colour Depth.
Hope this helps 🙂