How to Set Different Resolutions for Multiple Monitors on Windows 10
When you connect a second display to your PC, Windows 10 automatically sets the same resolution for it as the primary display.
If both displays are the same size, this isn’t a problem. If one of them has a higher resolution than the other, it is a problem. Unless you fix the resolution set for both monitors, one will always look bad. If nothing else, you won’t be getting the best out of at least one of your monitors.
Multiple screens on Windows 10
Windows 10 lets you set different resolutions for multiple monitors. It just doesn’t make it easy or obvious how it’s done.
Folks at MSFT removed the wallpaper and display settings from the Control Panel app and moved them to the Settings app.
The Settings app is a simplified version of basic settings but it complicates how you set different resolutions for multiple monitors.
Here’s what you need to do.
Dual monitors with different resolutions Windows 10
Connect your second, or third monitor to your PC or laptop. Turn it on and wait for your desktop to either extend or mirror to the new displays you just added. Once you’ve connected your displays, it’s time to fix their resolution.
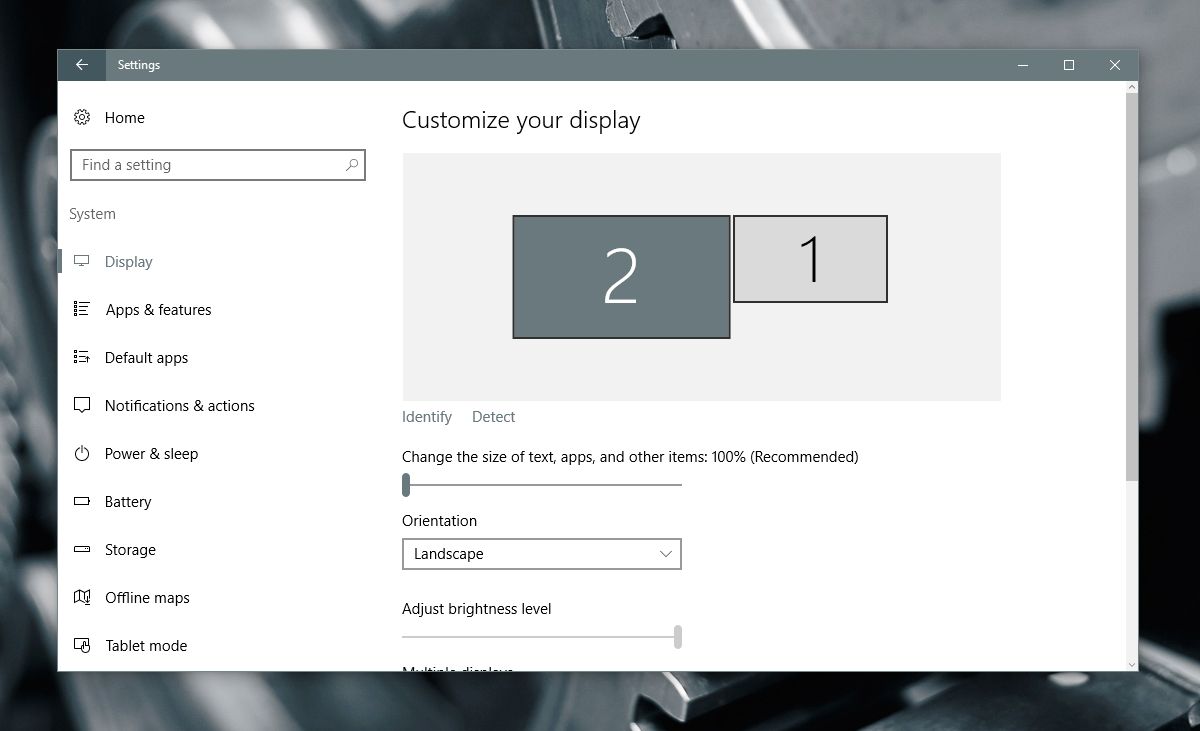
Open the Settings app and go to the System group of settings. Select the Display tab and make sure windows 10 is detecting all connected displays.
Click the ‘Identify‘ link at the bottom of the detected displays. This will help you identify which monitor is which.

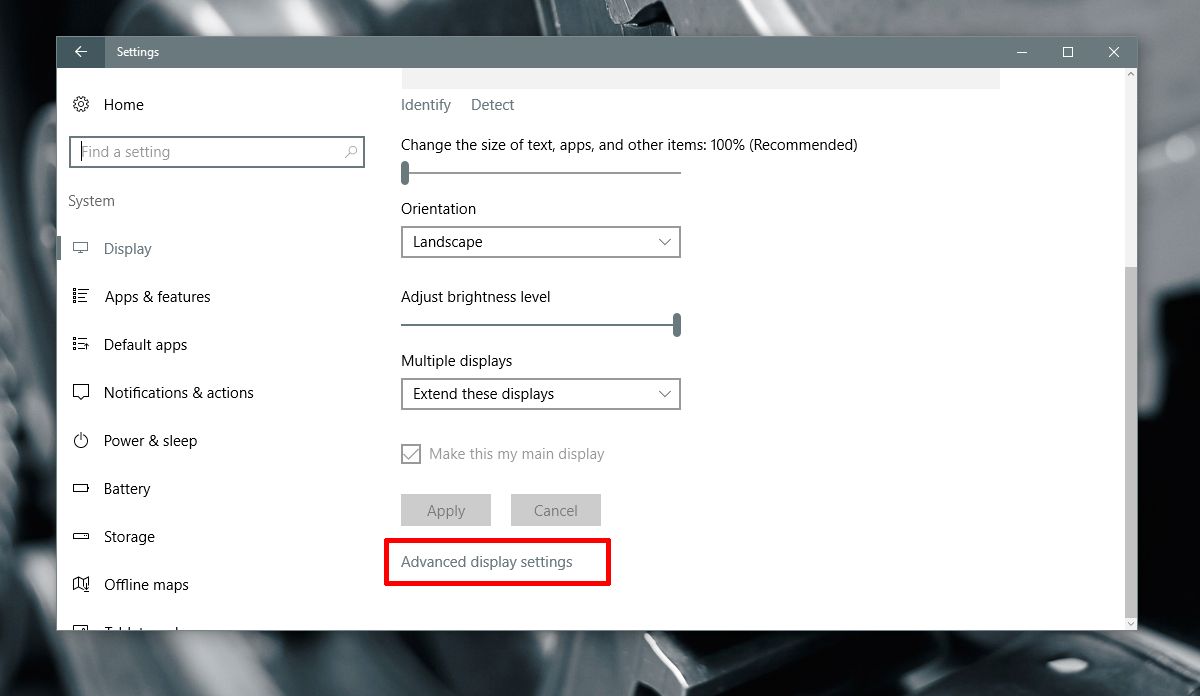
Next, scroll down this same tab and click ‘Advanced display settings‘.

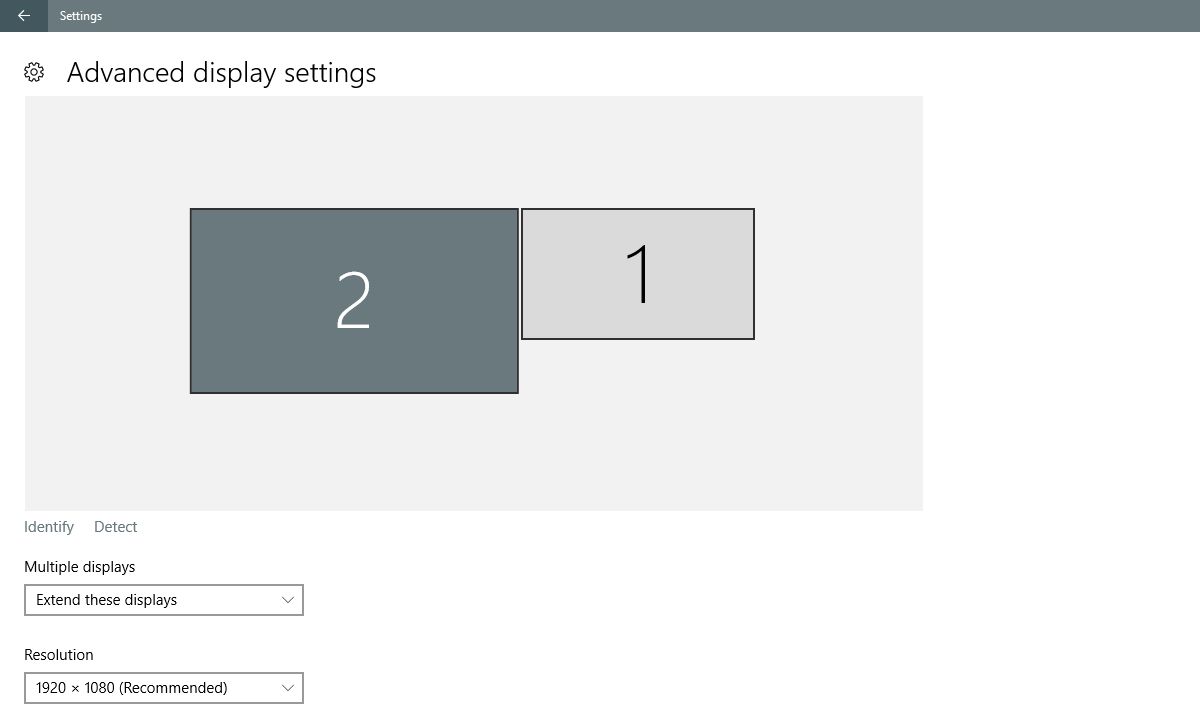
On the Advanced display settings screen, select the monitor you want to change the resolution for.
You should know which monitor is which from the first step. If you skipped it, there is an Identify link on this screen too. Use it to identify your monitor.
Select the monitor you want to set a different resolution for. This is a crucial step because the resolution options in the dropdown change depending on which display you’ve selected.
Display 2 has been selected in the screenshot below.

Open the Resolution dropdown and select the recommended (or higher) resolution for the display. Click Apply.
When prompted to keep or revert the change, click ‘Keep‘.
The resolution for the selected display will be changed. The resolution for the other display will remain the same as before.
Parting Words
This was easier on older versions of Windows 10. The trimming of the Control Panel app, and the addition of the Settings app have complicated otherwise simple tasks on Windows.
That said, the option is still there and it takes little effort to set different resolutions for multiple monitors. You just have to know where to look.

Found this article so helpful! really help me a lot
Thanks buddy! cleared my concepts
I have connected a 22 inch Dell monitor to my laptop. Laptop’s recommended resolution is 1366 x 768 and monitor resolution is 1920 x 1080. There is no issue and working good as I connected how you suggested above. But the issue happens when I connect to office VM/VDI, it is becoming Damn slow and CPU utilization hitting high. when I change my Monitor resolution to 1366 x 768, then it is working better. Kindly suggest is there any solution for me to keep the resolution 1920 x 1080 in my monitor and work better for my office VDI/VM.
I was delighted to find the advice but faltered at the first step when the second screen wasn’t detected and I couldn’t work out how to get it to do that.
Even though I have done this, my second monitor inherits the properties of my primary. I have 3840×2160 on the primary and the secondary is set at 1920×1080. These are the recommended settings. But the font sizes on the secondary monitor are all messed up in a number of programs. Quicken for instance, the sizes are very small or very large.
Hi, on the program that has very small or very large text, right-click it and select Properties. Go to the Compatibility tab and click the Change high DPI settings button. Try enabling or disabling these options. Disable them if the text is very small, and enable them if the text if very large. Try this out with one app and see if it makes a difference.
Additionally, if you’ve updated to Windows 10 1803 April Update, and open the Setting app and go to System>Display. Click Advanced Display Settings, and enable the fix for scaling.
Same issue as Rick, Steve but with two 1080’s framing a 4K display. All three are driven by twin Nvidia 1080 GPUs harnessed in SLI config, but not even Nvidia can display its control panel in dimensions that match two sets of screen resolutions. To me, the joy of multiple monitors is the freedom to move things from screen to screen. If that means having to reset preferences on every program, every time a program is bounced to a different monitor, it’s less than productive, fails state-of-the-art.
Child windows are the worst. Most have no Properties of their own. Returning them to the parent window’s screen doesn’t resolve wrong rez, and reinstalling the parent program doesn’t help either. Some child windows won’t even load fully — some fail to display half or more of their content, most likely a programming code choice Windows has yet to embrace.
I’m on Windows Pro x64 1803, 17682.1000 right now and there’s no such scaling fix in the Settings app, though Advanced Display Settings produces a read-only summary of all my monitors’ specs,it’s not a fix.
Did they move the Advanced display settings button? It’s not where you show it is, above. I cannot find it anywhere now.
yeah its not there anymore. now you can just click on the monitor, whether 1, 2, or whatever number and then change the settings accordingly for that monitor. its not in advanced anymore