How To Create A Custom Canvas Preset In Photoshop
You can create custom canvases in Photoshop. Photoshop CC 2017 comes with a few presets for mobile, web, and printing jobs. A preset is a canvas that is the correct size for the project you’re working on. A preset has a pre-determined resolution, background color, orientation, and more. It saves you time spent on setting up a canvas for the work you intend to do. Photoshop cc 2017 will show you recent canvas configurations you’ve used in the new document window. It won’t save all your recent canvas configurations though. The best way to save a custom canvas is to create a custom canvas preset in Photoshop. The preset will never be lost. You can name it whatever you want, and get right down to work. Here’s how you can create a custom canvas preset in Photoshop CC 2017.
Configure The Custom Canvas
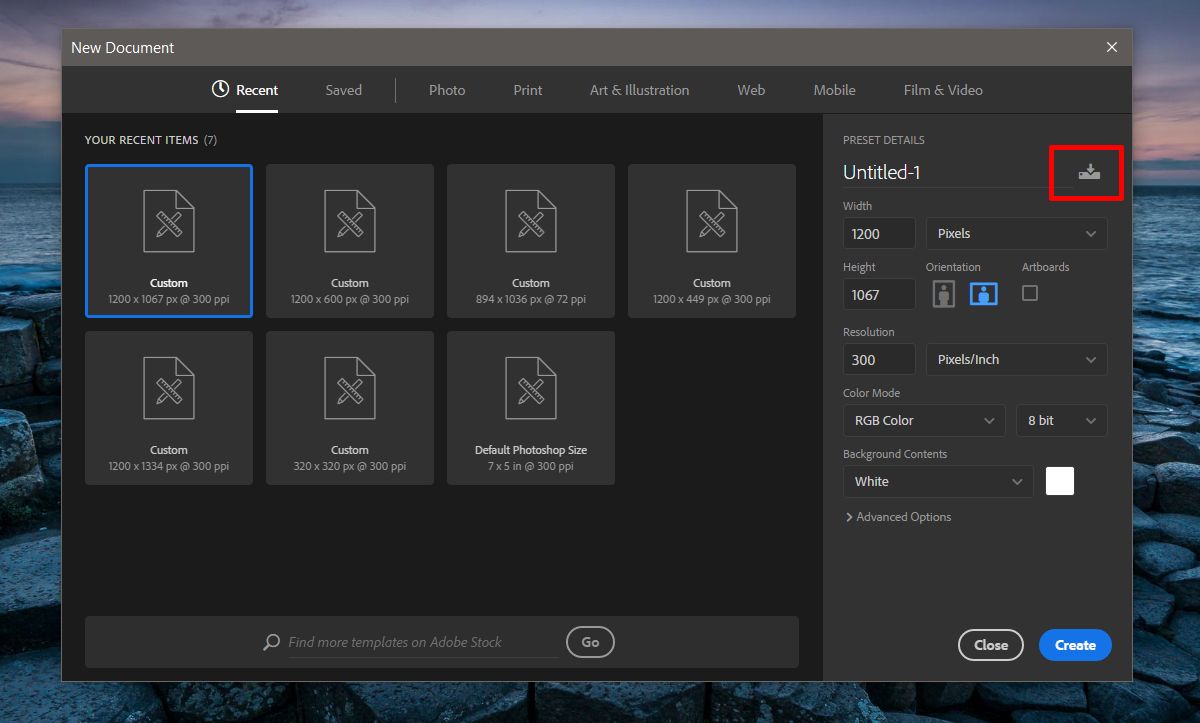
Open Photoshop CC 2017 and go to File>New or just tap Ctrl+N to open the New Document window.
Configure it for your project. Set the width, height, resolution, orientation, and color mode. You can enable artboards, and set the pixel aspect ration under Advanced options. Set everything up first. When you’re done, click the save button next to the title of the document in the Preset Details column.

Save Preset
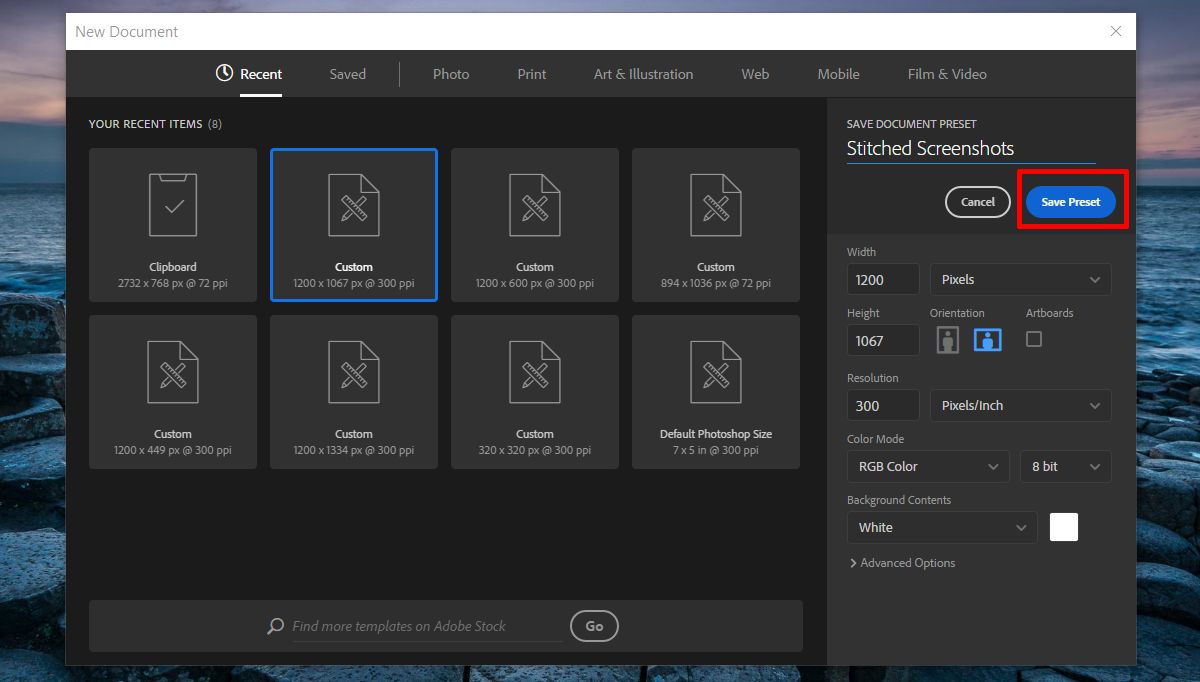
Enter a name for your custom preset in the ‘Save Document Preset’ field. Click the ‘Save Preset’ button under it and the canvas you created will be added as a preset to Photoshop.

Use A Custom Canvas Preset
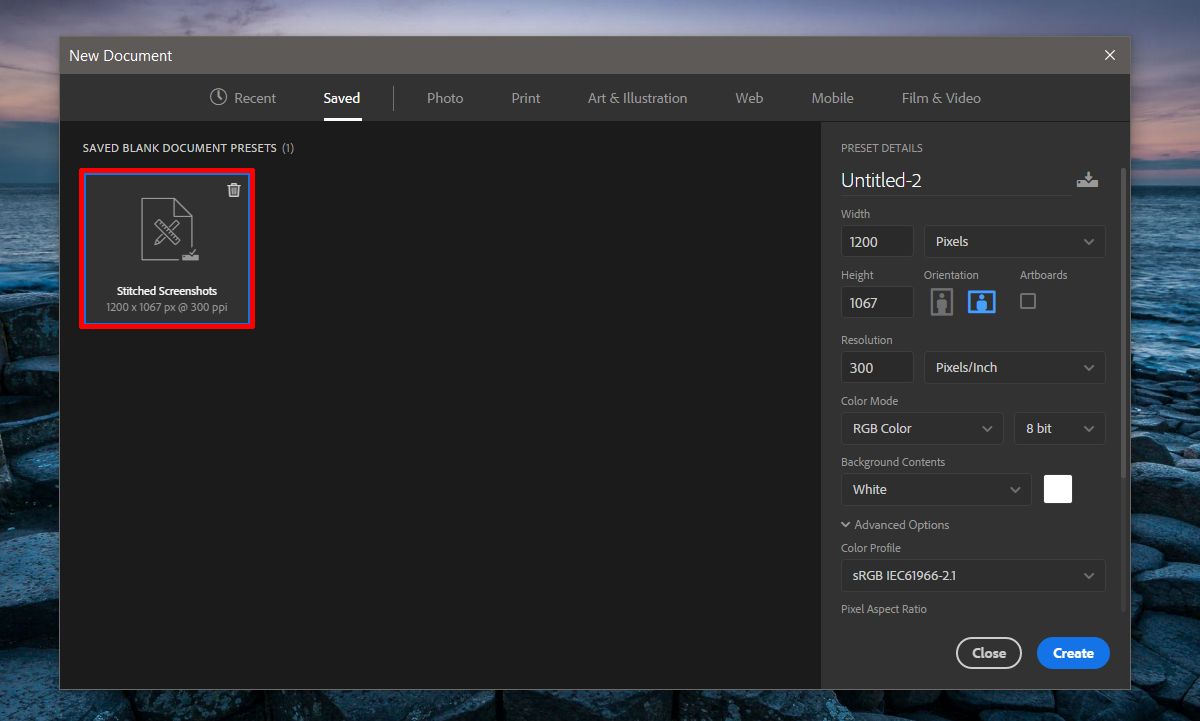
To use a custom canvas preset in Photoshop, tap Ctrl+N or go to File>New to open the New Document window. If you use your preset often, it will appear in the Recent tab. If it doesn’t go to the ‘Saved’ tab. All the custom canvas presets you save appear in this tab. Click the one you want to use. If you named it properly, it should be easy to find the right one. Unfortunately, you can’t sort a custom preset as ‘photo’, ‘Print’, ‘Art & Illustration’ etc. There is also no search feature so if you have one too many presets, you will have a cluttered New Document window.

Delete A Custom Canvas Preset
A custom canvas preset in Photoshop has a little delete button at the top right of its thumbnail. The delete button is a trash can icon. Click it to delete the preset. Once you delete a preset, you cannot recover it. It might still appear in the ‘Recent’ canvas configurations for a while. If you don’t use it, the canvas will eventually disappear from the Recent tab. It’s a good idea to trim your custom presets whenever you finish a project to avoid clutter.
