How To View And Clear The Printer Queue In Windows 10
In Windows 7, when you print a document a little printer icon appears in the System Tray. This icon lets you access the printer’s queue. From the printer queue you can pause or cancel a print job. This has changed in Windows 10. When you connect a printer and print a document no icon appears in the System Tray. As such, there doesn’t seem to be any way to view or clear the printer queue in Windows 10. It’s still possible if you know where to look. You can view and clear the printer queue and you don’t need to connect the printer to your system to do so. Here’s how.
This is Windows 10 we’re talking about. You can manage common settings from two places in Windows 10; the Settings app, and the Control Panel. We’re going to detail how you can view and clear the printer queue from both.
Printer Queue – Settings App
Open the Settings app. Go to the Devices group of settings and select the Printers & Scanners tab. Here you can add a new printer and see a list of all printers currently added to your system.
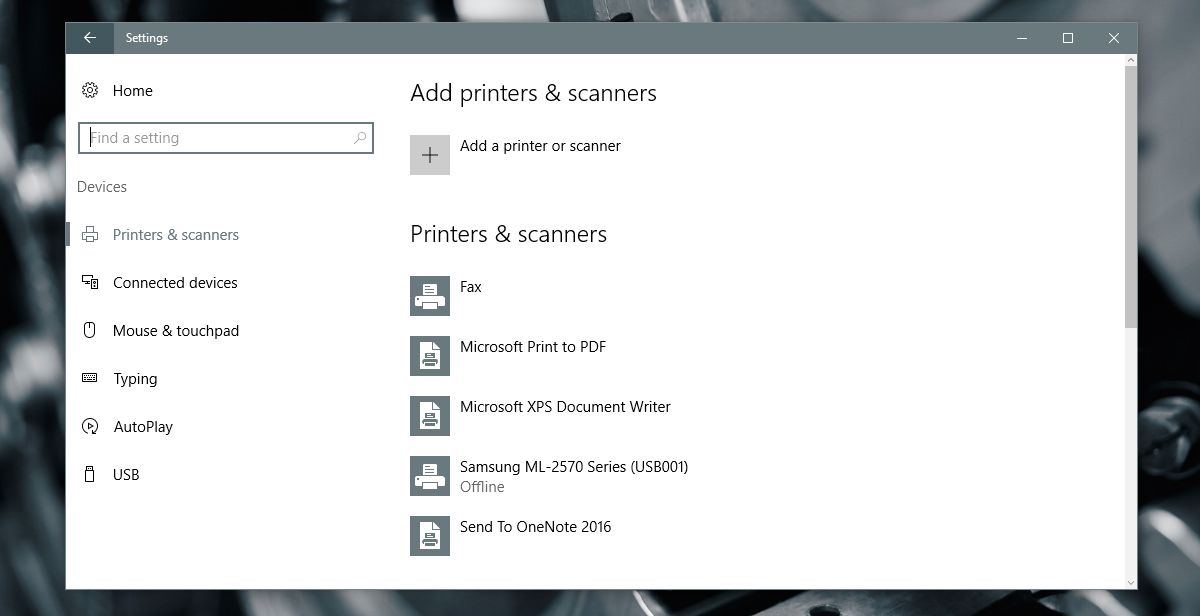
Select a printer from the list. If you have multiple printers added to your system and you’re trying to clear the printer queue for a specific printer you need to remember which one it is. The print queue for each printer is kept separate and for good reason.
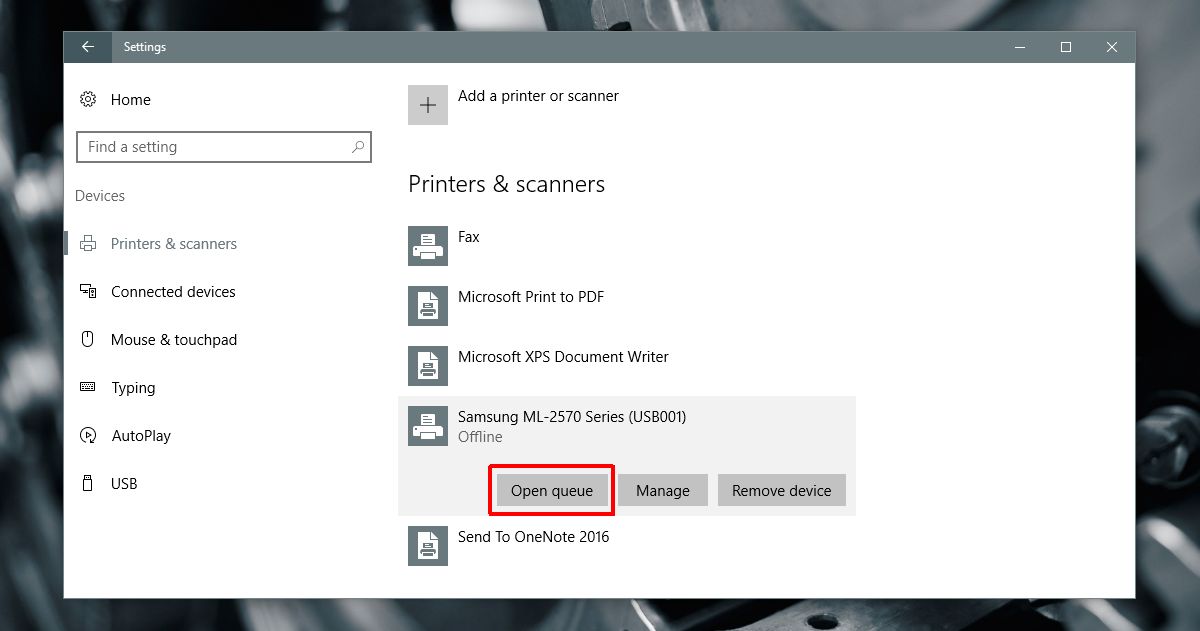
Click the printer you want to view or clear the print queue for. It will expand to reveal three buttons; Open queue, Manage, and Remove Device. Click the ‘Open queue’ button.
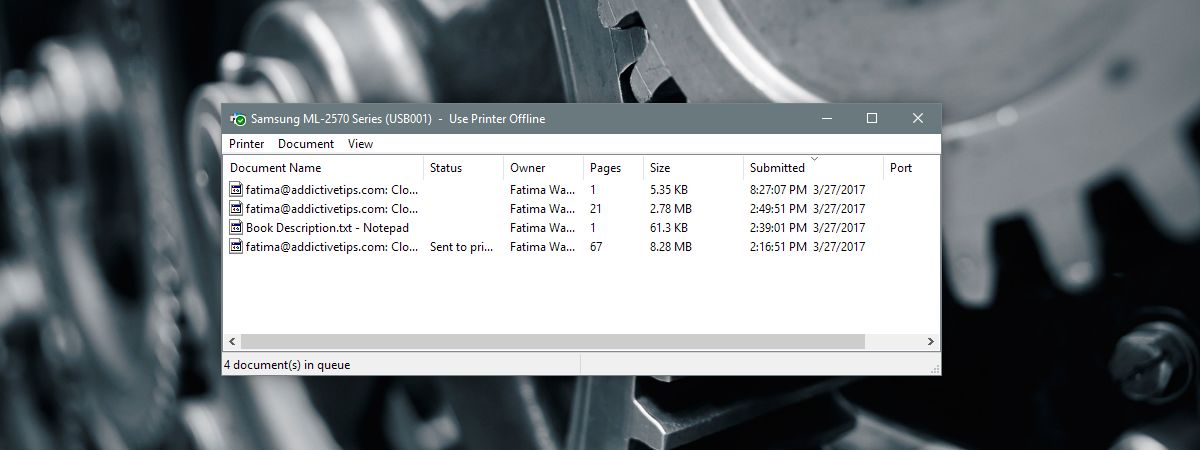
A new window will open listing all documents currently queued for printing. You can see which documents have been sent to the printer and which are waiting to be sent.
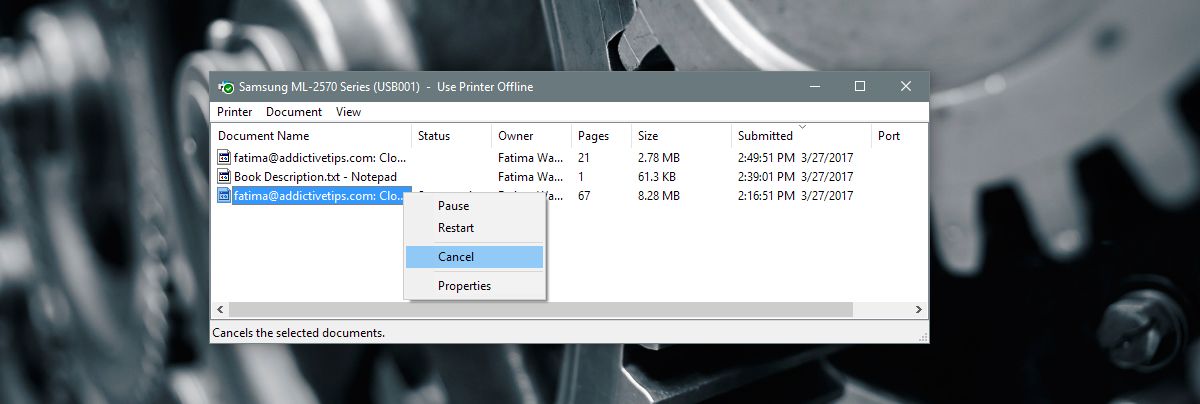
Right-click the document you want to cancel printing for and select ‘Cancel’ to cancel printing the document.
Printer Queue – Control Panel
Open the Control Panel. Go to Hardware and Sound > Devices and Printers. Under the Printers’ section right-click the printer you want to view the queue for. Select ‘See what’s printing’ from the context menu.
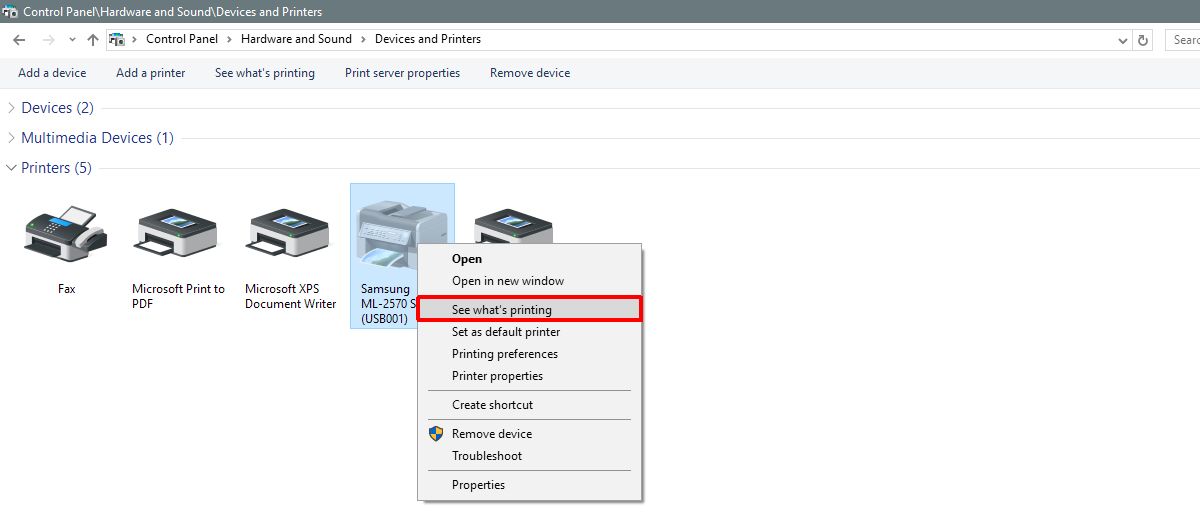
You will see the same printer queue window that the Settings app opens. Right-click a document and select ‘Cancel’ from the context menu to cancel printing a document.

Clearing A Print Job From The Printer’s Cache
Often, when you cancel a print job from your desktop your printer continues to print it anyway. This happens for print jobs that have been sent to the printer. Ideally, the printer should not print the document but printer technology is still pretty old and clunky.
If you’ve cancelled a print job from your desktop but the printer will not stop printing it disconnect the printer from your system. Turn the printer off and wait for ten minutes. Turn it back On and the print job should be cleared. Let the printer start up properly before you connect it to your system again.
