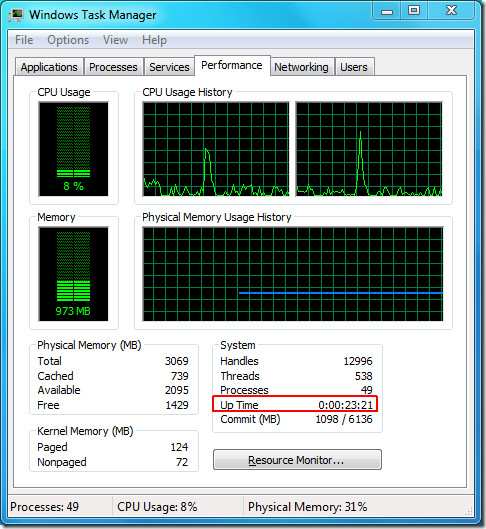
Check Windows 7 Uptime
If you keep your computer always-on then checking the uptime of the system is important. This comes useful if you run your computer 24/7 and want to see how many days are over since last reboot.
There are two ways in which you can check the uptime of the system in Windows 7.
Method 1 – Using Windows Task Manager Performance Tab
This is the quickest method for checking the uptime of your system, just hit Ctrl+Shift+Esc and select the Performance tab. Here you will find the Up Time listed under System.

Method 2 – Using 3rd Party Tool, Uptime.exe
Uptime is a dead-simple command line tool developed for those users who want to check the uptime quickly over output console. This can be useful if you want to routinely check the uptime of your server. The author developed this small utility because he needed a similar tool for Windows like the ‘uptime’ tool which can be found in Linux Terminal.
Just copy the uptime.exe file to the C drive, start Windows Command Prompt by typing CMD in Start Search and hit Enter. Once launched, go to C drive by using ‘cd..’ command, now type uptime and it will show you the details in the following format:
current time uptime [days,] time since last boot

Here, days will only be displayed when the system is online for more than 24 hours.
Enjoy!

If you want to know when your computer was booted see “Boot time” using the tool:
Cmd -> “systeminfo”
…or simply write “net statistics workstation” in a command prompt
…or simply write “net statistics workstation” in a command prompt
…or simply write “net statistics workstation” in a command prompt