Automate Plex backups on Windows Server
It’s always wise to have backups of your Plex Media Server data, as unforeseen events can occur. If you’re looking to automate this backup process on your Windows Server, there’s good news—it’s indeed possible! Let’s walk through the steps to automate Plex Media Server backups using Windows Task Scheduler.

How to Identify the Plex Data Location
Before setting up a scheduled script on Windows Server to automatically back up your Plex configuration data and library databases, you first need to identify their locations.
Start by locating the Plex Configuration data. Open Windows Explorer on the Windows Server desktop, and navigate to C:\Users\USERNAME_HERE\AppData\Local\Plex Media Server\. If this directory contains files, you can confirm it’s the Plex Media Server data repository, storing all configuration details for your Plex Server.
After finding this data, use Windows Explorer to go to a backup disk on your Windows Server. In this example, the backup disk is D:\. Once there, create a folder named “Backups.”
Identifying Plex Database Locations
Typically, you can back up your Plex Media Server and configuration files simultaneously, as the database files are usually in the C:\Users\USERNAME_HERE\AppData\Local\Plex Media Server\ folder on Windows Server. However, if you prefer, it’s also feasible to back up the databases separately.
To back up the databases individually, first, identify their storage location. Open a new Windows Explorer window on the Windows Server desktop and navigate to C:\Users\USERNAME_HERE\AppData\Local\Plex Media Server\Plug-in Support\Databases\.
Examine this directory. If the “Databases” folder contains data, you can confirm that this is where the Plex Media Server databases are stored on your Windows Server, ready for backup.
How to Write the Backup Script
Creating a backup script that automatically runs with Windows Task Scheduler isn’t difficult, as it simply involves using standard Windows Command Prompt commands in script form. Start by opening the Notepad program on your Windows Server Desktop.
In Notepad, enter the “xcopy” command. This command copies data from one directory to another, specifically from C:\Users\USERNAME_HERE\AppData\Local\Plex Media Server\ to the “Backups” folder on the D:\ drive.
Please note, this command is a template. Modify the “USERNAME_HERE” part of the source path and “D:\Backups” in the destination path according to your setup.
xcopy "C:\Users\USERNAME_HERE\AppData\Local\Plex Media Server\" "D:\Backups\" /E /I /Y

pause
After writing your backup script, save it as “BackupPlexData.bat”.
How to write the Database backup script
To write the Database backup script, start by launching the Notepad app. Once it is open, paste the following code into the Notepad program. This code is an “xcopy” command that will make a backup of your Plex Media Server databases, ensuring they are backed up.
Remember, just like the last script, this code is a template and must be customized. Be sure to change “USERNAME_HERE” and “D:\Backups\Databases\” to suit your own needs, or the script will fail to execute correctly.
xcopy "C:\Users\USERNAME_HERE\AppData\Local\Plex Media Server\Plug-in Support\Databases\" "D:\Backups\Databases\" /E /I /Y

pause
When you’ve finished customizing your script, save it as “BackupPlexDatabase.bat”.
Automatic backups with Windows Scheduler
To add your scripts to the Windows Scheduler so that your Plex backups are automated, do the following. First, open up Task Scheduler. You can launch this program by searching for “Task Scheduler” in the Windows Start Menu.
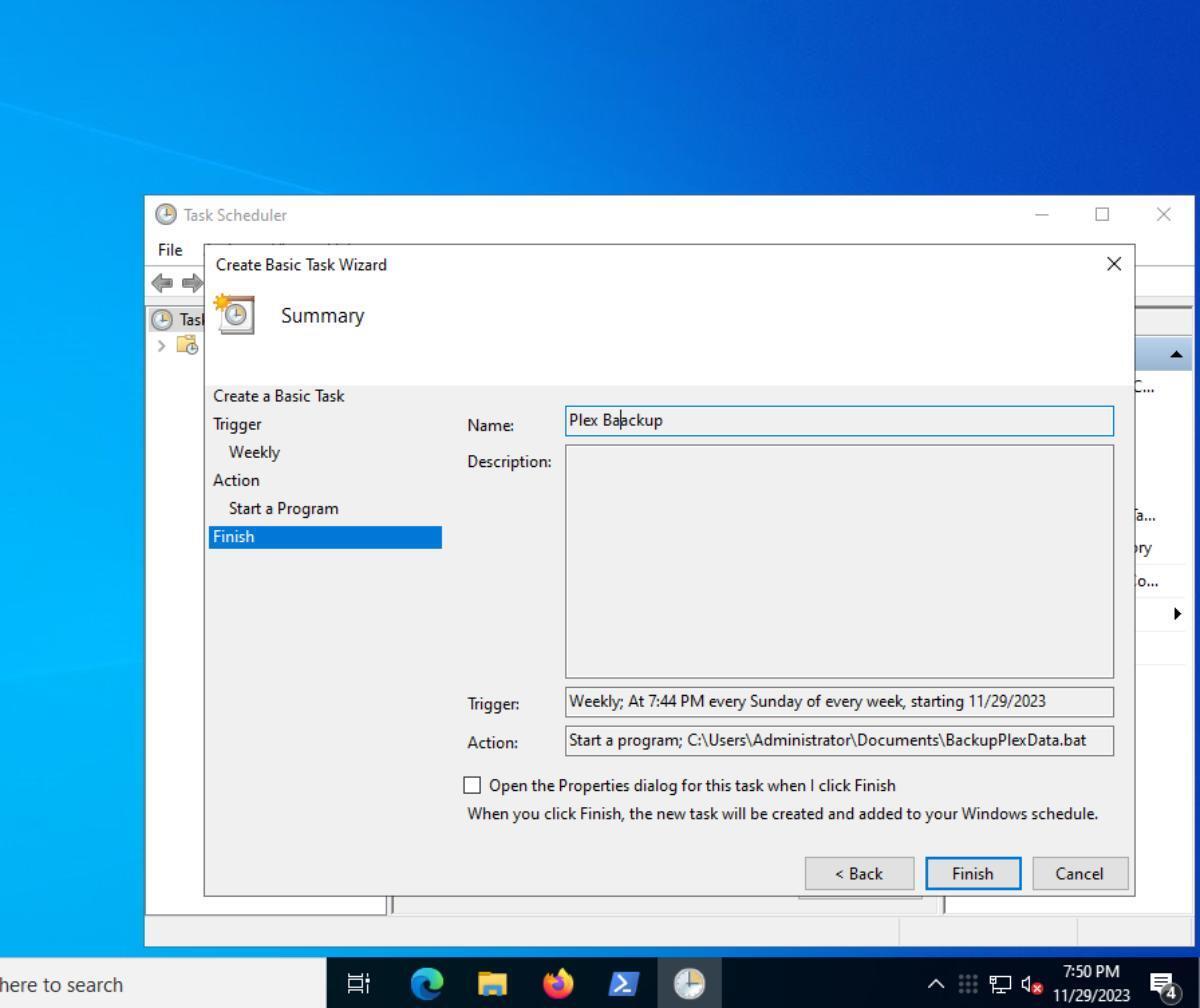
Once “Task Scheduler” is open, select the “Action” menu, and choose the ”Create Basic Task” option. When you select the “Create,” a new window will appear. In the “Name” box, enter the name of your new task. In this case, we’ll enter “Plex Backup”. You can then fill out a description, and click the “Next” button to continue.
After setting the task name and description, choose when you want the task to start. We recommend setting up either a daily, weekly, or monthly task. When you’ve chosen your time, you can further configure it on the next page. When everything is configured, click the “Next” button to continue.

Windows Server will now ask you what action you wish to perform. Select the option “Start a program, ” and click the “Next” button to continue. On the next page, browse for the “BackupPlexData.bat” script or the “BackupPlexDatabase.bat” script. Then, click the “Next” button to continue.
With your task configured, you’ll have automated Plex backups on your Windows Server. Be sure to always check on your backups to ensure they’re being made correctly, and monitor your drive space to ensure your Windows Server has adequate space.
