Auto-Resize Images Without Shrinking The Main Subject
How many times has it happened that you found a good image to use as your wallpaper, but when you tried to set it as the desktop background, the resolution did not match that of your computer’s screen. The image is still displayed, but sometimes you most favorite part of the image is left out from focus and goes to the side. In such situations, either you have to find a new wallpaper with the resolution that fits your screen, or you can resize it using any image editing tool. You can use the previously covered Easy Image Modified, a tool that lets you perform everyday image related tasks, such as resize, rename, sort, realign, convert etc, or Microsoft’s very own Office Picture Manager that lets you quickly crop or resize images. However, the problem with these tools is that when you resize the image, the pixels can get squeezed together distorting the real image. Today, we have a tool for you called Image Resize Guide Lite that mixes the concept of resizing and cropping, and using its Smart Resize technology, changes the size of the image by both squeezing the pixels and cropping out the empty parts of the image. Keep reading to find out more about Image Resize Guide Lite.
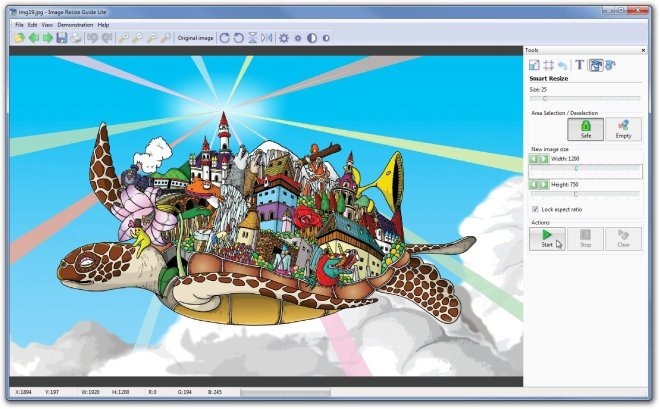
The application sports simple controls allowing you to resize images. Other than the Smart Resize option, there are also simple resize and crop options, as well as a tool for adding text on to your images available. From the top you can Rotate the image, Flip it vertically and horizontally, increase and decrease the Brightness, and increase/ decrease the image Contrast. The Crop, Resize, Text, and Smart Resize options are available on the right side. To use the Smart Resize feature, select it from the right side, choose the required resolution, select Empty from Area Selection/ Deselection and click Start.

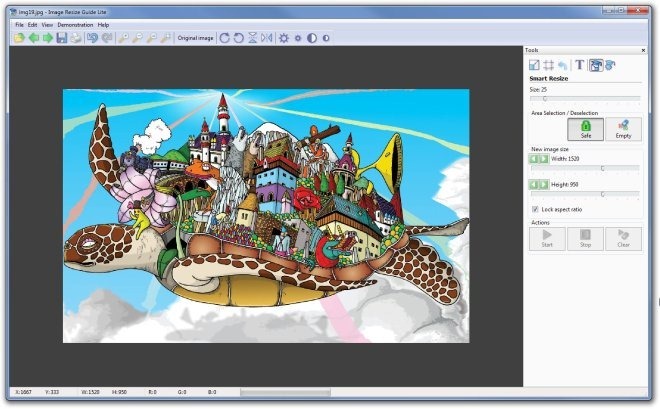
The application will work its magic, automatically detect the Empty parts of the image and remove everything useless that it can. If everything is removed and the image is still bigger than the specified size, it will start shrinking the image.

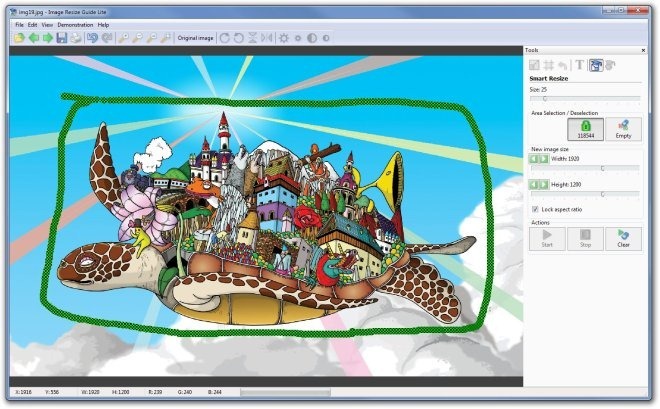
If you choose Safe under Area Selection/ Deselection, you can define a safe area in the image. The Smart Resize feature will not touch the area inside the safe area.

Image Resize Guide Lite works on both 32-bit and 64-bit version of Windows XP, Windows Vista, Windows 7 and Windows 8.

isn’t this magical feature called “crop”