Add Panoramic Camera Motion To Time-Lapse Videos With Panolapse
If you’ve ever seen those nature documentaries on Discovery Channel or National Geographic, you don’t really need any explanation about time-lapse videos. Just how they fast-forward time to capture all those plants growing and sun moving in and out of sight in seconds is simply jaw-dropping. With wide adoption of DSLR cameras, time-lapse photography has become quite famous over the past few years. Beside professional cameras specifically designed with this option, there’s a variety of smartphone and desktop apps developed to help all types of users with creating time-lapses. So, how about creating them using a bit of your time and a free desktop tool called Panolapse? It’s a free app available for Window as well as Mac OS X for creating time lapse videos with virtual camera motion.
The application uses perspective correction to create real world rotational panning through the scenes. In layman’s terms, you simply have to change the perspective of the photo in different time frames, and the output result appears as an actual motion in the scene. The developer has also provided a demo video on their website to show how this perspective correction works.

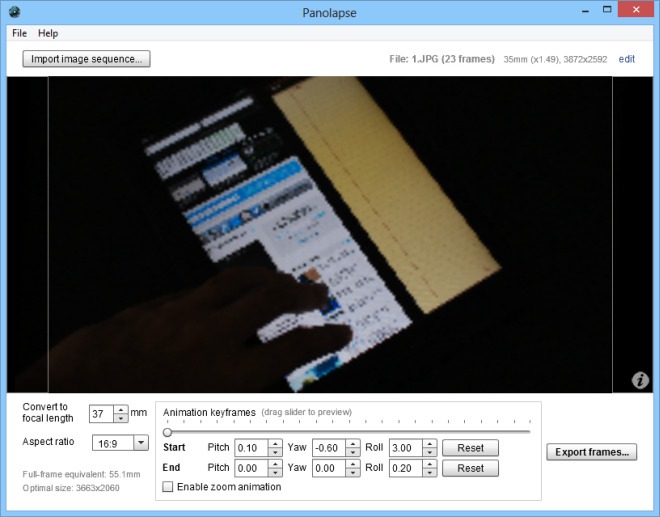
On its interface, you will find a few perspective control buttons at the bottom. Using these buttons allows you to adjust pitch, yaw and roll of the image. Alternatively, you can also use your mouse buttons for the purpose. For instance, you use the mouse scroll wheel to zoom in and out, and the left and right clicks to control pan and tilt respectively.
The usage is quite simple. The first step is to insert the photos that you want to use for your time-lapse video by clicking ‘Import Image Sequence’ button at the top-left. Just make sure all the images in the folder carry a sequential naming scheme. Once selected, you need to specify a custom focal length and crop factor, as well as lens type. The application allows you to choose between normal (rectilinear) and fisheye lens types.
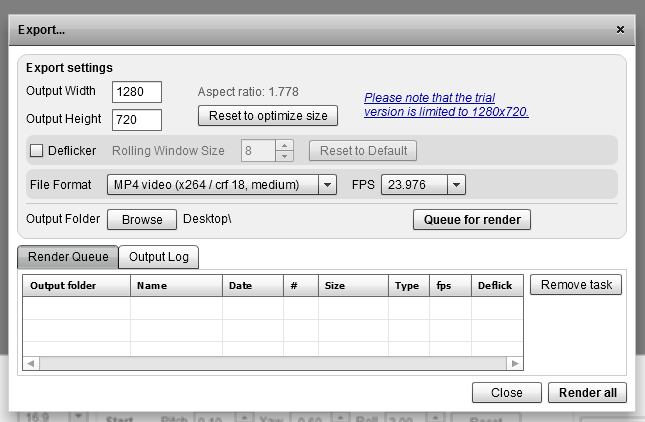
You can always click the Edit button at the top-right to make changes to the aforementioned settings any time you wish. The application also allows you to choose the aspect ratio from 16:9, 4:3 and 3:2. To save the output, you need to render the selected frames into a video file, basically stitching the frames together to create one continuous loop. To do this, click ‘Export Frames’ on the main interface and specify a few output parameters, such as resolution (width and height), Deflicker (can be manually enabled or disabled), file format (JPG, MP4 and MOV) and FPS (frames per second). The application allows you to render multiple tasks in batch. To add your current task, simply click ‘Queue for render’. Finally, click ‘Render all’ at the bottom-right to begin the rendering process.

In a nutshell, it’s quite a handy app for adding virtual camera motion to your existing photos. The application works on Windows and Mac OS X.
