A Basic Guide To Photoshop Filters [Tutorial]
Photoshop filters are plugins aimed to provide additional image effects which are usually hard to come in effect using Photoshop alone. New users, no matter what version they are using, do play with the available filters found right under the Filters tab in Photoshop. Today,we will look at the basic use of some these filters and the ability of these filters to provide great image effects.
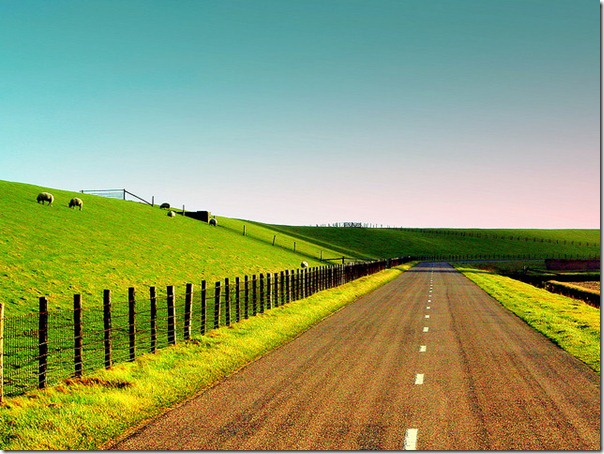
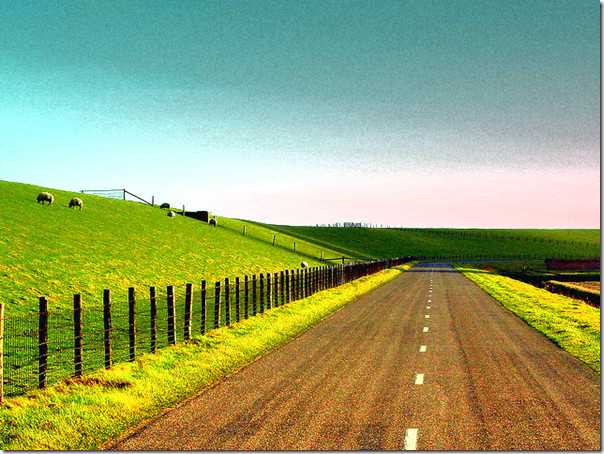
This picture was taken from Flickr, and now we will show you some basic tips of placing some of the filters on this picture, gaining different tones and feels.
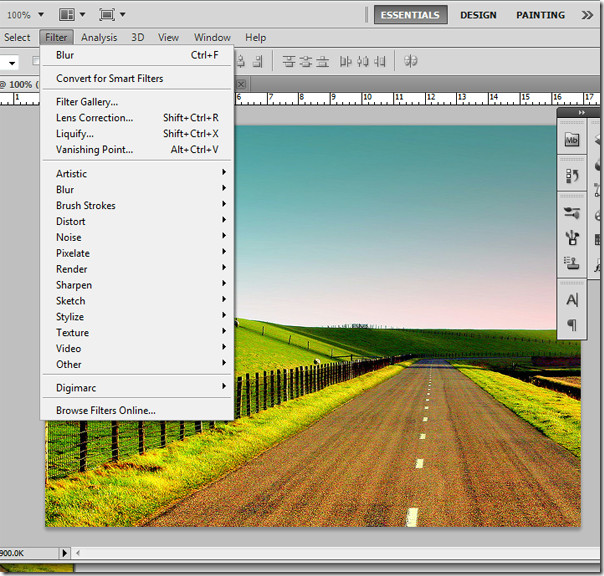
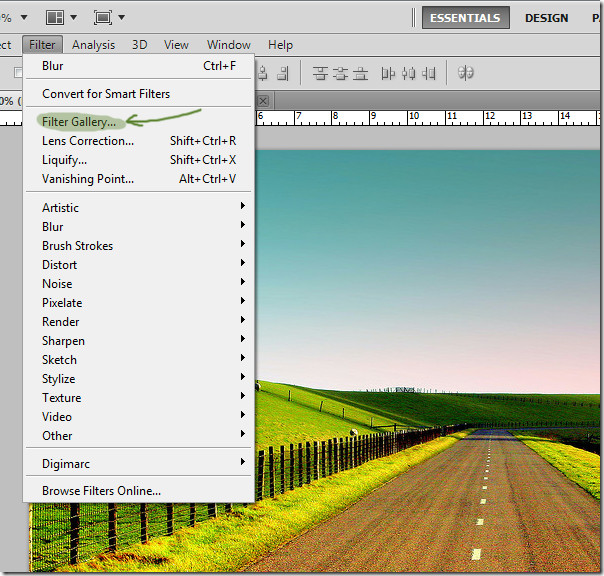
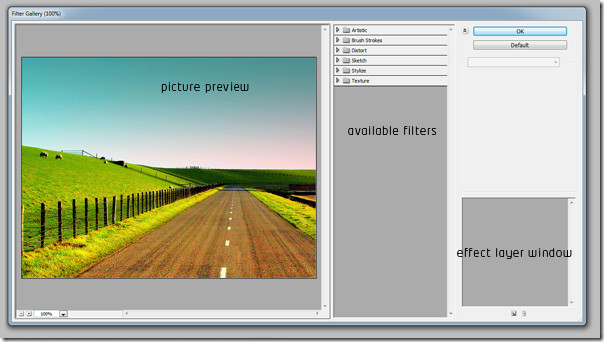
When you click the Filter tab, a drop down will appear and will show you all the filters like artistic, blur, brush strokes, distort, noise, sketch etc.. To see a preview of filters click the Filter Gallery tab (available in versions CS3, CS4, CS5).
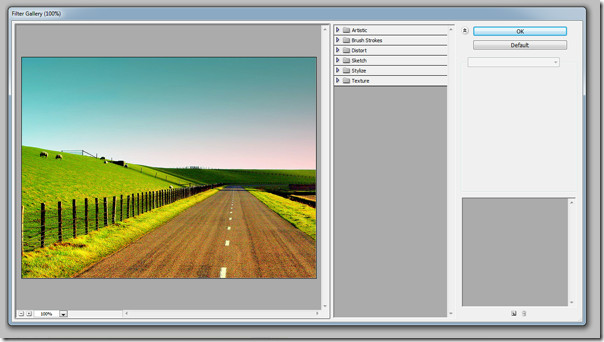
When clicked, another window will pop up, titled Filter Gallery, apart from your Photoshop work window.
In versions CS3, CS4, and CS5 the filter gallery would have the following main features. A preview window where you will see your current picture (in this case, the landscape), available filters, where you can see all the available filters in your Photoshop version with which you can play with and an effect layer window in which you can create separate effect layers in the filter gallery and later on import them into your main Photoshop work window.
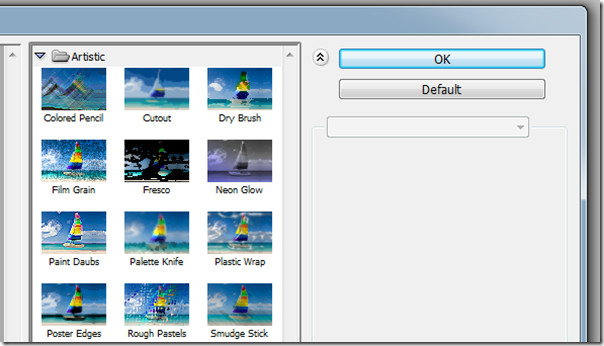
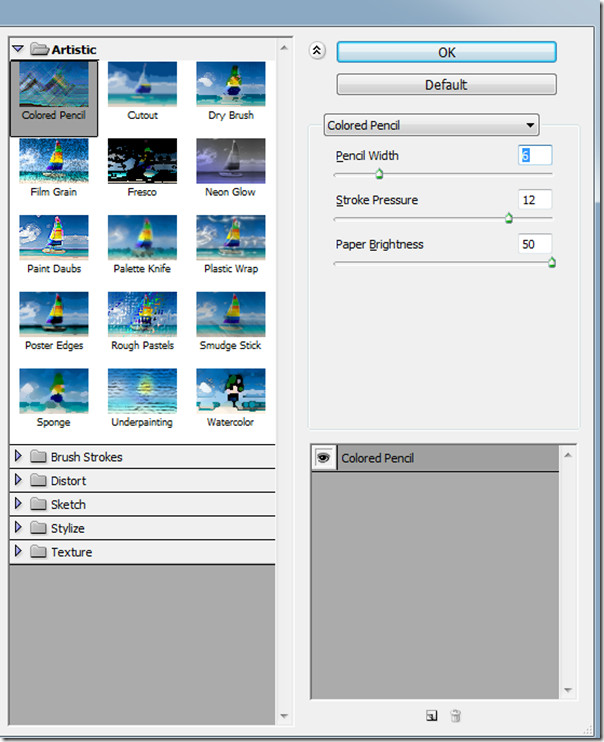
Once you click any of the filters tab, in this case the Artistic tab, a drop down appears with a number of sub filters. For instance, we can see filters like Colored Pencil, Cutout, Dry Brush, Film Grain, Fresco, Neon Glow etc..
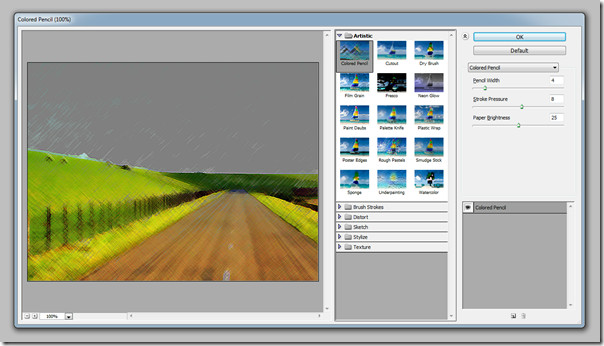
Now click Color Pencil, your picture will get an instant effect as that of the selected Filter. You will also notice that some settings have appeared on your right hand side and a new layer has appeared in the effect layer panel.
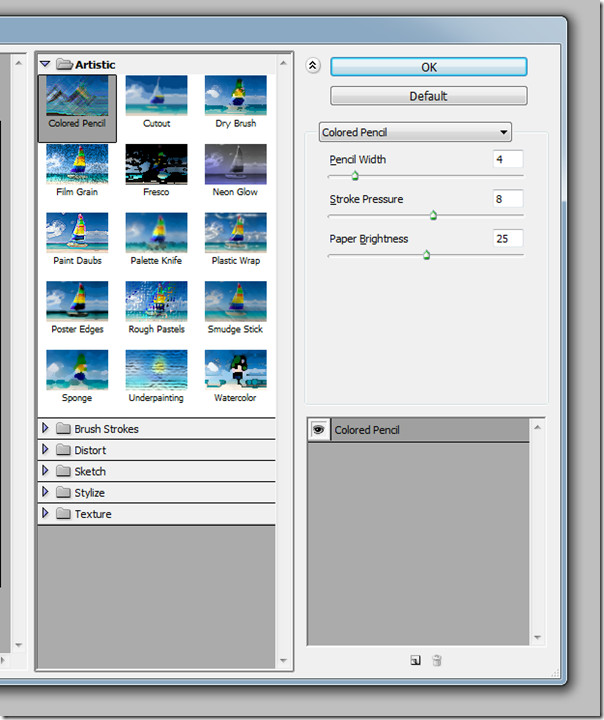
In further settings like mentioned above, you can play with the pencil width, stroke pressure and paper brightness. Stroke is the border, pressure becomes the pressure as that of exerted by a paint brush or color pencil in this case and lastly, by paper brightness you can simply control the brightness of the picture.
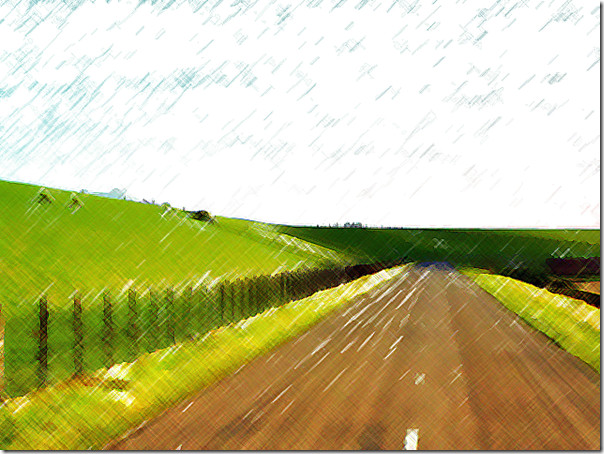
By adjusting some pencil width, stroke pressure and paper brightness, the outcome should look like this. You get a nice color pencil feel to your picture in few clicks. The process speed also depends on the size of your picture. Naturally, if you have a higher quality picture taken with a better mega pixel camera, it is going to take a little bit more but definitely not forever.
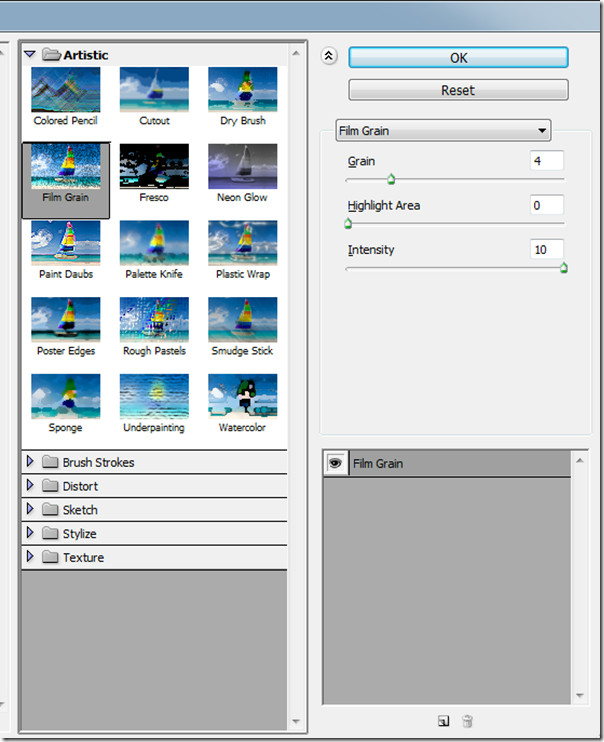
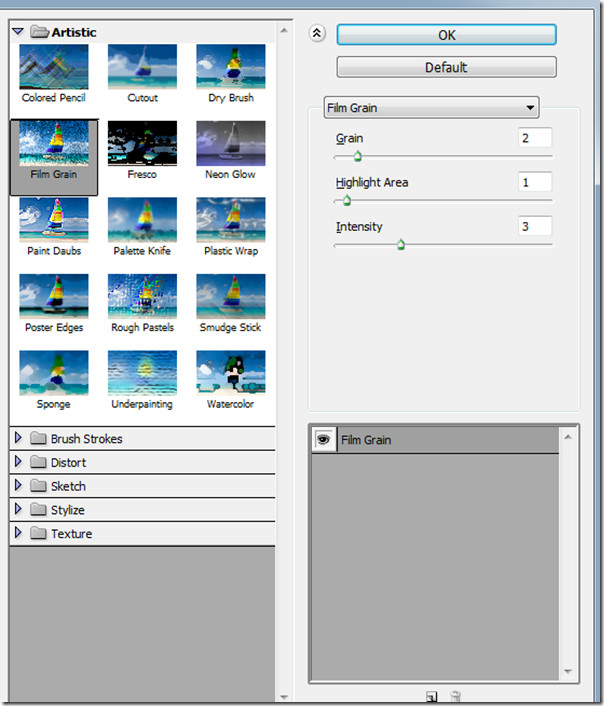
The next filter, to be tried on the same picture is Film Grain. As soon as you click it, some settings will appear like Grain, Highlight Area and Intensity. You can increase the graininess of the picture, lit the picture accordingly by increasing highlight area and control the over all light intensity on the picture.
Apply the following settings, increasing the grain to 2, highlight area to 1 and intensity to 3 to get a decent film grain.
Final image would look like this on your left preview panel.
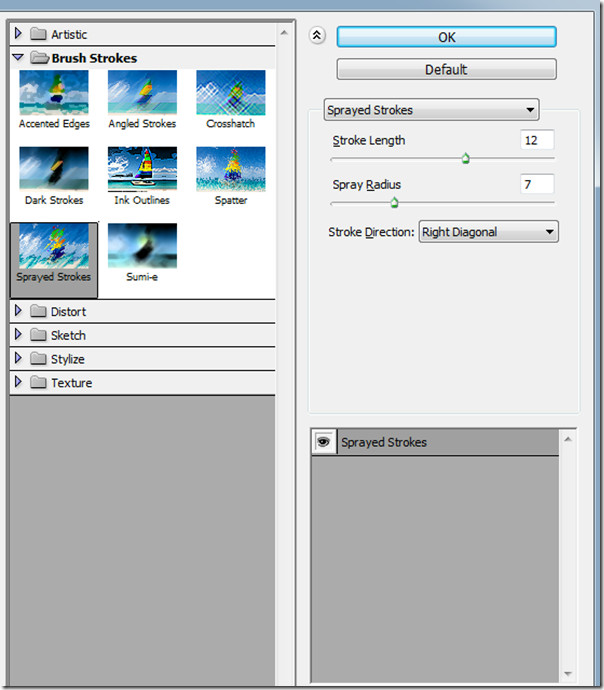
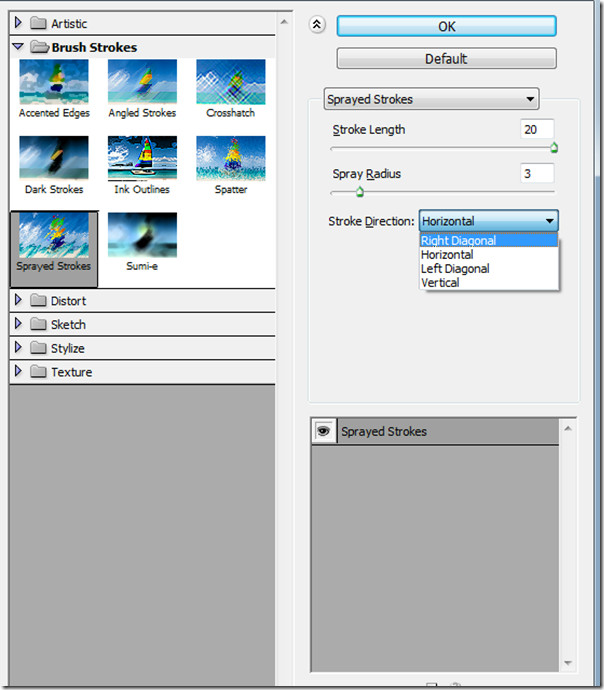
Lets try one of the great filters present in Photoshop namely sprayed strokes. You can find it under the Brush Stroke tab. As soon as you click it, you will find some new settings according to the filter. In this case, Stroke length, spray radius and stroke direction.
Set the stroke length to maximum which is 20, the area I want to spray being the spray radius to 3 and stroke direction to Horizontal.
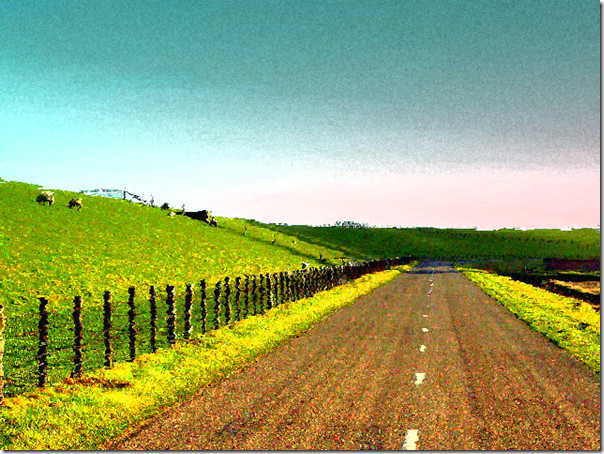
When completed, the picture would turn out like this. Again, not to forgot you will get the preview simultaneously every time you make a little adjustment on your left side preview window in the filter gallery.
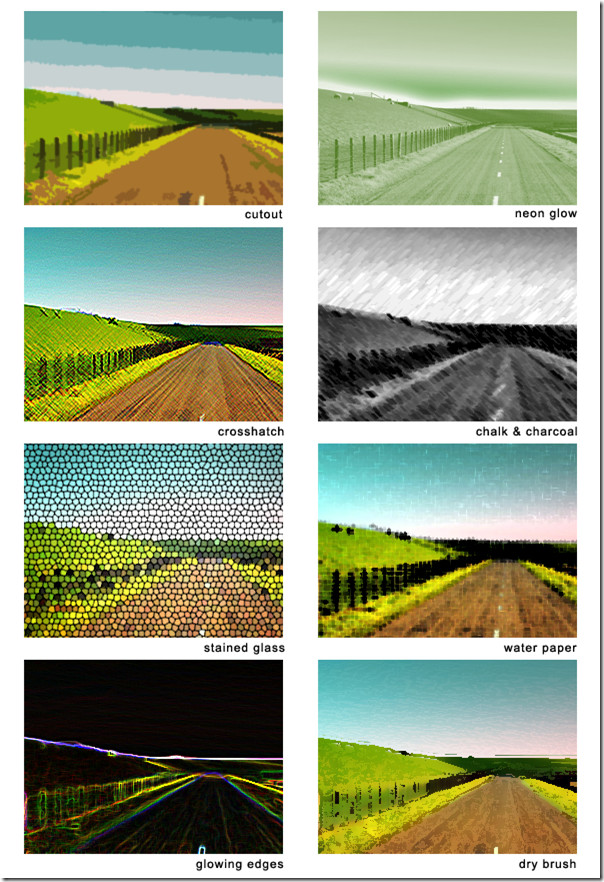
Here are some more filters applied to the same picture. There are many more and you can get third party filters as well. The default pre-installed filters are shown at the top of the filter menu and the third party filters go at the bottom.
More will be reviewed soon for the beginners to get the maximum out of this extra ordinary photo editing tool called ‘Photoshop’.
Enjoy applying the filters on your pictures!

I am an adobe user and I work in a company for 3 years. I do photo editing at my workplace, I am looking for this type of article and found this. It is very informative and useful. I think this tutorial might be helpful for me and I appreciate you. Thanks for sharing the “A Basic Guide To Photoshop Filters” Tutorial!
I really appreciate reading such kinds of blogs. Thanks for sharing such informative articles.
What a beautiful article you wrote. I really enjoyed reading it all the way.
Antworten
Thanks for sharing a nice photoshop tutorial. It’s really useful for me. I am learning from it.
Nice tips for applying photoshop filters. These tips are helpful as I am a beginner on photoshop. Thanks for sharing the great tips.
Thanks for sharing this helpful tutorials,
nice blog……………
Being a passionate photo editor, I really like the tutorial utmost. Thanks for sharing, Go ahead.
Get more form your post. Thanks for shearing.
This is a most important blog and it’s a very helpful for us . Thanks for sharing .
Thanks for your nice sharing.
Wow! the Photoshop filters tutorial really helpful. I learn to know easily how to use Photoshop filter. Thanks a lot for sharing us a nice and informational tutorial.
Thanks for your nice post.
love your blog post as a beginner photographic student.
Such a nice blog it is. Nicely described all the filters. Well Done!