Record A Video Of The Current Tab In Chrome With Screencastify
There are various screencast software, both free and paid, that allow users to record on-screen activity within a web browser. Screencast-O-Matic from Big Nerd Software, for instance, is a perfect example. The popular web-based app lets you create screencasts, add narration, and upload the output to Screencast-O-Matic or YouTube, or simply save it to your local drive for offline viewing. Recently, I stumbled upon Screencastify, a lightweight extension that offers similar functionality on Chrome, and found it worth sharing with our readers. The dead-simple tool enables recording screen activity within a Chrome tab or on the desktop. It also carries options for configuring screen resolution and frame rate.
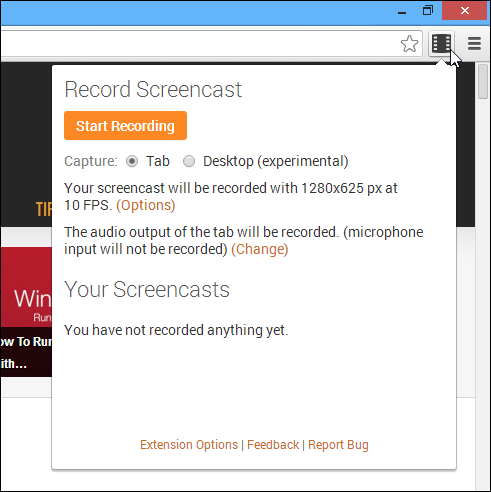
The bare-bones design of Screencastify makes it less complicated and more functional. Once it is installed, all you need to do is click its toolbar icon to reveal a menu from where you can configure things according to your requirements. You can choose capture mode (Tab or Desktop), for instance, specify both FPS and resolution by clicking ‘Options’ below.

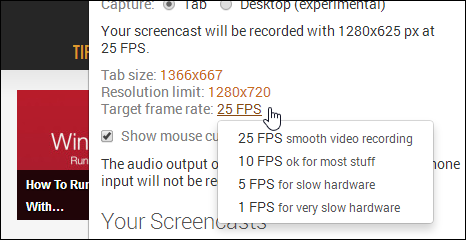
You can set both tab size and resolution limit to values from 240p to 1080p. Likewise, FPS (frames per second) can be set at 1, 5, 10 or 25. A checkbox below these two settings allows you to enable the mouse cursor in your screencast.

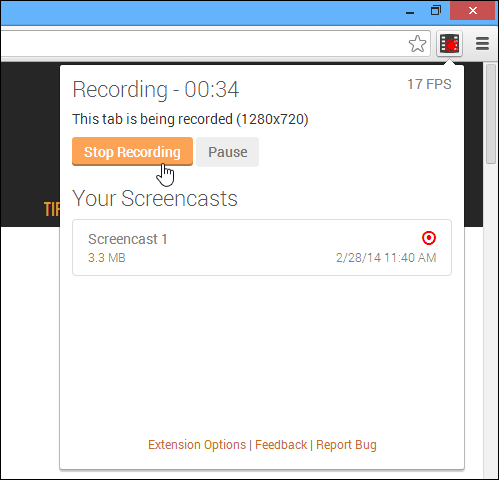
After configuring required settings, simply click ‘Start Recording’. If the ‘Capture’ mode is set to ‘Tab’, Screecastify will begin capturing all on-screen activity within the current tab. When you’re done, you can click stop to finish. Screencasts can also be paused and resumed at any time.

Once that is done, the extension keeps the file in its cache, and allows you to rename, delete, or export it to local storage as HTML5-ready WebM video, or upload it to YouTube. It also displays the size of each recording.

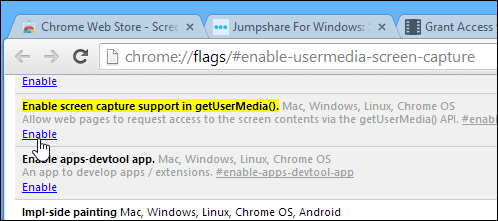
Desktop recording works the same way, but first you need to enable ‘UserMedia’ option in the chrome://flags/ experimental console.
To do that, enter chrome://flags/ in the URL bar, click ‘Enable’ under ‘Enable screen capture support in getUserMedia().’, and relaunch Chrome. Once that is done, you should be able to screencasts in Desktop mode.

Screencastify is not only user-friendly but also carries all the screencast essentials. If you’re looking for a full-fledged screencast tool, this one probably isn’t for you. If, however, you’re a Chrome user who often finds the need to record activity within a website – maybe to guide a friend – having Screencastify a click away might help.
Install Screecastify from Chrome Web Store

Amazing tutorial! I am not aware that we can capture the browser screen that easy. I will give it a try. Before I am using Acethinker Screen Grabber Pro which is a software for Windows and Mac computers. This can record any part of your computer screen without any limit.
only 10 minutes free.
Thanks Waqas.
Any idea why it’s recording a pink screen for me? Windows 8.1.