How To Create A Facebook Messenger Bot Without Coding [Guide]
Facebook’s Messenger chat bots are a new way for Facebook pages and apps to interact with users. They were introduced only a month ago and many chat bots have been created since. These chat bots are incredibly easy to set up requiring very little coding skills. The only thing you need to do is set up an API, something that’s fairly basic. If you’re a small business owner lacking the funds and the skills to do this, you can use Botsify. It’s a web service that lets you set up a chat bot for your Facebook page for free. It’s very easy to use and requires absolutely no coding skills whatsoever. All you need is thirty minutes and this post to walk you through the process.
In order to create a Messenger chat bot, you must have a Facebook page and a Facebook app first. Creating a Facebook page is simple enough but creating the app so that it can work with Botsify will take a little guiding through so we will tackle that here. If you don’t have a Facebook page already, go ahead and make one first.
Part 1 – Creating A Facebook App
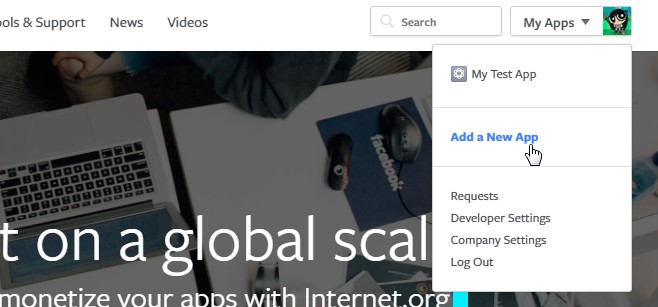
Step 1: Visit your developer dashboard and create your very first app by opening the dropdown under your profile picture.
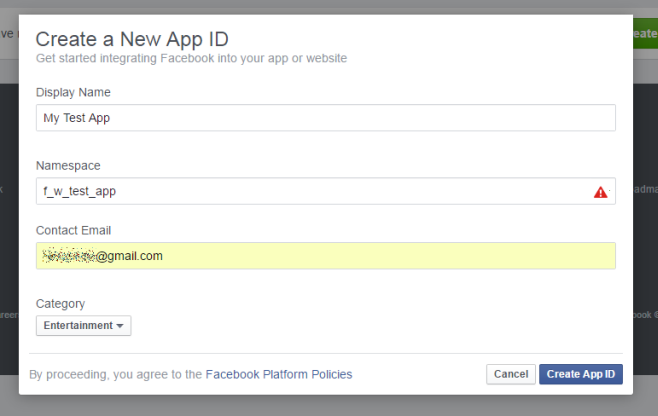
Step 2: When prompted, enter a name for the app, a namespace (must be original), an email ID, and a category for the app. Click ‘Create App ID’. The app will be created when you click ‘Create app ID’.
Part 2 – Setting Up Your Facebook App
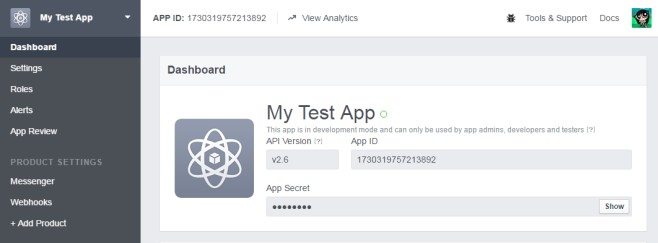
This is the dashboard for the app you’ve just created. Since you just created the app, you won’t see the ‘Messenger’ and ‘Webhooks’ items listed in the left column. You have to add them first in order to create the bot. We’re going to detail how to do that.
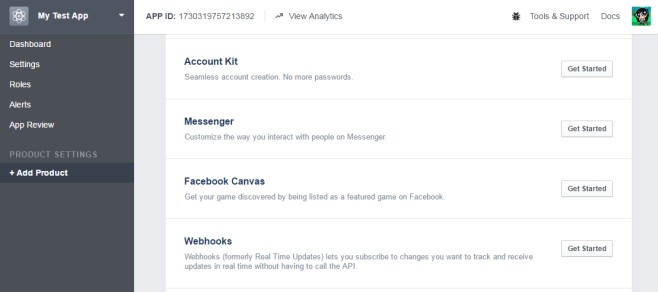
Step 1: Click ‘Add Product’ in the left bar. You will be taken to the following page listing the various Facebook products you can integrate with your Facebook app. Click the ‘Get Started’ button next to ‘Messenger’ first.
Step 2: When you add the Messenger product, you’re asked to connect the app to a page. Here is where you will connect the app you just created to the page we assume you created before you made the app. If you have several pages you can pick any one of them to connect the app to. You must own the page yourself and must not be an administrator.
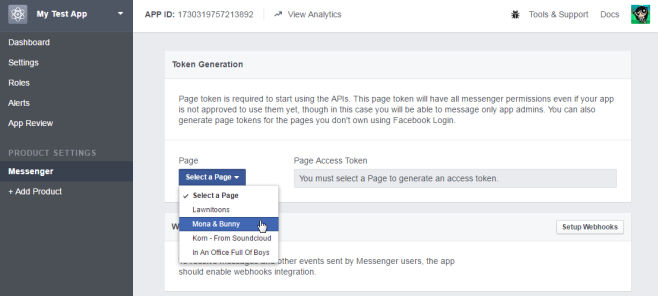
Step 3: Connecting a page will generate a Page Access Token. You will need it when you set up the bot. You can copy it now to a text file so it’s faster to get to or you can always return to your app’s dashboard and click the ‘Messenger’ product tab to view and copy it when you need to. With the page connected you can now proceed to connecting the second product i.e. Webhooks. Click the ‘Setup Webhooks’ button you see on this same screen.
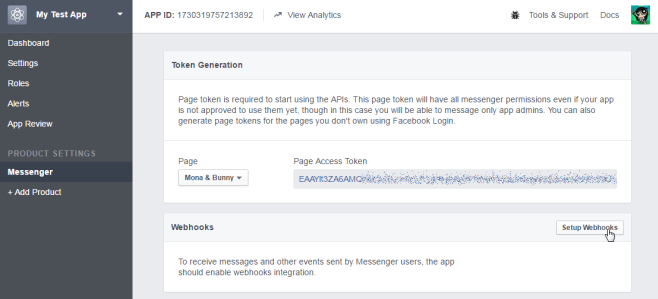
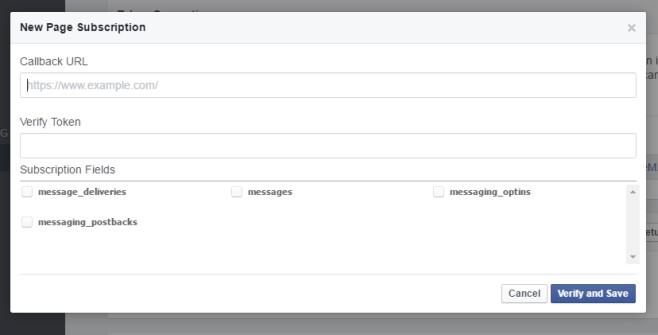
Step 4: The next step asks for a callback URL. This is as far as you’ll go for now. Don’t close this tab. Instead switch to Botsify and sign up for a free account.
Part 3 – Creating The Chat Bot
Step 1: Assuming you’ve signed up for Botsify and granted it any permissions it asked for you will see a dashboard. Click ‘Create Application’.
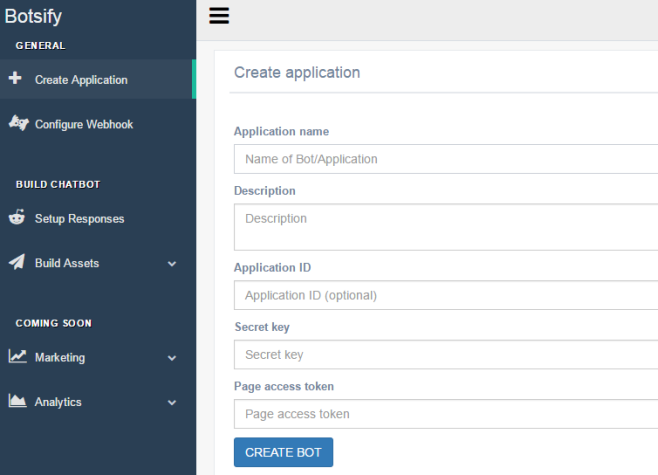
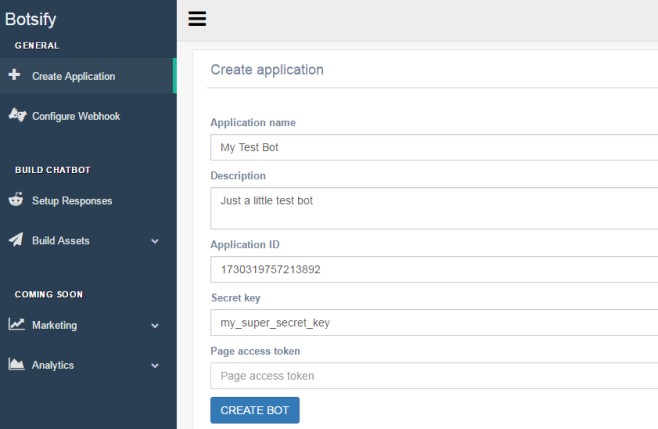
Step 2: Name your bot, add a description if you like, enter the application ID (you can get this from your app’s dashboard), and provide a secret key. A secret key is like a password that bots use to authenticate with apps and pages. It can be anything you want it to be for example, secret_key_is_secret. To add the Page access token you need to return to your app’s dashboard on Facebook for Developers, click ‘Messages’ on the left column, and copy the token. You generated this token in Part 2 – Step 3. Paste it in the page access token field on Botsify and click ‘Create Bot’.
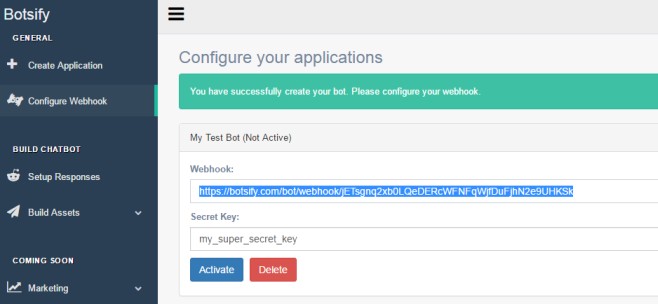
Step 3: It is now time to finish setting up Webhooks. You will automatically be taken to the ‘Configure Webhooks’ tab on Botsify. If you aren’t, click it yourself. Botsify will give you the callback URL that you needed in Part 2 – Step 4. Copy the URL highlighted below.
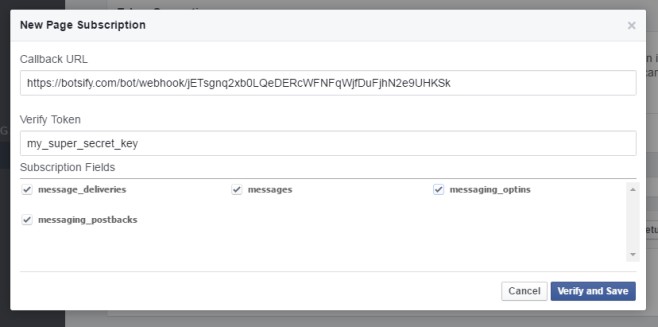
Step 4: Return to the app dashboard on Facebook for Developers and click Webhooks to configure them. We assume you have the tab open as instructed in the previous steps but if you don’t, simply go to the app’s dashboard, click Messenger, and below the Page Access Token you will see the ‘Setup Webhooks’ option. Click it and the following box will appear. Paste the callback URL here. Enter the secret key you set up in Step 2 in the Verify Token field. Check all four options and then click ‘Verify and Save’
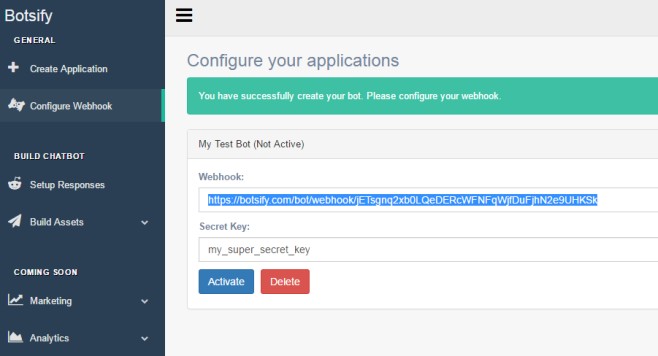
Step 5: Savor the success for a minute and then return to Botsify. We left off here to configure Webhooks. With Webhooks now configured, click ‘Activate’. Your bot will be created.
Part 4 – Configure Chat Bot
Step 1: Now that you’ve created the chat bot, it’s time to teach it how to talk. Click Configure Bot or ‘Setup Responses’ in the left column.
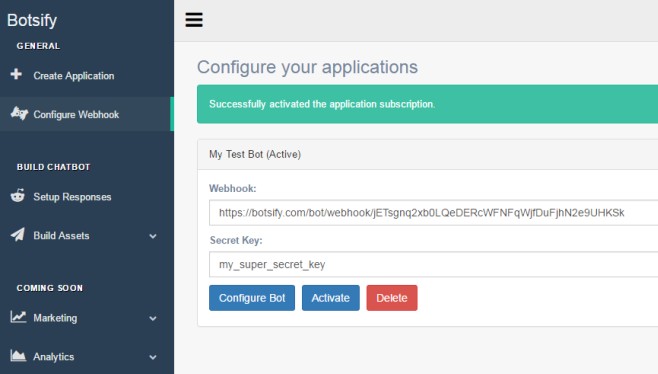
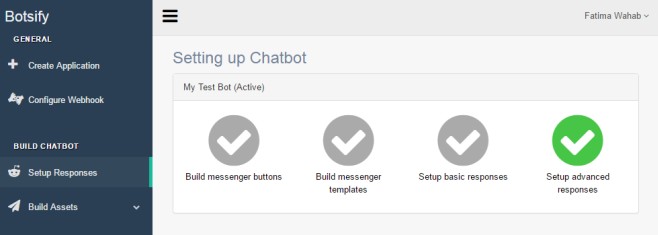
Step 2: There are several types of responses that you can set up. The first is going to be a basic response which is what anyone who first engages the bot you’ve made will see. The other two types allow you to build templates and create buttons. These options allow you to send users images and links in response to a command. For this guide, we’re tackling a simple chat bot where a user will send a text message and the bot will reply with a text message. Click ‘Setup advanced responses’.
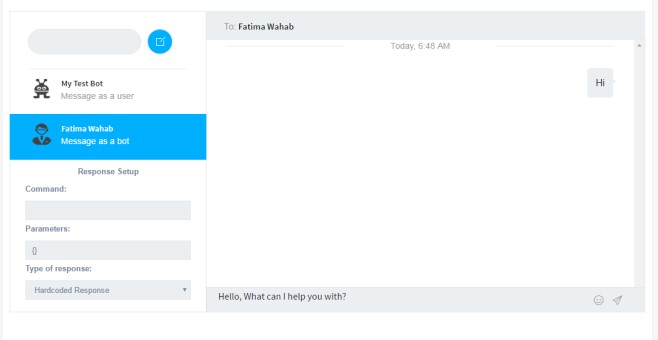
Step 3: The interface you now see will let you enter a command and the bot’s response to it. Select your bot on the left. In our case the bot is named My Test Bot so we selected that and entered a message a user is likely to send to a bot. The message was ‘Hi’, it was entered in the text input field and sent. Next, select your Username on this very same interface. It will say ‘Message as bot’ under it. With your username selected, enter the response you want your chat bot to give when someone sends the message ‘Hi’, and hit send.
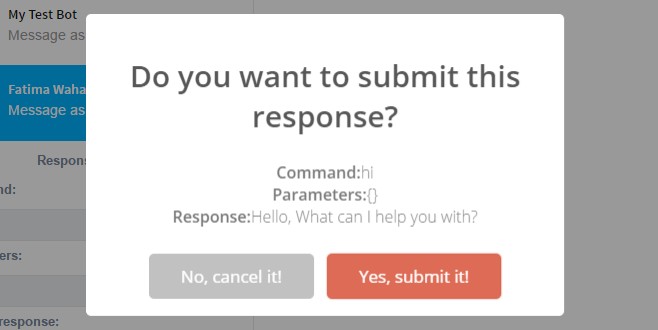
Step 4: Confirm the message and you’ve set up the first response for your bot.
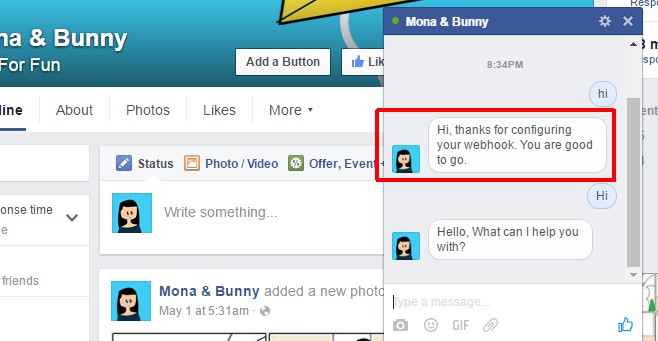
Step 5: You can test it out. The very message you see below, the one we’ve highlighted will appear only to you the first time you configure the bot. Users will not see it ever. The chat bot responds as configured to.
Go ahead and explore the other responses you can configure. You won’t need any coding skills to set any of the other responses up. Botsify has a helpful tutorial to guide you to configure the other types of responses. The service can also help you configure responses if you don’t want to do them yourself though that is likely a premium service.
