Enable The Document Outline Pane In Google Docs For Faster Navigation
Google Docs is slowly and steadily catching up in terms of features to offline desktop word processing apps like MS Word. It supports a lot of the basic document editing features that MS Word has and as of a recent update, a new navigation pane has been added to it. The pane relies on your document’s outline elements i.e., headings, to help you find and navigate to a particular section. Here’s where it’s hiding.
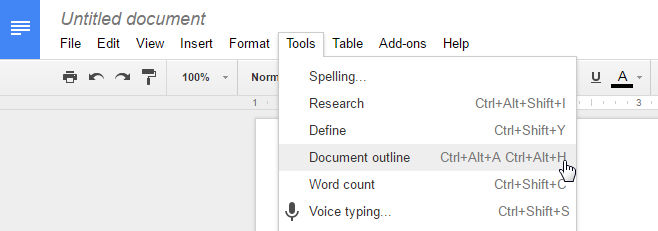
To enable the document outline pane, go to Tools> Document outline to enable it. You can also use keyboard shortcuts Ctrl+Alt+A and Ctrl+Alt+H to show and hide it respectively.

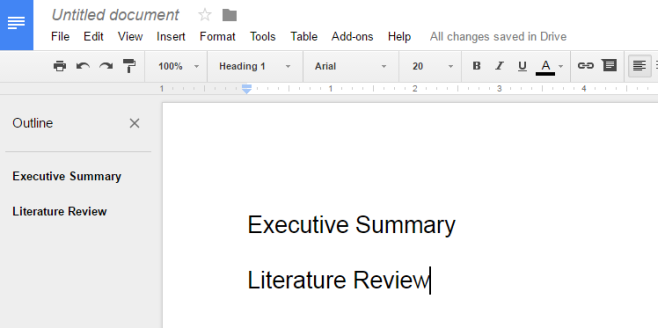
The pane appears on the left side of the document and lists all document sections and headings that you’ve created. Click on an item in the outline pane, e.g. the Executive Summary, and you will be taken to it.

To add an item to the outline, you have to apply an outline attribute to it such as marking it as heading 1 or heading 2. Select a heading in your document and on the toolbar, pull down the ‘Normal text’ dropdown. Select Heading 1, Heading 2….etc., and it will be added to the outline pane. If you’ve created a table of contents in a Google Doc then all you need to do is enable the outline pane.
This should work on older documents as well i.e., those that were created before this update was rolled out. It also works on the Google Docs mobile apps. Needless to say if a document doesn’t have properly identified and marked headings, the outline pane will be of little to no use until they are added.

Thanks for this write up. For some strange reason I can’t seem to expand the outline pane. It seems to be fixed.
Many outline items are cut off as a result. Is it a browser limitation do you think? Or maybe google just did not enable widening the outline.