GlobalProtect VPN Overview: How to Use
There are a lot of VPN providers on the market these days, but GlobalProtect VPN is a little different. While it is still a virtual private network that is used to encrypt your browsing habits and keep your location and identity protected, it is usually used by businesses and schools for their endpoint users to remotely connect to their system. This gives users access to otherwise protected internal resources and data.
If this sounds familiar, it is likely that your school or employer uses this type of VPN, and that you use it to connect to their corporate network. This guide will briefly discuss the reasons so many companies are choosing this provider, how end users can download and use this VPN, and we’ll cover some troubleshooting questions too.
Why GlobalProtect VPN

GlobalProtect is a product of Palo Alto Networks, a global cybersecurity company with a variety of technical solutions for businesses looking to stay secure. One way it does this specifically for their VPN product is through multi factor authentication for users, meaning they will receive a code through email or text when they try to log in. These GlobalProtect sessions also terminate on Palo Alto’s firewall, which means they have robust protections in place, such as defenses against malware and spyware. These precautions protect both the data being accessed and the user accessing this data.
Benefits of Using GlobalProtect VPN
- It gives you remote access to their virtual private network: Not only do you get to access your school or work’s internal and cloud-based applications, you get to be private and protected while doing so.
- Enhanced security: Because you’re using an encrypted connection, it makes your internet traffic more secure, stops endpoint threats and helps prevent phishing and other online attacks.
- It controls and protects access: Your work or school will have access to their data protected, meaning there are fewer threats and they can control who connects and how.
- Remote access for remote workers/students: This type of access is particularly common for remote workers or online students who may be scattered abroad and don’t have in-person access to the apps or data they need. It also helps identify unmanaged devices (like your computer or cell phone) so that there is more protection and control over who is accessing their system.
- Enforces multi-factor authentication: Because two-factor authentication is industry standard for security best practices, using the GP app enforces this type of login from users who may not otherwise take these extra precautions.
- The VPN extends Palo Alto’s secure network platform to GlobalProtect users: This adds an extra layer of protection
- Secures traffic: This is done by associating it with specific devices and users
GlobalProtect VPN Download: How to Install

Because your workplace or school is the one to typically give access, they may already have download instructions for you. If not, the following may be helpful. Here are the step by step instructions, according to device and operating system.
Prerequisite Requirements
Here are some preparatory steps to know before you can actually start downloading:
- In order to download and install the GlobalProtect app on your device you should receive the download file/link directly from your employer or school, as it must be from a portal from within their organization. There is no download link for this on Palo Alto, you must get it from the entity providing you access so you get the correct one.
- To download and install the GP app, you will need the fully qualified domain name (FQDN) or the IP address for the GP portal you’re trying to access. This should also be given to you by your administrator. They will also likely inform you of the username and password you’ll be using.
- You may need to enable the extensions on your system, so that it will be able to use certain GlobalProtect features, such as split tunnel, or other app customizations.
Another important point, before you try to download GlobalProtect VPN, is to make sure it’s not on your device already. This may especially be the case if you are supplied with a computer or device from work or school. Their IT support may have already done the work for you. Also, because there are so many download and login details that may be specific to your workforce or school, they should be your first point of contact if something goes amiss.
GlobalProtect VPN Download Mac: Instructions
Minimum Required macOS Versions
- macOS 10.15 (Catalina)
- macOS 11 (Big Sur)
- macOS 12 (Monterey)
- macOS 13 (Ventura)
- macOS 14 (Sonoma)
- macOS 15 (Sequoia)
Here are some steps:
Step 1: Download the installation package for GlobalProtect or click the download link for the app that is relevant for your operating system. In this scenario, we will be selecting the “Mac 32/64 bit GlobalProtect agent“.
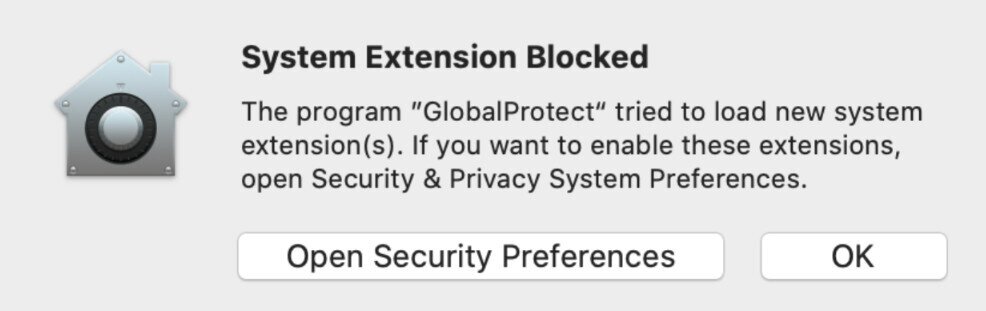
Step 2: Install GP by double-clicking on the downloaded file. If prompted, you can check the GlobalProtect extensions. Click Continue. Click Install. If you get a pop-up about the extension being blocked, select Open Security Preferences. Select Allow, then close the Preferences window. Select Continue, then Install. You may need to restart your device.
Step 3: Once installation is complete, if you’re prompted to move the installer to the trash, you may.
Step 4: You may be prompted for a password. Enter it and select Always Allow. Close.
Step 5: The GlobalProtect icon should be in your menu bar.
Step 6: To use it, double click the icon and enter the portal address you were given. Select connect.
Step 7: Enter your ID and password and confirm via any multi factor authentication your administrator may have set up. You should be connected.
Step 8: To disconnect, click the GlobalProtect icon on the menu bar and select Disconnect.
GlobalProtect VPN for Windows
There is a huge list of contenders for best VPN for Windows, and GlobalProtect plays well with this operating system. Here’s what to know:
Minimum requirements:
- Must be Windows 7 or later
Instructions:
Step 1: Download the installation package or app for GlobalProtect (per your administrator’s instructions). One way to do this is to enter the following in your browser:
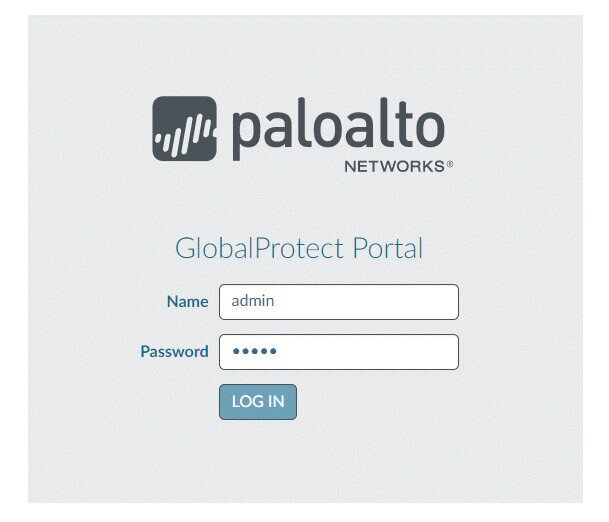
https://<portal IP address or FQDN> Example: http://gp.acme.comStep 2: Log into the GlobalProtect portal (your administrator should have given you log in credentials.
Step 3: Go to the app download page (which will likely already pop up) and click the “Download Windows bit GlobalProtect agent” choosing the one that corresponds with the operating system on your device or computer. In this scenario, we will be selecting the “Download Windows 64 bit GlobalProtect Agent”.
Step 4: An installation file should pop up. Open it and Run the software, then Run GlobalProtect Setup Wizard, if applicable. Follow additional installation prompts. Close Setup Wizard.
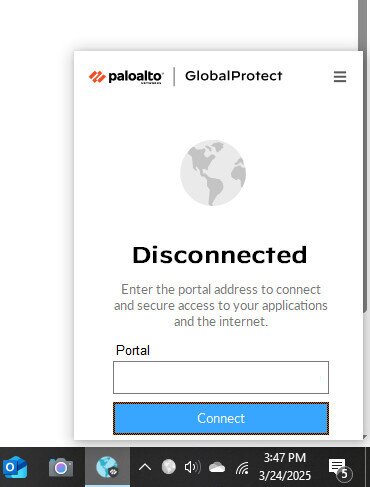
Step 5: From here, you should see the GlobalProtect icon in the system tray. Click this to launch the app and enter the FQDN or IP address you were given. Click Connect.
Step 6: From here, you should be connected to the VPN. When you’re finished, just click the icon again and choose Disconnect.
Linux
If you’re using a VPN on Linux, it can be a little more complicated. There are two different ways to install GlobalProtect on your Linux device, a GUI-based installation and a CLI version. Choose whichever version is appropriate for your needs. Here are the steps:
GUI-Version Download:
Step 1: Go to the Customer Support Portal and log in with your credentials
Step 2: Choose Updates Software Updates
Step 3: Find GlobalProtect Agent for Linux
Step 4: Download the TGZ file
Step 5: Extract these files from the package. Here is an example of what you’ll see. The GUI version has the GlobalProtect_UI prefix:
user@linuxhost:~$ tar -xvf ~/pkgs/PanGPLinux-5.1.0.tgz
./
									./GlobalProtect_deb-5.1.0.0-62.deb
									./GlobalProtect_deb_arm-5.1.0.0-62.deb
									./GlobalProtect_rpm-5.1.0.0-62.rpm
									./GlobalProtect_rpm_arm-5.1.0.0-62.rpm
									./GlobalProtect_tar-5.1.0.0-62.tgz
									./GlobalProtect_tar_arm-5.1.0.0-62.tgz
									./GlobalProtect_UI_deb-5.1.0.0-62.deb
									./GlobalProtect_UI_rpm-5.1.0.0-62.rpm
									./GlobalProtect_UI_tar-5.1.0.0-62.tgz
./manifest
./relinfo
Step 6: Install the GUI GP app using root privileges and an installation method that adds missing packages as required by the app. For Ubuntu and Debian, use:
sudo apt-get install <gp-app-pkg>If using Red Hat and CentOS, use:
sudo yum install <gp-app-pkg>Step 7: Once the install finishes and the app launches, you can put in your portal address and log in information to connect. When finished, just click Disconnect.
CLI Version Download:
Step 1: After getting the app package from your administrator, copy the TGZ file to the endpoint
Step 2: Unzip the package and you’ll see these options:
- DEB for Ubuntu
- RPM for CentOS and Red Hat
Step 3: Install the package. To install the CLI version, use either:
sudo dpkg -i <gp-app-pkg> or: sudo apt-get install <gp-app-pkg>Step 4: The app installs to the /opt/paloaltonetworks/globalprotect directory. After it initially runs, there will also be a folder created called $HOME/.globalprotect, where you can save settings and registration configurations.
Step 5: After installation is finished, you can find the GP app in your menu bar and you can connect and disconnect from there. Note, you can run the app in command-line mode or prompt mode, depending on your preferences.
Android
There are lots of great VPN apps for Android devices. If you’re using Chrome for your GlobalProtect VPN download, here is how:
Step 1: Go to the Google Play Store and look for GlobalProtect
Step 2: Download the installation package and follow the prompts
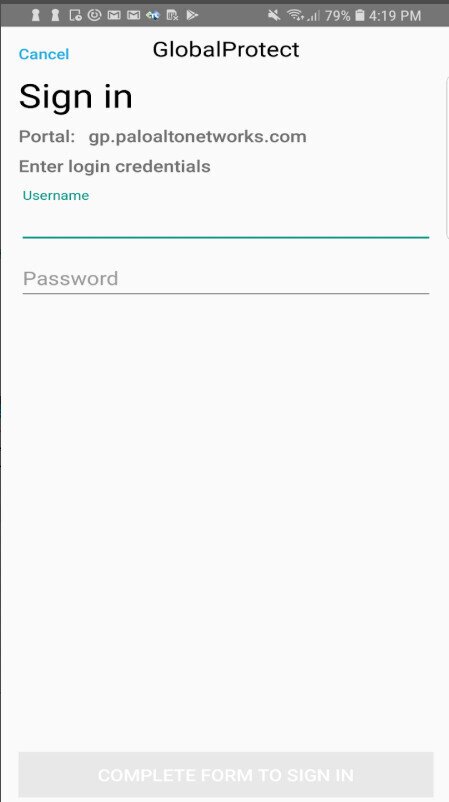
Step 3: When asked for a portal address, use the one given by your administrator
Step 4: When the install is finished, you’ll get a prompt to connect to the GP VPN and you’ll fill in your ID and password, using multi-factor authentication as needed.
Step 5: Select OK to connect when the request pops up
iOS
If you need to download GlobalProtect VPN on your iPhone or iPad, here are the instructions:
Step 1: Go to the App Store
Step 2: Search for GlobalProtect and select it
Step 3: Tap GET
Step 4: Install the GP app
Step 5: Sign in with your Apple ID
Step 6: Enter your portal address when prompted
Step 7: If prompted, tap to connect
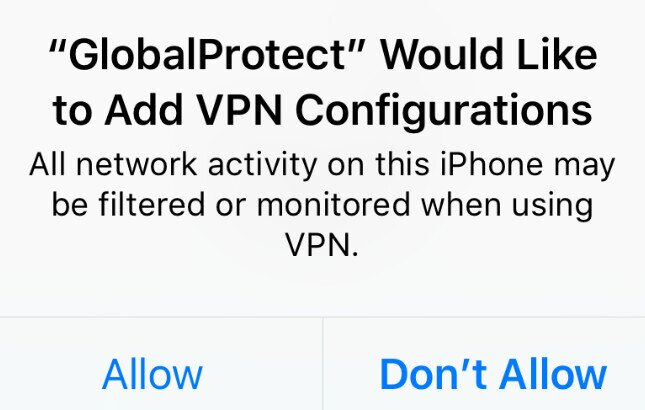
Step 8: There will likely be a pop up that says “GlobalProtect would like to add VPN configurations.” To permit this, tap Allow and enter your iPhone or iPad passcode
Step 9: To connect to the VPN, fill in your ID and password, doing multi-factor authentication as required. When finished, you can just tap Disconnect
Frequently Asked Questions

Here are some frequently asked questions regarding GlobalProtect.
There are a handful of possibilities as to why your GlobalProtect VPN isn’t connecting. Here are some troubleshooting fixes to try:
1. See if your portal address is correct. Try deleting it and re-submitting it, in case there was a typo or error. If it still doesn’t work and you know it should be correct, try double checking with your administrator that they gave you the right address.
2. Similarly, make sure your login credentials are accurate and without errors
3. Another possible fix is to uninstall and reinstall the app again. Make sure you have downloaded the right version for your operating system. This can potentially fix a lot of errors and bugs, such as a corrupted installation file, so it may be one of the first things you try
4. Make sure you have the updated to the latest version of your operating system
5. It could be that you’re trying to access the VPN too early or too late, such as if you’re a student and your semester hasn’t started yet, or has recently ended. Permissions may not be available.
It could be connection issues from your home network or ISP
6. If you use a Mac, make sure the system extensions are enabled for GP
7. Check your system for possible startup issues due to software, such as antivirus software that may be preventing it from running
8. Clear your computer’s cache and cookies
If you’re having issues with GP connecting or other errors, your IT support may want to look into the logs to try to pinpoint the cause of the problem.
They give detailed information regarding the interactions between the server and the client, helping diagnose the issue. If you want to really help out your IT support person, you can actually collect these logs yourself and send them to them. It’s pretty straightforward.
Here are the steps:
From Mac or Windows:
1. Open the GP app
2. Go to Menu
3. Go to Settings
4. Go to Troubleshooting
5. Select the Collect Logs button
6. You should get a GlobalProtectLogs.zip package that you can send to your IT support for analysis
From mobile device:
1. Open your GlobalProtect VPN app
2. Go to the Menu
3. Tap Help
4. Tap Send Logs
5. Choose the email address you want the logs sent to, such as your administrator or IT support
6. Tap Email logs
With so many workers and students connecting to their work or school remotely, it benefits the administration in the following ways:
• It’s harder for cybercriminals to intercept important data when the worker or student is using a VPN, which keeps secure information better protected. Sometimes this is legally required by schools or employers, depending on privacy laws and the type of content being accessed
• It keeps activities private, further protecting sensitive data or interactions, such as confidential assignments or meetings
• It protects the administration’s resources from unauthorized access
• It enables geographically spread users to still access content remotely
If your school or employer gives you access to GlobalProtect VPN, often you can use it on your device for non-official purposes, such as browsing the web for your own use. That said, be sure you’re not violating terms and services of your company or school in doing so. Also, while GP has many strong VPN capabilities, it is currently more geared towards enterprise-level situations. If you lose access to GP or your administration has restrictions, you may be better off looking for another one of our favorite VPN providers for your own purposes.
