How To Set Up X2Go On Linux
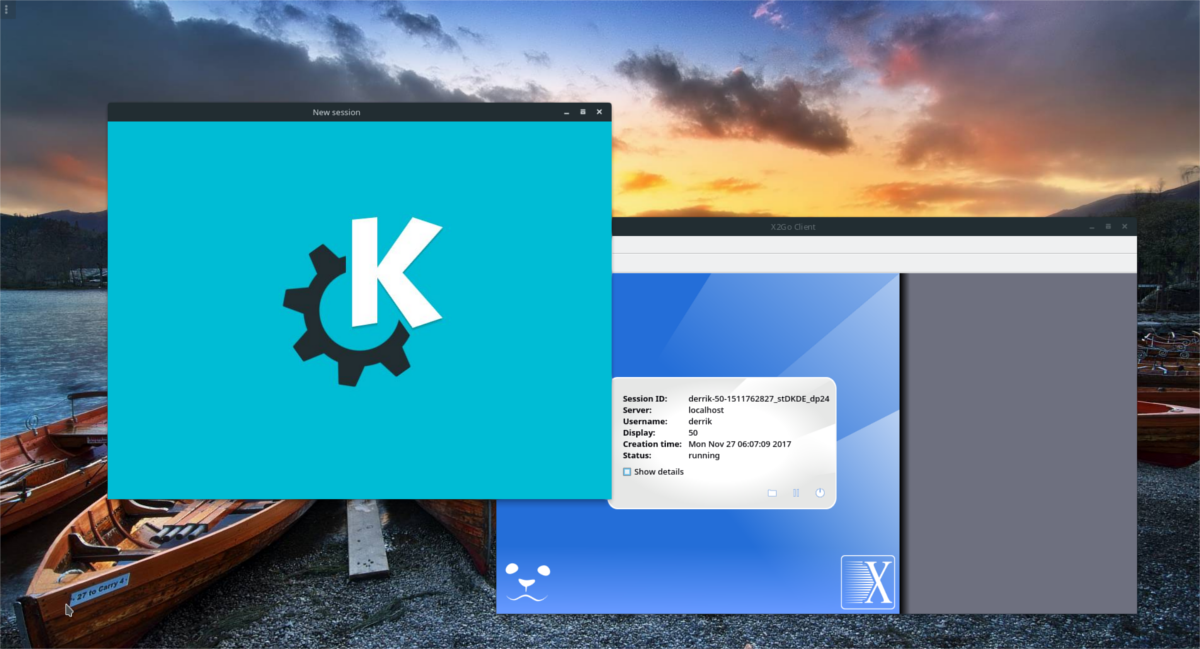
Looking for an easy way to remotely access your Linux desktop? Consider installing X2Go. It’s much more user friendly than something like VNC, and it doesn’t need a web browser like Chrome remote desktop. The best part is, it’s primarily focused on Linux, so you won’t need to worry about losing support in favor of other operating systems. Here’s how you can set up X2Go on Linux and get it running.
SPOILER ALERT: Scroll down and watch the video tutorial at the end of this article.
Server Set Up
Setting up an X2Go Host is different on every Linux distribution. It is because of this, we’ve broken down exactly how to get the server software running for the most popular Linux distributions. If you’re looking to get the X2Go server software working on your version of Linux, but find it hasn’t been covered below, it’s a good idea to check your operating system’s package manager, or the X2Go website for a downloadable source archive.

Using X2Go requires using SSH. Please set up SSH, along with X11 forwarding before following this guide.
Ubuntu
X2Go has two parts. On Ubuntu, only the client is present. This is irritating, if you’re looking to host an X2Go session. To fix this, community members have taken it upon themselves to create a PPA that users can add to quickly add the server component. The PPA isn’t specific to the desktop versions of Ubuntu. If you’re looking to set up X2Go hosts on an Ubuntu server box, it’ll work just fine. Furthermore, the PPA will work on all Ubuntu derivatives (think Elementary and Mint, etc).
Open a terminal, and add the X2GO PPA:
sudo apt-add-repository ppa:x2go/stable
Then, update Ubuntu’s software sources with apt update.
sudo apt update
When the software sources for Ubuntu are up to date, install the software.
sudo apt-get install x2goserver x2goserver-xsession
These two packages should be everything you need. That said, if you use Lubuntu or Ubuntu Mate, there are some additional packages to install. These are desktop-specific bindings.
Ubuntu Mate:
sudo apt-get install x2gomatebindings
Lubuntu:
sudo apt-get install x2golxdebinding
Installing these packages to Ubuntu will automatically set up an X2Go server session. Everything is done within the install process, and nothing needs to be tweaked.
Debian
Though Debian shares the same package base as Ubuntu, there is no easy way to get the X2Go software repos working. Instead, you’ll need to tweak some things manually. Start off by adding the repo key. This is important, as Debian will not install software that isn’t trusted.
sudo apt-key adv --recv-keys --keyserver keys.gnupg.net E1F958385BFE2B6E
With the key added, it’s time to add the actual software repo.
Note: Not using Debian 9.2 Stable? Change “stable” with whichever version of Debian you are running.
echo 'deb https://packages.x2go.org/debian stable main' | sudo tee /etc/apt/sources.list.d/x2go.list
After adding the software source, update Debian to reflect the changes.
sudo apt-get update
Lastly, install the X2Go server tools to get everything working.
sudo apt-get install x2goserver x2goserver-xsession
Arch Linux
Arch Linux manages to support the X2Go server software via the Community repository. To install it, use the Arch package manager.
sudo pacman -S x2goserver
With the software installed, create a new database for X2Go:
sudo x2godbadmin --createdb
Lastly, enable the server software in systemd (and start it too).
sudo systemctl enable x2goserver.service
sudo systemctl start x2goserver.service
Fedora
X2Go is well supported on Fedora. Install it like any other package, using the dnf install command.
sudo dnf install x2goserver x2goserver-xsession
Then, create the database that X2Go will use (if Fedora doesn’t do it for you).
sudo x2godbadmin --createdb
Lastly, enable the service with systemd.
sudo systemctl enable x2goserver.service

sudo systemctl start x2goserver.service
OpenSUSE
The X2Go server software is available for installation via the developer’s own software repositories. Here’s how to add it:
sudo zypper ar https://packages.x2go.org/opensuse/SUSE-VERSION/extras x2go-extras
and
zypper ar https://packages.x2go.org/opensuse/SUSE-VERSION/main x2go-release
After adding the software repos, install the packages to your system:
sudo zypper in x2goserver x2goserver-xsession
Create the database for X2Go. The SUSE packages may (or may not) take care of this. If X2Go doesn’t work, that’s a sign to just do it yourself, using the terminal.
sudo x2godbadmin –createdb
With everything installed, enable X2Go within the systemd init system.
sudo systemctl enable x2goserver.service

 sudo systemctl start x2goserver.service
Install X2Go Client
Now that the server is set up, it’s time to remote in. The X2Go client is widely used on Linux, but it’s also possible to use it on (https://code.x2go.org/releases/binary-win32/x2goclient/releases/4.1.0.0-2017.03.11/x2goclient-4.1.0.0-2017.03.11-setup.exe) Windows, Android, and other platforms. In any case, to connect with a Linux guest, you’ll first need to install the client for your favorite operating system. Luckily, setting up an X2Go client is less involved than the server aspect of the software. If your Linux distribution isn’t mentioned below, check the website for the latest source version of the client.
Ubuntu
sudo apt install x2goclient
Debian
sudo apt-get install x2goclient
Arch Linux
sudo pacman -S x2goclient
Fedora
sudo dnf install x2goclient
OpenSUSE
Grab the latest version of the X2Go client from the OBS. To install, select your version of OpenSUSE, then click the “1-click install” button.
Connecting
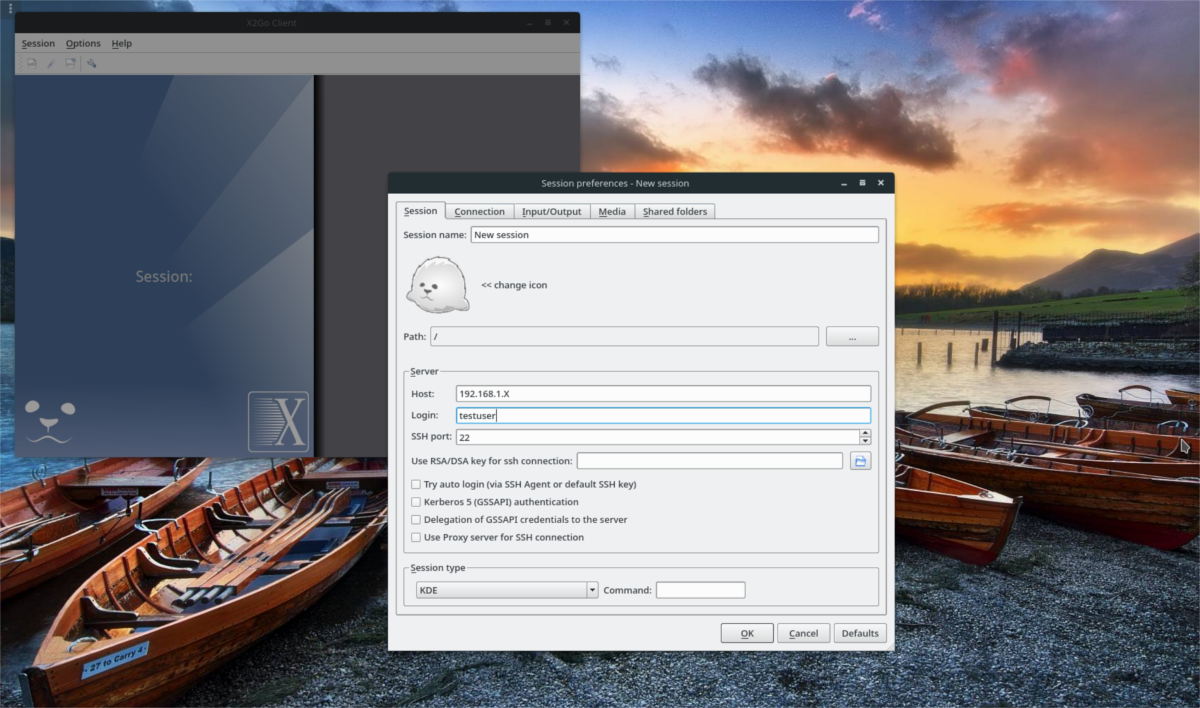
To connect, enter the name of the remote server/Linux PC that is hosting an X2Go session. This should be the same host or IP you use to log into SSH. Then, follow the steps below.

For example: to log into my desktop, I’d enter “arch-linux-desktop”, or the internet IP address if I am doing this outside of my local network.
In the next field, fill out the username you use to log in over SSH in the “login” field.
For “port”, the best idea is to leave it alone. This is because most people do not change the default SSH port from 22. If, however, you have changed it in OpenSSH, add that in place of “22”.
Lastly, select a desktop environment from the drop-down menu. If you do not see any in your client, you’ll need to install one.
Note: try LXDE, MATE or XFCE for X2Go, as they are very light.
Once everything is set, click “OK” to connect to your X2Go server!
